

With the Urban Airship & Radar integration, brands can trigger push notifications based on location events generated within location platform provider Radar. In this post, we’ll share how to get the integration set up and walk through an example of a notification you can trigger using data from Radar.
You’re strolling by your favorite outdoor retailer, when you get a notification. You check your phone: it’s a message from the store reminding you that your limited-lime-offer of 40% off of any one item expires tomorrow. You give a silent thanks to whatever genius sent you that, and head in to grab your deal.
That’s just one of dozens of scenarios that illustrate the magical power of personalizing messages — and getting them to the right person at the right place at the right time — based on location data.
This month we released an integration with a new location platform for mobile apps, Radar. Radar’s iOS & Android SDKs make it easy to start tracking location data and create personalized interactions based on this data using their different location event types including Geofences, Places, and Insights.
Geofences are regions or locations that your company wants to monitor. These could include a neighborhood, a particular business, a specific address, etc. You can create the specific geofences you wish to track in the Radar dashboard.
Places make it easy to know when one of your users visits a place belonging to a specific chain, or category even if you haven’t set up a geofence for that location. Places utilize Facebook Places, the same location database that powers Facebook & Instagram with over 140M places worldwide.
With Insights events, Radar is able to learn a particular user’s home and work locations and can tell you when a user is at home, at work, or traveling.
The Urban Airship and Radar integration makes it easy for marketers to:
- Create personalized interactions with app users with data based on location
Trigger notifications (push notifications, in-app message, and/or message center messages) based on user location events
Send events generated in Radar to Urban Airship in the form of custom events and properties
In this post, we’ll share how to get the integration set up and walk through an example of a notification you can trigger using data from Radar.
How to Integrate Radar With Your Urban Airship Account
To take advantage of this integration, Urban Airship customers will first need to create a Radar account and follow a few steps to complete the integration. You will need both the Radar & Urban Airship SDKs in your app to utilize this integration. If you’re a marketer, you may want to enlist the help of one of your developers to complete the integration — once set up you’ll be able to trigger notifications on your own.
Once you’ve enabled the integration, you will be able to pass Radar location data to Urban Airship using our Server-Side Events API. When location events are generated, Radar will send custom events and properties to Urban Airship. This location data can then be used to trigger automated messages utilizing the Event Trigger in our Automation composer. Radar is the first integration that will take advantage of our release for Custom Event properties in the UI from earlier this year.
Example: Using Radar’s Places Location Type
Let’s walk through an example of how you can utilize this integration for your mobile app. In our example, we’ll use the Places location type.
Triggering an automated message of a Places event makes it easy to send a notification when a user’s location matches pre-defined chain or category. For example, a restaurant brand could send a notification including a 20% off coupon to a user who enters one of its locations, or a retailer can share a special in-store exclusive via push notification. In our example, we’re setting up a notification as if we’re a fitness app that wants to send a notification to users who enter a location within the fitness/recreation category.
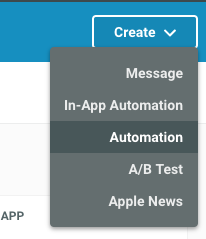
1) To create your automation, navigate to your Urban Airship dashboard and click Create > Automation.
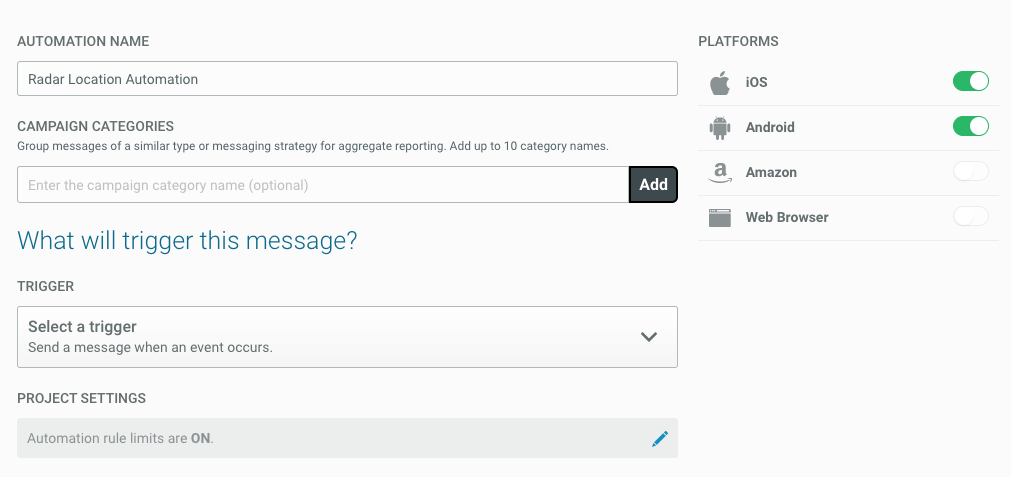
2) Give your Automation a name and choose the platforms you wish to reach — Radar supports iOS and Android — and add an optional campaign category (you can add up to 10).
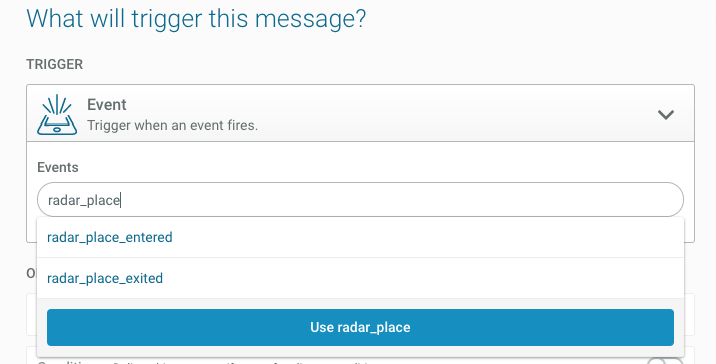
3) Select the Event trigger from the dropdown menu and search for the Radar event you wish to use. You’ll find two different events available for Places: one for an “Enter” event (radar_place_entered) and one for an “Exit” event (radar_place_exited). In our example, we’ll use an “Enter” event.
4) Next, select specific properties for this location event so you send a notification to only those users who enter a location that meet your specific criteria. Click the Add Properties/Values button, then the Add Property button in the modal. In the modal window, you can click Search for Properties to reveal a dropdown menu of the available Radar properties for this event type.
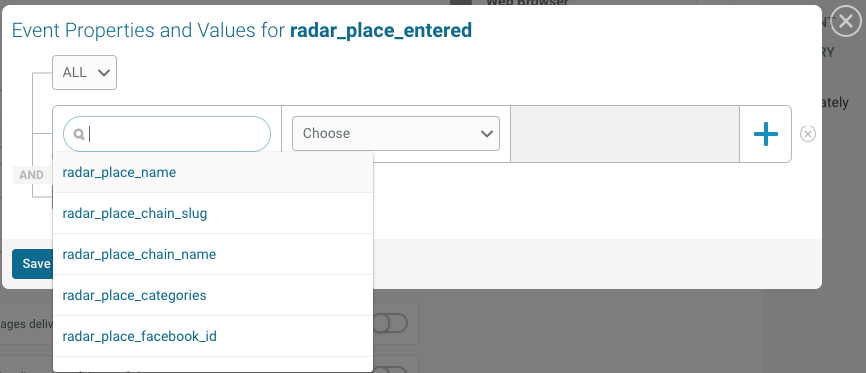
Radar offers tons of predefined Chains and Categories — check out their documentation for a full list of supported chains and categories. For our example, let’s select the property radar_place_categories and for the value, we’ll input the category fitness-venue.
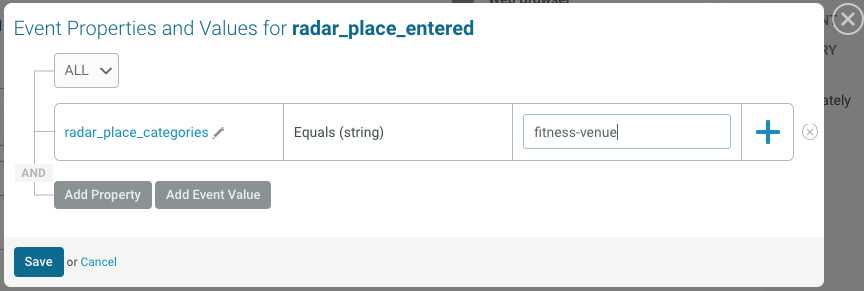
You also have the option to add multiple properties to this event and the ability to and/or them together. For example, you could choose to only send a notification to users who enter a place within the category fitness-venue with a medium level of confidence using the radar_confidence property. All Radar place events have confidence levels that can be low, medium, or high. The level of confidence that a user is in a specific place will be low for less visited places or in areas of high density, whereas confidence will be high for more visited places or in areas of low density. After you’ve selected all the properties you wish to use, click save.
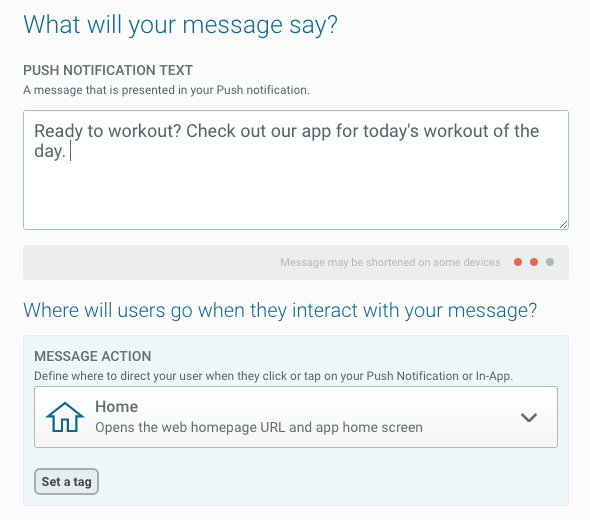
5) From here, you can continue to create your automated message just like any other. Choose what type of message you’d like to send (Push Notification, In-App Message, and/or Message Center).
6) Input your content and any optional features you’d like to add such as interactive buttons or a rich image.
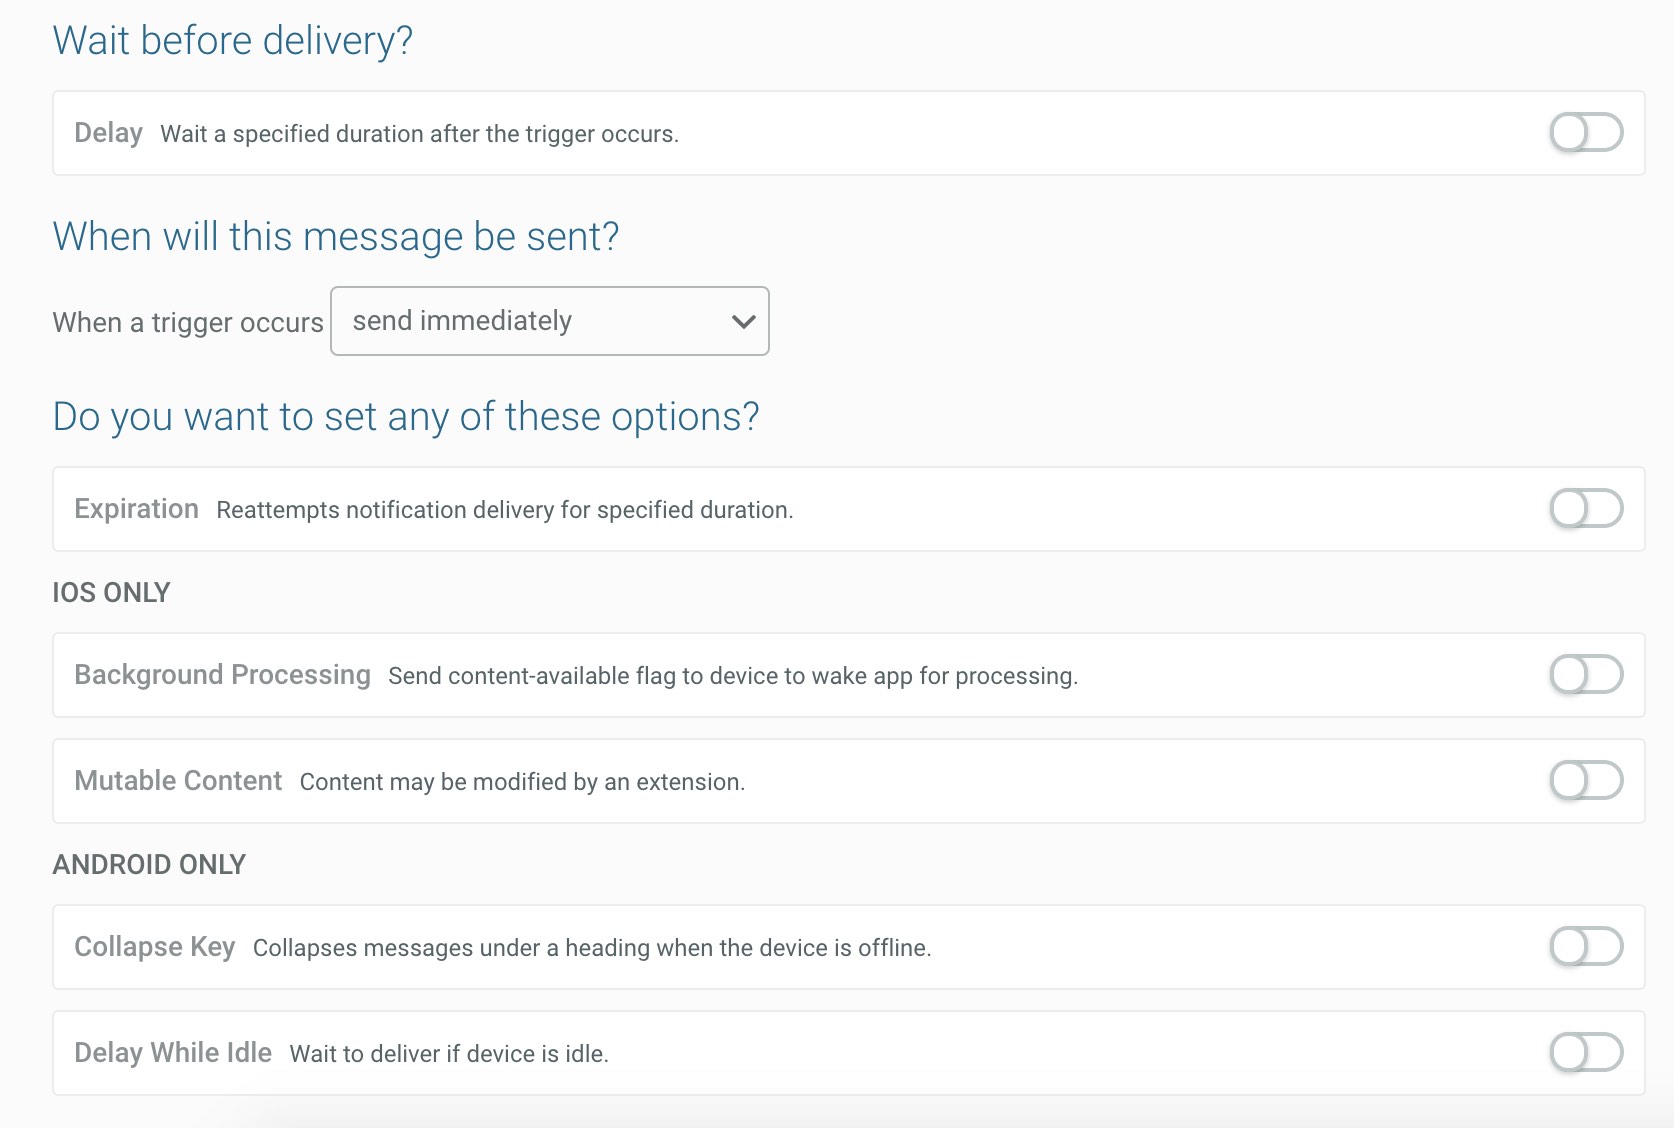
7) Decide when you would like your message delivered, (i.e. right away, or 1 hour after the trigger occurs.)
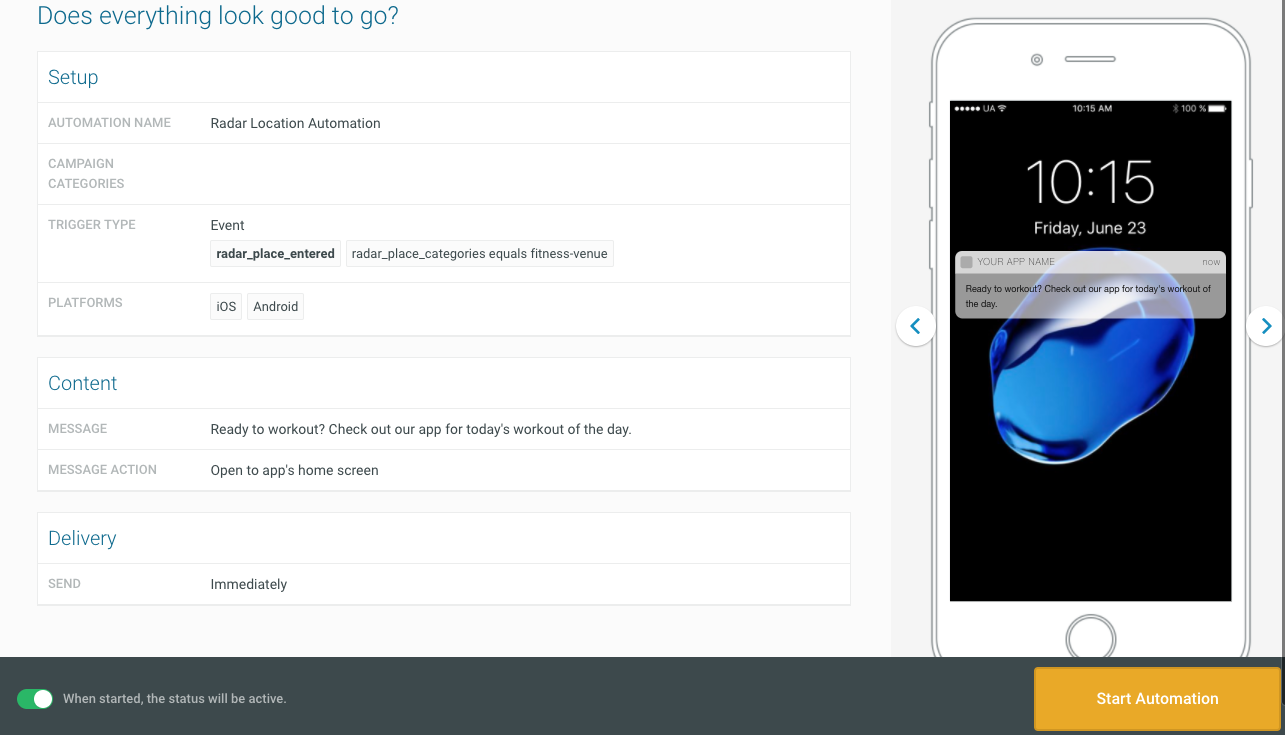
8) Last step! Review everything one last time to check your settings — now you’re ready to start your automation.
Ready to Get Started?
Here’s a few resources to help get you up and running. Check them out, and contact us if you’d like to learn more.
Urban Airship Radar Integration Release Notes
Our documentation on setting up the Radar Integration
Radar’s documentation on the Urban Airship Integration
Let us know what you think – we’re committed to continuous improvement, and we’d love your feedback!
![The best retail customer engagement platforms for no-code growth teams [2026]](https://www.airship.com/wp-content/uploads/2026/06/The-best-retail-customer-engagement-platforms-for-no-code-growth-teams-2026-404x211.png)
![Retail customer engagement: The ultimate guide to growing your business in 2026 [5 real examples]](https://www.airship.com/wp-content/uploads/2026/06/Retail-customer-engagement-The-ultimate-guide-to-growing-your-business-in-2026-5-real-examples-404x211.png)