When creating messages, you configure its appearance in the Content step. In the Delivery step, you can configure content-related features that do not affect the appearance of the message.
**Silent push notifications** do not have visual content. In the *Content* step, click **Silent Push Notification**, then click *Delivery* in the header and complete the remaining steps in the composer. The remainder of this section applies to regular push notifications. --- In the *Content* step, click **Push Notification** then **Add content**: 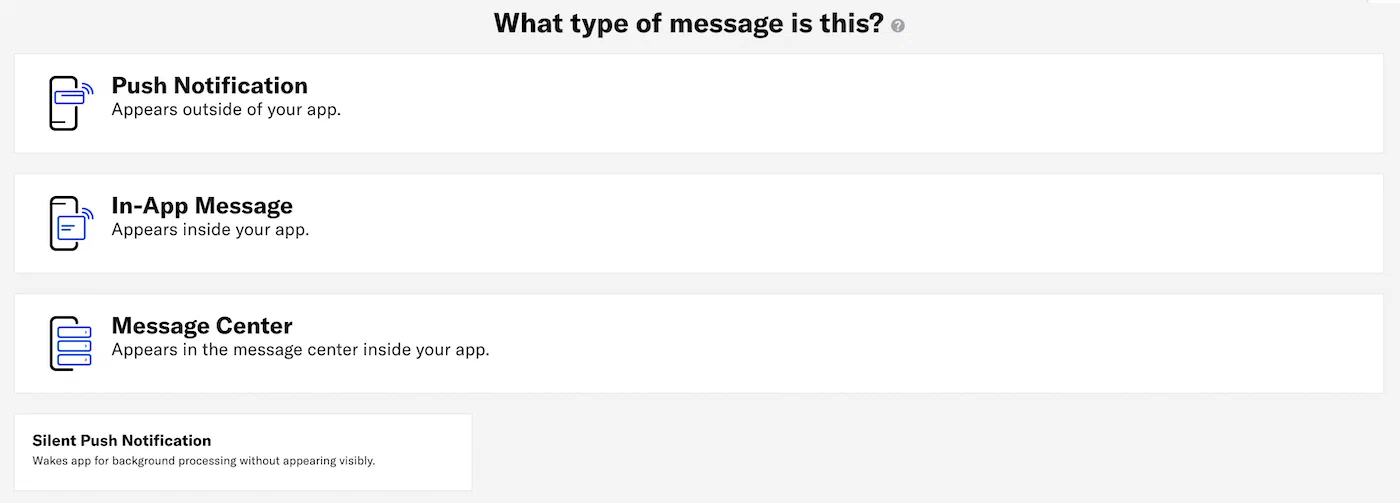 *Selecting Push Notification in the Content step* Now you can configure the body of the message: 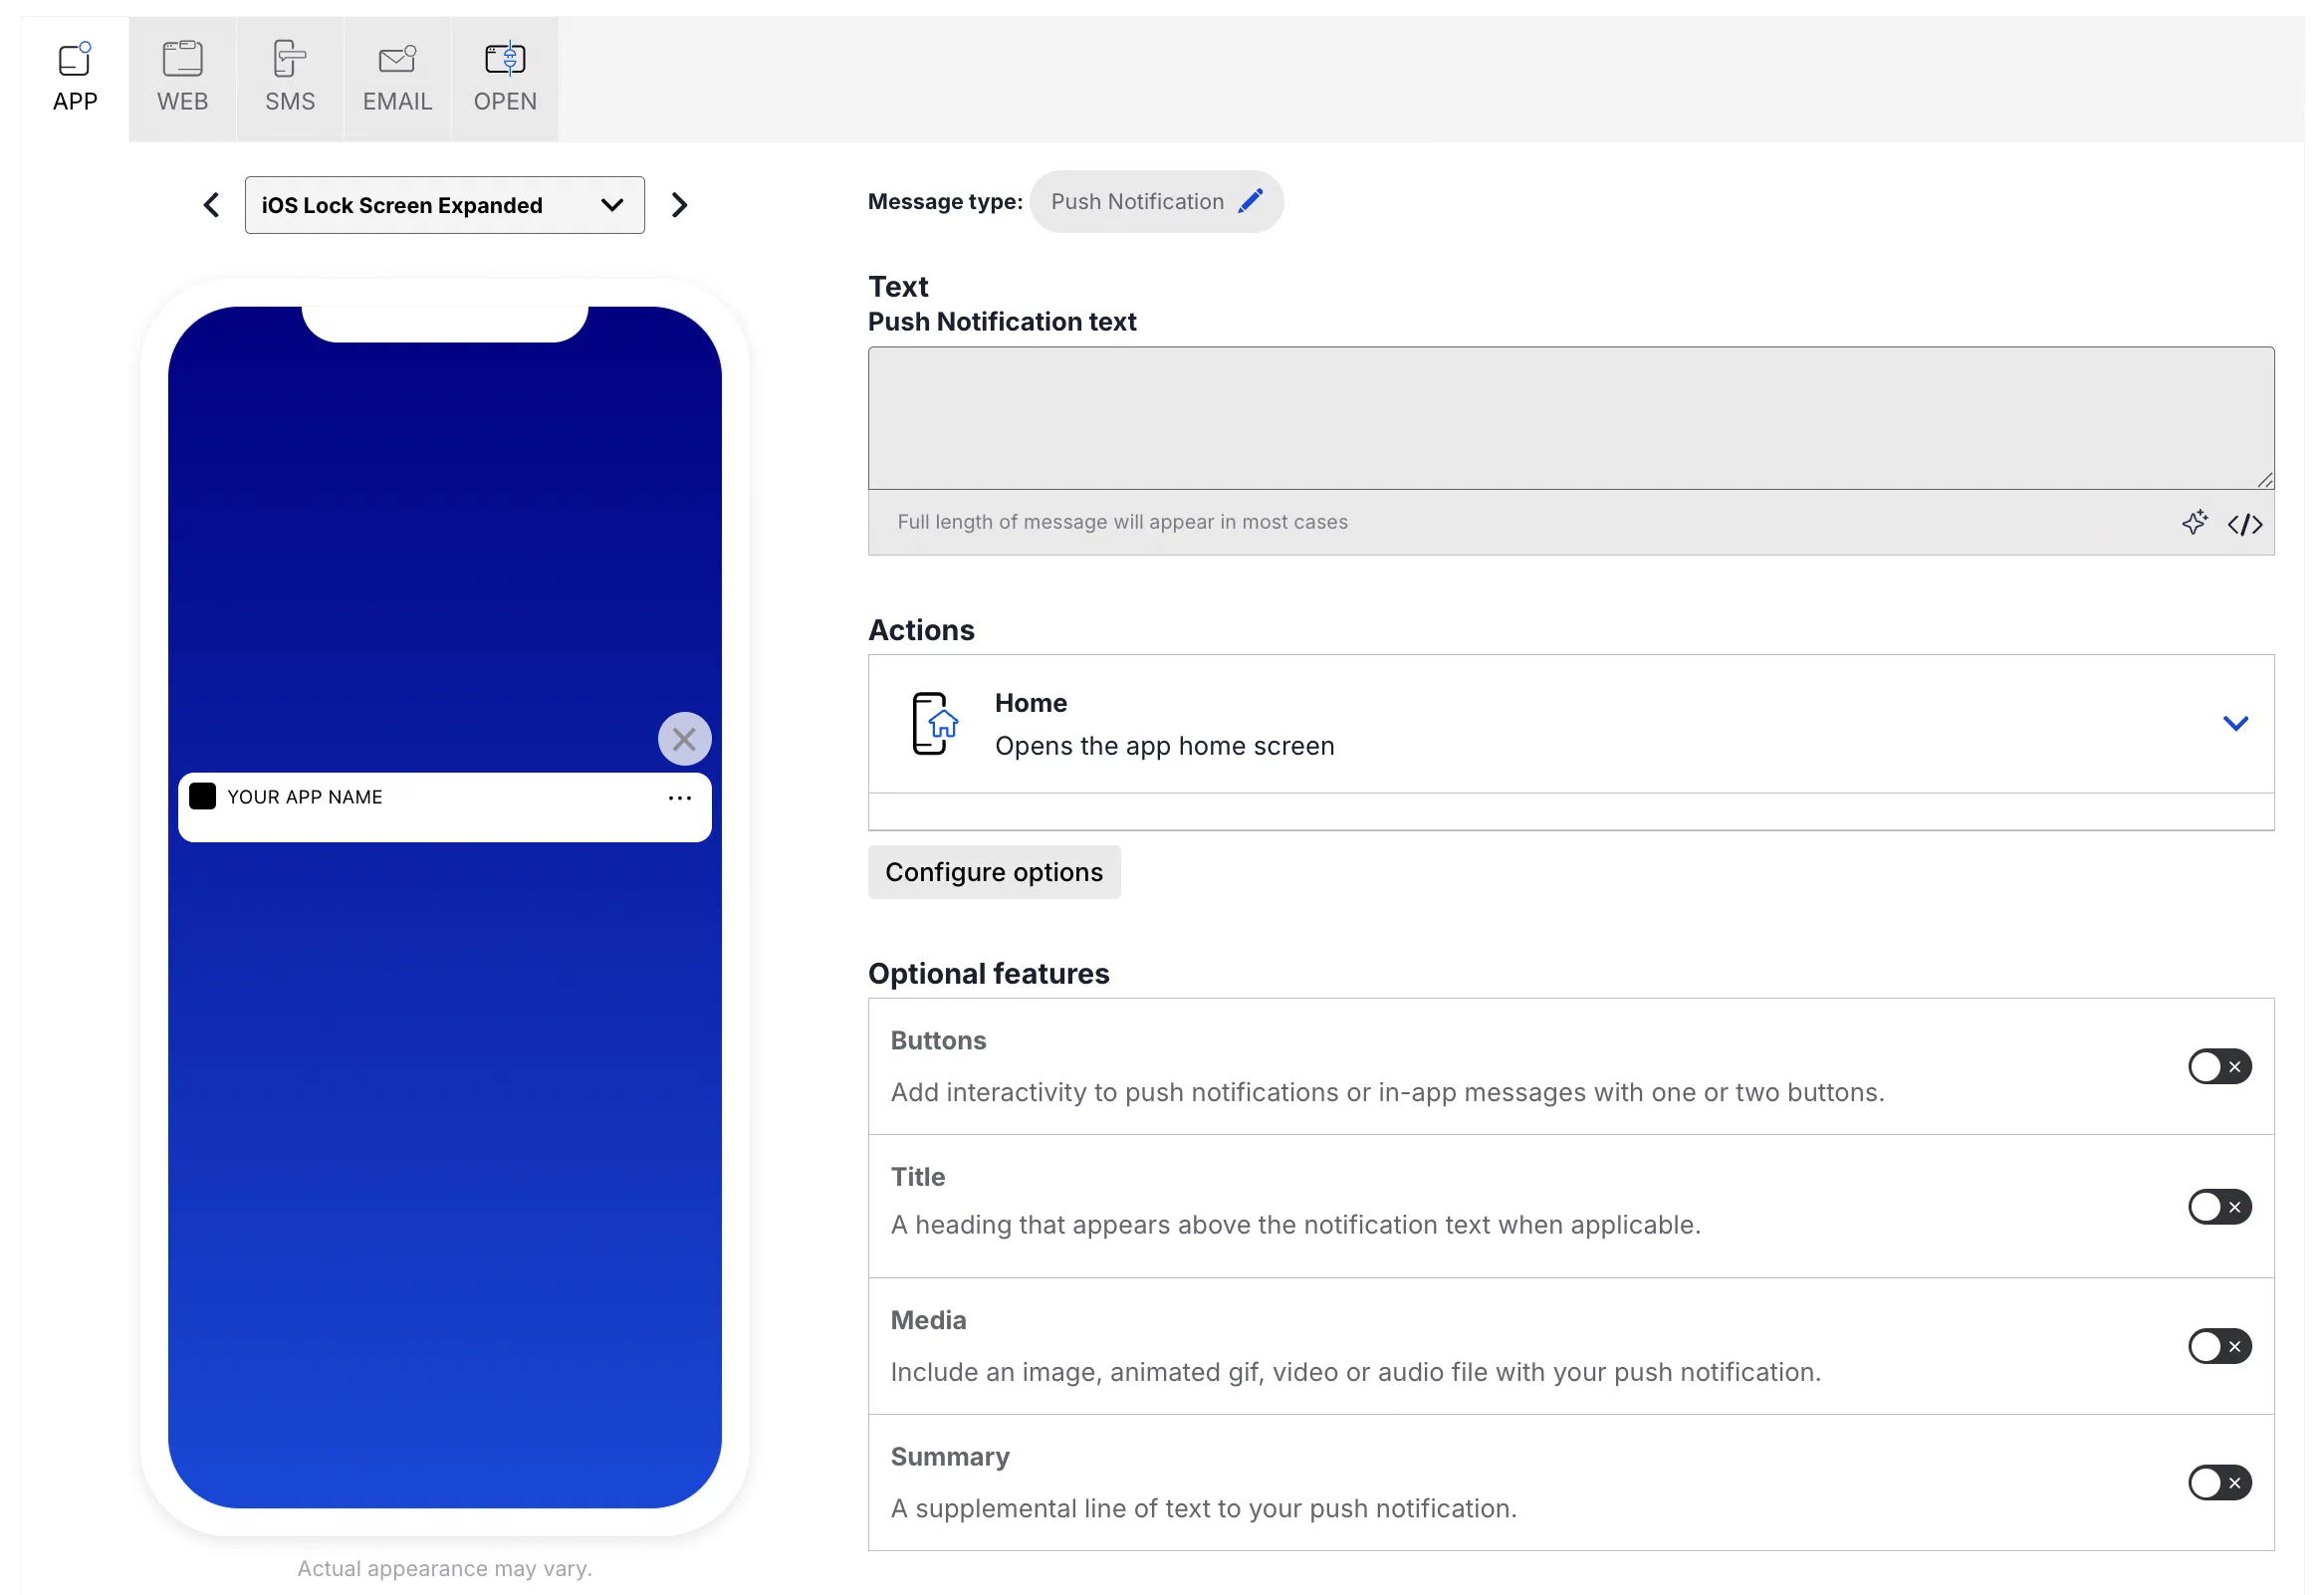 *Configuring push notification content* 1.Enter the message text. If you are using [Handlebars](https://www.airship.com/docs/reference/glossary/#handlebars), you can test how the content will appear. See Previewing personalized content.
1. Select an [Action](https://www.airship.com/docs/reference/glossary/#action): * Home * Message Center * Landing Page * Deep Link * Adaptive Link * Web Page * Share 1. (Optional) Set and/or remove tags when the user interacts with your message.You can also assign an event value and specify string, number, or boolean property values that you can use later when filtering Custom Events. If you want to use properties, you must define the event and its properties in your project in advance. See Manage Events.
Enter a URL to add media to your notifications. See also Media guidelines.
If using a personalized media URL for an App push notification, you must specify the media type after entering the URL:
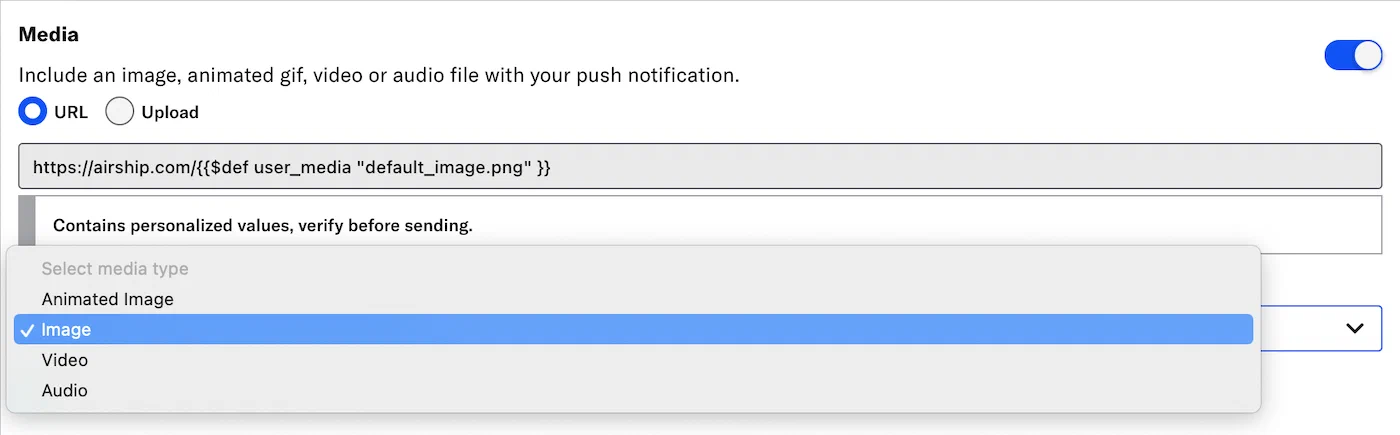 *Specifying the media type for a personalized media URL* > **Note:** When you enable both the iOS platform and one or more of Android and Fire OS, and you do not enter a static image in the initial URL field, a Static Image field is added to the media settings. Enter a URL, or use the Upload option.If your Airship plan includes CDN support, you can also upload media or select from previous uploads in your project’s media library. See Insert media in message content in Media library.
### Summary Add a summary line as supplemental text displayed with the notification. * **iOS:** The summary appears below the push notification title. * **Android and Fire OS:** The summary appears below the main notification text in most cases. This is the only visible text other than the title when Android Picture is visible in expanded mode, as the main notification text is suppressed. ### Title Enter a title to create a heading that appears above the notification text in: * iOS Notification Center * Apple Watch Looks * Android and Fire OS Notification Area/Drawer # In-app message content > Send in-app messages to your App channel. See also the [In-app messages](https://www.airship.com/docs/guides/features/messaging/in-app-messages/) feature guide. ## Setting design defaults You can set the default colors, message position, and duration of your in-app messages: 1. Next to your project name, select the dropdown menu (▼), then **Settings**. 1. Under **App settings**, select **In-App Message Design**. 1. Configure the message design. Colors are hexadecimal color values. * **Primary Color** is the color of the button text and message background. * **Secondary Color** is the color of the message text, button background, and certain UI elements, e.g., the drawer pull on iOS. * **In-App Message Position** controls whether the in-app message displays at the top or bottom of the screen. * **In-App Message Duration** is the amount of time that the in-app message displays on the screen. The default is 15 seconds. Otherwise, select *Specify*, enter a numerical value, and select *Seconds* or *Minutes*. 1. Select **Save**. Additional customization may be made via the SDK. See the [SDK integrations documentation](https://www.airship.com/docs/developer/sdk-integration/). ## Creating contentWhen creating messages, you configure its appearance in the Content step. In the Delivery step, you can configure content-related features that do not affect the appearance of the message.
In the *Content* step, click **In-App Message** then **Add content**:  *Selecting In-App Message in the Content step* Now you can configure the body of the message: 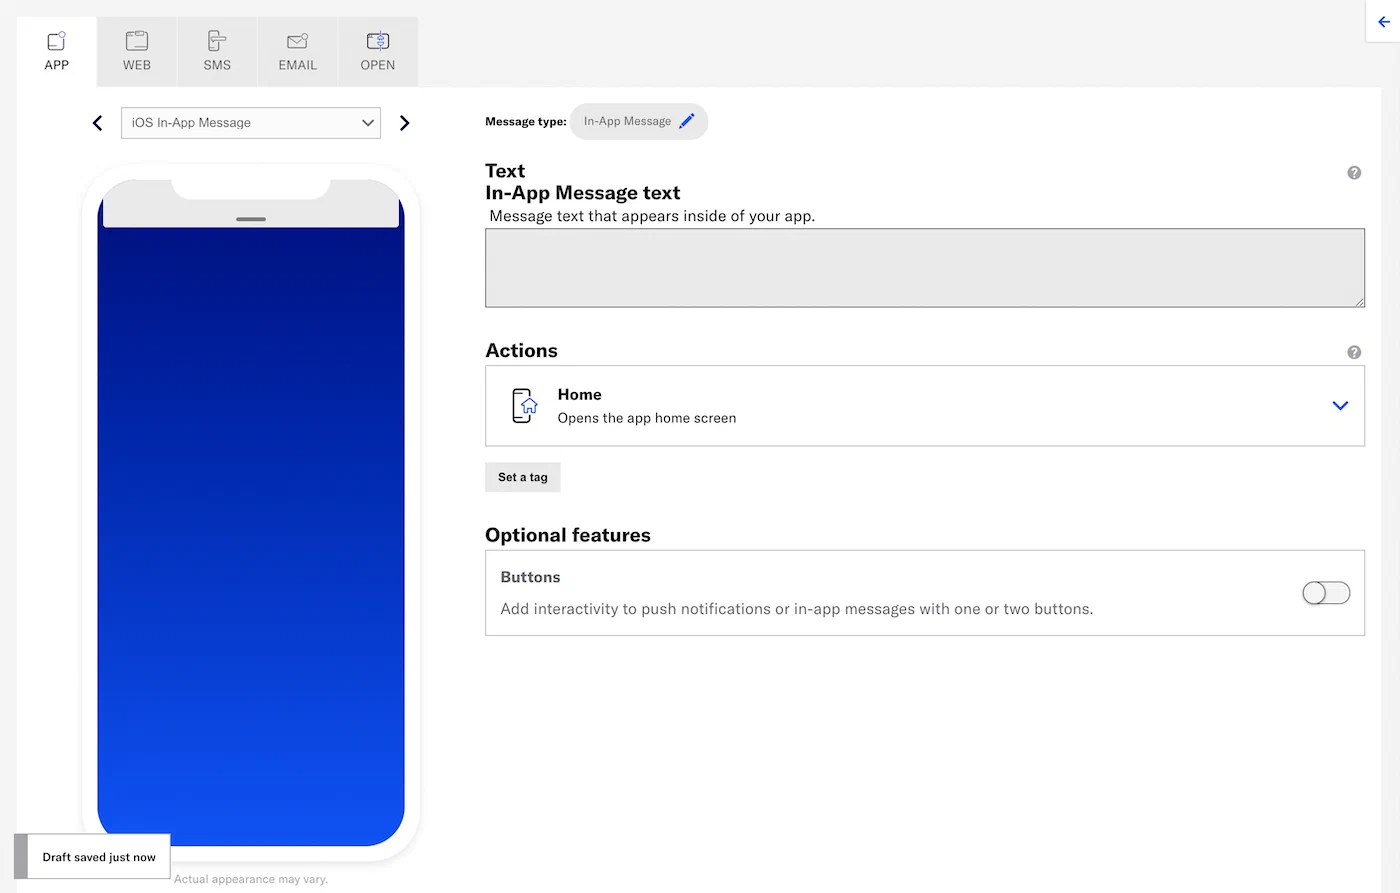 *Configuring in-app message content* 1.Enter the message text. If you are using [Handlebars](https://www.airship.com/docs/reference/glossary/#handlebars), you can test how the content will appear. See Previewing personalized content.
1. Select an [Action](https://www.airship.com/docs/reference/glossary/#action): * Home * Message Center * Landing Page * Deep Link * Adaptive Link * Web Page * Share 1. (Optional) Set and/or remove tags when the user interacts with your message.You can also assign an event value and specify string, number, or boolean property values that you can use later when filtering Custom Events. If you want to use properties, you must define the event and its properties in your project in advance. See Manage Events.
When creating messages, you configure its appearance in the Content step. In the Delivery step, you can configure content-related features that do not affect the appearance of the message.
In the *Content* step, click **Message Center** then **Add content**:  *Selecting Message Center in the Content step* Then click **Interactive editor » Add content » Edit**. Now you can configure the message content: 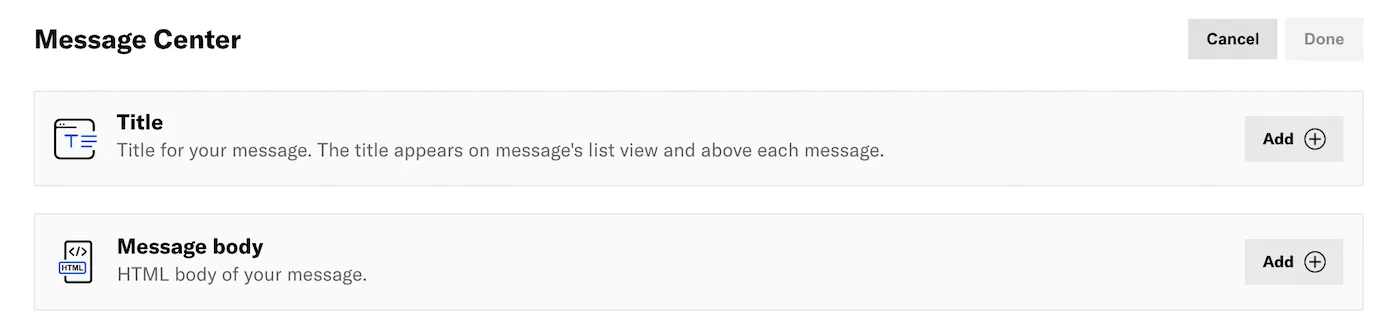 *Configuring Message Center content in the Interactive editor* If your message includes [Handlebars](https://www.airship.com/docs/reference/glossary/#handlebars), you can preview how the content will appear. See [Previewing personalized content](https://www.airship.com/docs/guides/personalization/previewing/). 1. Add a *Title*. 1. Click **Add +**. 1. Enter a title. 1. Click **Done**. 1. Add the *Message body*. 1. Click **Add +**.Select Settings in the left sidebar.
Enter the HTTPS URL of an image. See Media guidelines.
If your Airship plan includes CDN support, you can also upload media or select from previous uploads in your project’s media library. See Insert media in message content in Media library.
When creating messages, you configure its appearance in the Content step. In the Delivery step, you can configure content-related features that do not affect the appearance of the message.
Do the following to add only a Message Center message: 1. In the Content step, select **Message Center**, then **Add content**. 1. Select **Visual editor**. 1. Under **Rich Page**, select **Create**. Or you use the Visual editor in the Content step when configuring a push notification or in-app message: 1. Under **Actions**, select **Message Center**, then **Visual editor**. 1. Under **Rich Page**, select **Create**. Now you can configure the message content. Follow the steps in [The Visual editor](https://www.airship.com/docs/guides/messaging/editors/visual/). ## Android app reinstallationMessage Center inboxes are associated with channel IDs. On Android, reinstalling an app creates a new channel ID. Messages previously available in an Android user’s inbox will no longer be available after app reinstall.
## Hosting and page sizeContent is hosted in a CDN, ensuring responsive load times for your users globally. Hosted content — including embedded CSS, images and JavaScript — is limited to 1.5 MB, however the ideal page size is much smaller, given the potential for degraded download speeds on cellular networks. We recommend that you optimize your images and HTML to keep total page sizes under 100 KB.
If you have additional assets to load, you can host them in another location and link to them. Airship offers additional asset hosting options as a Professional Service. Contact Airship Sales for more information.
## Welcome Message You can create a default message that appears in every new user's Message Center inbox when they open your app for the first time: 1. Go to **Messages**, then **Welcome Message**. 1. Enter a message title. 1. Enter HTML for the message body. 1. Select **Save**. After saving, you have the option to delete the message. ## Remove a message from a Message Center You can remove messages from the Message Center inbox from the dashboard. > **Warning:** Removing a message from a Message Center is irreversible. 1. Go to **Messages**, then **Messages Overview**. 1. Select the report icon ( ) for the message you want to remove. 1. Select **Remove from inbox** and confirm. After removal, *Removed from inbox* and the removal date, time, and time zone appears in these locations: * [Messages Overview](https://www.airship.com/docs/reference/glossary/#messages_overview) — Message Details expanded view * [Message report](https://www.airship.com/docs/guides/reports/message/) — Header # Landing pages > Direct users to a landing page when they interact with your message. See also the [Landing pages](https://www.airship.com/docs/guides/features/messaging/landing-pages/) feature guide. ## Choosing an editor If your landing page content is hosted outside Airship, configure it using [Creating content: Custom URL](#creating-content-custom-url). You do not use the Interactive or Visual editors for that path. When Airship hosts your landing page, choose an editor for creating content: Interactive or Visual. For information about each, see [Content editors](https://www.airship.com/docs/guides/messaging/editors/about/). See the sections below for access steps and links to configuration details: [Creating content: Interactive editor](#interactive-editor) or [Creating content: Visual editor](#visual-editor). ## Creating content: Custom URL In the *Content* step for a push notification or in-app message, select *Landing Page* from the [Actions](https://www.airship.com/docs/reference/glossary/#action) menu, then click **Custom URL** and enter an HTTPS URL. ## Creating content: Interactive editor {#interactive-editor} In the *Content* step for a push notification or in-app message, select *Landing Page* from the [Actions](https://www.airship.com/docs/reference/glossary/#action) menu, then click **Interactive editor » Add content » Edit**. Now you can configure the landing page:  *Configuring landing page content in the Interactive editor* If your landing page includes [Handlebars](https://www.airship.com/docs/reference/glossary/#handlebars), you can preview how the content will appear. See [Previewing personalized content](https://www.airship.com/docs/guides/personalization/previewing/). 1. Click **Add +**.Content is hosted in a CDN, ensuring responsive load times for your users globally. Hosted content — including embedded CSS, images and JavaScript — is limited to 1.5 MB, however the ideal page size is much smaller, given the potential for degraded download speeds on cellular networks. We recommend that you optimize your images and HTML to keep total page sizes under 100 KB.
If you have additional assets to load, you can host them in another location and link to them. Airship offers additional asset hosting options as a Professional Service. Contact Airship Sales for more information.
## iOS developer notes The default behavior in the iOS SDK is to *not display* the landing page when the corresponding push notification is received while the app is in the foreground state. The logic behind this behavior is that you may not wish to interrupt or distract a user who is currently occupied with the app, only to ask them to visit a different part of the app. If you need to display a landing page while the app is in the foreground state, replace the registry predicate associated with that action with one that allows foreground execution. In the Airship SDK, this relative state between *what the app is doing now* and *how the action was invoked* is known as a *situation*, or more properly, [ActionSituation](https://urbanairship.github.io/ios-library/v20/AirshipCore/documentation/airshipcore/actionsituation) . Other examples of situations besides foreground state include background push and app launched from push notification. See [ActionArguments](https://urbanairship.github.io/ios-library/v20/AirshipCore/documentation/airshipcore/actionarguments) for more detail on the methods involved with this display behavior.