# In-App Automation
Set up messages that appear in your app when users meet certain conditions.
# Create an In-App Automation
> Set up messages that appear in your app when users meet certain conditions.
See also the [In-App Automation](https://www.airship.com/docs/guides/features/messaging/in-app-automation/) feature guide.
To get started, access the In-App Automation composer:
1. Select **Create** in the sidebar.
1. Next to **Build from scratch**, select **View all**.
1. Select **In-App Automation**.
Next, enter a message name and save it. After completing a step, select the next one in the header to move on.
## Style
Select a message [style](https://www.airship.com/docs/guides/features/messaging/in-app-automation/#styles): banner, modal, fullscreen, or Custom HTML.
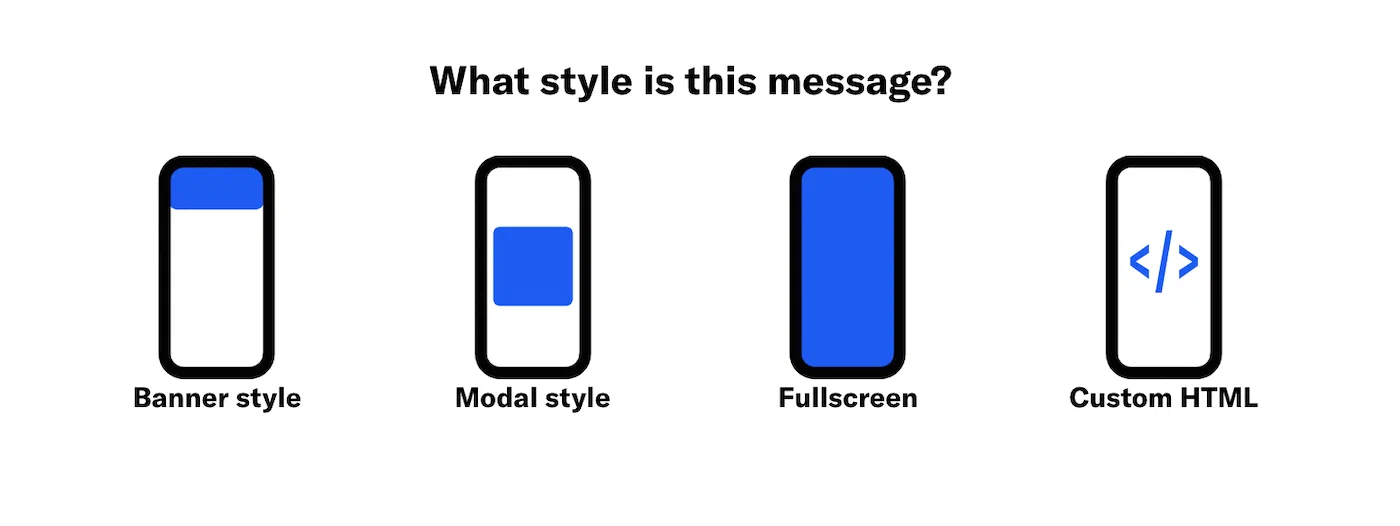
*Selecting a message style in the In-App Automation composer*
> **Note:** After selecting Custom HTML, the settings available in this composer
> are reduced to only those applicable to the Custom HTML message style.
## Settings
Configure [optional features](https://www.airship.com/docs/guides/messaging/in-app-experiences/configuration/optional-features/) and set or verify the [Message Purpose](https://www.airship.com/docs/reference/glossary/#message_purpose). Purpose only appears if enabled for the project.
Under **Localization**, enable the option if you want to provide different content depending on a user's language and country. See [Localization for In-App Automation](https://www.airship.com/docs/guides/messaging/in-app-experiences/in-app-automation/localization/).
## Audience
First, determine who can see your message:
| User group | Description | Steps |
| --- | --- | --- |
| **Target by conditions** | Include only users who meet conditions you define based on user data. | Use the same process as when building a [Segment](https://www.airship.com/docs/reference/glossary/#segment). |
| **Test users** | Include the members of a [Test Group](https://www.airship.com/docs/reference/glossary/#preview_test_groups). | Select a Test Group. |
| **Feature Flag Audience** | Include members of a [Feature Flag](https://www.airship.com/docs/reference/glossary/#feature_flag) Configuration audience | Search for a flag by name, display name, or description, and then select a Configuration. |
| **All users** | Include all app users in your project. | n/a |
> **Note:** For projects using the [channel-level segmentation system](https://www.airship.com/docs/guides/audience/segmentation/segmentation/#channel-level-segmentation), use the following options for the user group:
>
> | Option | Description | Steps |
> | --- | --- | --- |
> | **All Users** | Your entire app audience | n/a |
> | **Target Specific Users** | Audience members in a group you define | See [Targeting Specific Users](https://www.airship.com/docs/guides/audience/segmentation/target-specific-users/). |
> | **Test Users** | Members of a [Test Group](https://www.airship.com/docs/reference/glossary/#preview_test_groups) | Select a Test Group. |
### Channel conditions
> **Note:** For projects in accounts using the [channel-level segmentation system](https://www.airship.com/docs/guides/audience/segmentation/segmentation/#channel-level-segmentation), channel conditions are instead set when using the **Target Specific Users** option for your message audience.
Use channel conditions to filter which channels are included in the audience. A channel must meet the conditions to remain in the audience.
To set channel conditions, use the same process as when building a [Segment](https://www.airship.com/docs/reference/glossary/#segment). You can use the following data in your conditions:
- App version
- Device tags
- Locale
- Location opt-in status
- New users
- Platforms
- Push opt-in status
Follow the configuration steps in Targeting Specific Users.
## Content
Content configuration varies by style:
* **Custom HTML** — Upload your HTML.
* **Banner** — Configure using the Classic design method.
* **Modal** and **Fullscreen** — Select a design option, then configure.
Design methods:
* [Classic](#classic) — Select a layout, then configure Text, Media, and Button elements.
* [Template](#template) — Select a [Template](https://www.airship.com/docs/reference/glossary/#template). You have the option to edit after selection.
* [Interactive editor](#interactive-editor) — Provide your own HTML or design using the [Interactive editor](https://www.airship.com/docs/guides/messaging/editors/interactive/about/).
A preview updates as you type and make selections.
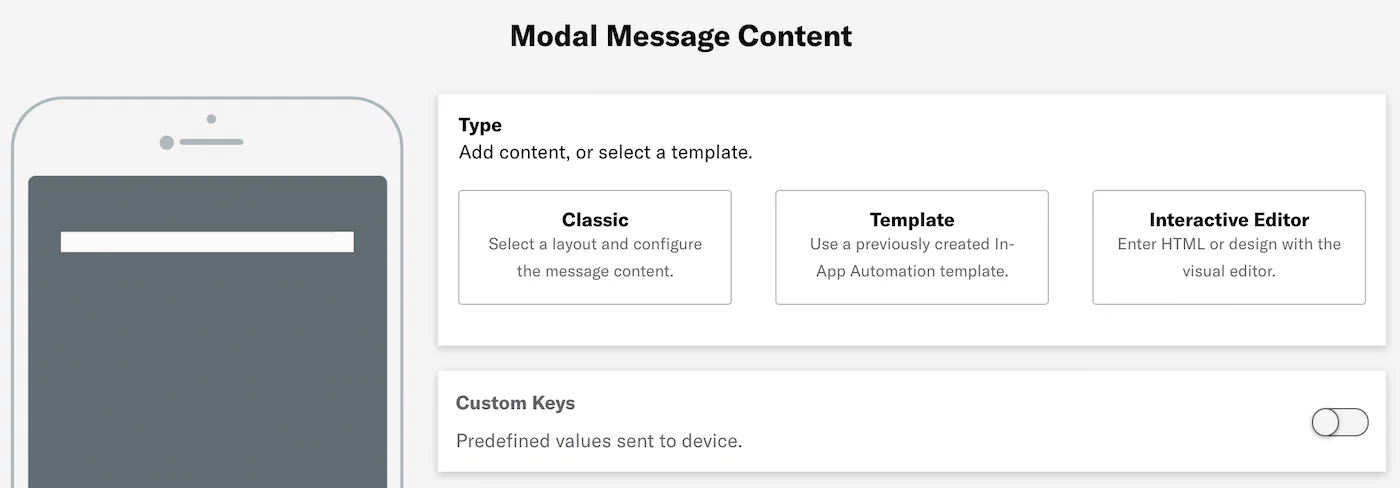
*Content configuration for an In-App Automation*
### Classic
To add message content using the Classic method:
1. (Modal and fullscreen styles only) Select *Classic*.
1. Select a [layout](https://www.airship.com/docs/guides/features/messaging/in-app-automation/#layouts) to determine the order of content elements: Media/Header/Body or Text Only. Layout options vary by message style.
1. Configure the content elements. Available fields and options vary per message style. The Custom Keys option is available for all message styles.
-
Text — Enter text for the header, body, and footer.
The footer is for fullscreen messages only. It is designed to link to your Terms and Conditions, Privacy Policy, or additional information to help the user make a more informed decision about the actions they could take in this message. The footer inherits the styling of the body text and functions as a button.
-
Media — Enter an HTTPS URL that will be accessible by your mobile audience.
If your Airship plan includes CDN support, you can also upload media or select from previous uploads in your project’s media library. See Insert media in message content in Media library.
-
Buttons — Enter button label text and click Add button. Banner and modal messages support up to two buttons. Fullscreen messages support up to five buttons. If there are two buttons total, choose a button layout: separate, joined, or stacked.
-
[Custom Keys](https://www.airship.com/docs/reference/glossary/#custom_keys) — Optional. Enter a key and value. Click Add another for additional keys.
### Template
To use a [Template](https://www.airship.com/docs/reference/glossary/#template) for the message content:
1. Select *Template*.
1. Choose a template.
1. Click **Continue with selected template**.
If you want to change the design after selecting a template:
1. Click **Edit**, then click **Edit
** to open the template in the [Interactive editor](https://www.airship.com/docs/guides/messaging/editors/interactive/about/).
1. Make your design changes.
1. Click **Done** to save your changes in the Interactive editor, then click **Done** to return to the Content step.
Edits affect the current message only and will not be saved for the selected template.
### Interactive editor
To design message content using the [Interactive Editor](https://www.airship.com/docs/reference/glossary/#interactive_editor):
1. Select *Interactive Editor*.
1. Click **Add +** for the message body.
1. Configure the content:
1. Click **Done** to save your changes, then click **Done** to return to the Content step.
After adding content, you can configure [Custom Keys](https://www.airship.com/docs/reference/glossary/#custom_keys). Enter a key and value. Click **Add another** for additional keys.
## Actions
This step only appears if you added content using the [Classic method](#classic).
Assign an action for each button in the message, then configure options. See [Actions for in-app experiences](https://www.airship.com/docs/guides/messaging/in-app-experiences/configuration/button-actions/).
> **Note:** If you selected Custom HTML as the style, there are no options available in the *Actions* step. You must set actions in your custom HTML file.
## Design
Optionally override [default settings](https://www.airship.com/docs/guides/messaging/in-app-experiences/configuration/defaults/#setting-in-app-automation-defaults). Enable Background, Text, or Buttons and make your changes.
* Changes apply to the current message only and do not affect the project's default design settings.
* The available options are the same as those available when setting defaults.
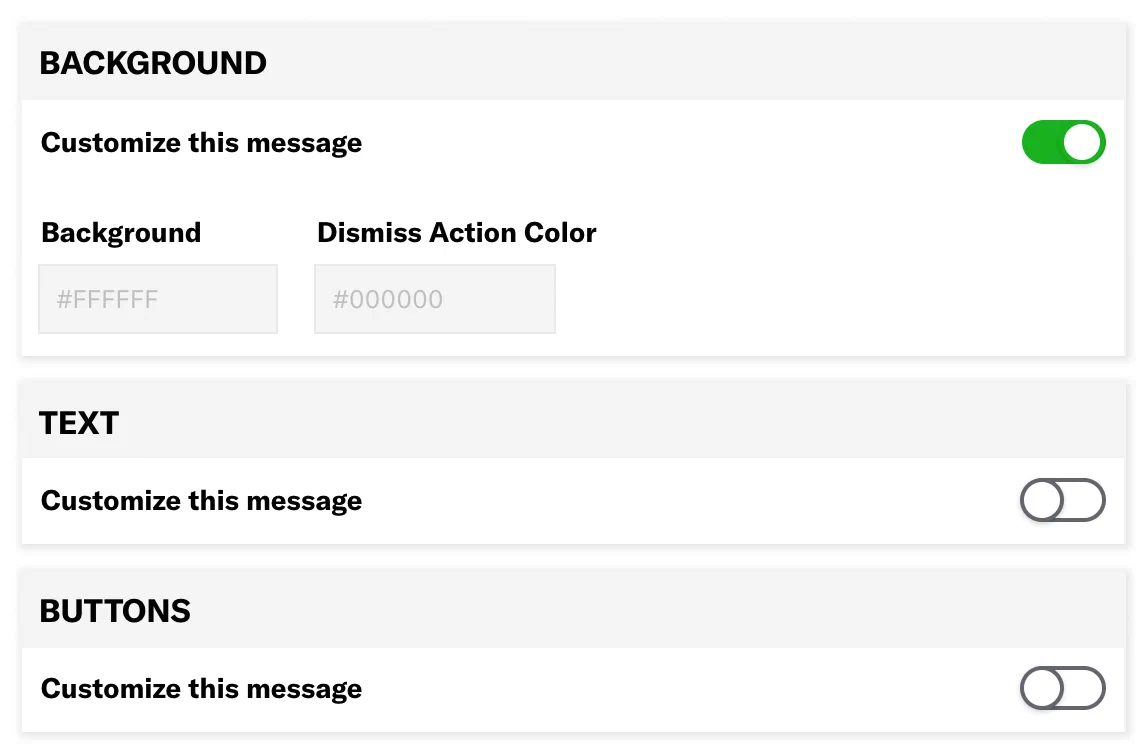
*Overriding default design settings for an In-App Automation*
## Behavior
Configure the [trigger](https://www.airship.com/docs/guides/messaging/in-app-experiences/configuration/triggers/) that will cause the message to appear to users. You can also configure cancellation events, display conditions, and set a tag when the message is displayed.
## Review {#iaa-review}
Review your message appearance and summary.
* If you selected **Feature Flag Audience** in the [Audience step](#audience), compare the flag and In-App Automation start and end dates in the Schedule section to make sure your intended timing is set up correctly.
* If you want to make changes, select **Edit**, make your changes, then either select the right arrow icon (caret-circle-right) or select the central navigation dot to return to the Review step.
Select **Finish** to make the message active. If you exit before selecting **Finish**, the message is saved as a draft.
# Localization for In-App Automation
> Localizing your messages helps you reach your audience with content specific to their language settings without creating independent messages for each language.
## About localization
Airship’s localization feature provides a way to send a single message with multiple localizations. You can prepare localizations based on language information or [Locale](https://www.airship.com/docs/reference/glossary/#locale) for more specific, regional localizations. Airship delivers localized messages to your audience according to language and country information gathered by the Airship SDK.
For example, if you prepared a German localization, users with their language set to German will receive the German localization of your message. If you want to make your message more regionally specific, you could add German localizations for both Germany and Austria. Users with their language preferences set to German would receive different messages depending on whether their country/region settings are set to Germany or Austria.
---
You can create localized content using:
* The **Message** and **In-App Automation** composers
* [Message A/B tests](https://www.airship.com/docs/guides/experimentation/a-b-tests/messages/)
* The `/push` or `/schedules` APIs, with a `localizations` array in your request
All message types for the App channel are supported: push notifications, in-app messages, and Message Center messages. In the Message composer and A/B tests, you also have the option of selecting a [content template](https://www.airship.com/docs/guides/personalization/content/templates/).
Localization for In-App Automation includes support for Custom HTML messages.
**This document is for the In-App Automation composer.** For the Message composer, A/B tests, and the APIS, see: [Localization](https://www.airship.com/docs/guides/messaging/messages/localization/).
## Create localized content
To localize a message with In-App Automation, you will create an CSV file containing the content for your language variants, then upload it in the composer, where you can preview and edit each version of the message. Airship generates localized messages for each language or locale in your CSV.
### Format localization CSV {#format-localization-csv}
First you must create a CSV containing translations for each language and country combination that you want to localize your message for. The first row in your CSV contains your column headers. Subsequent rows in the CSV represent your localizations, organized by language and country code. The only required value in a localization CSV is `id.language`, for all rows except the default localization row.
**Localized CSV Example**
```text
id.language,id.country,header,body,button1,button1.link
,,Hi there!,Whatcha doin?,Not much,https://www.example.com/nada
de,DE,Guten tag,Was machst du gerade?,Nicht viel,https://www.example.com/de/nada
```
**Your CSV *must* contain:**
* `id.language` and `id.country` column headers.
* A row with empty `id.language` and `id.country` values; this row represents the default localization for the message and goes to users who do not match any of the language/country combinations in your CSV.
* Additional column headers corresponding to `data-ua-id` values for the custom HTML elements that you want to localize. **Custom HTML messages only.**
> **Important:** Except for the default row, `id.language` is required; `id.country` is optional.
**Column headers for ALL messages:**
* `id.language` — The two-letter language code associated with this translation. Acceptable values are defined by [ISO 639-1](https://en.wikipedia.org/wiki/List_of_ISO_639-1_codes).
* `id.country` — The two-letter country code associated with this translation. Acceptable values are defined by [ISO 3166-1](https://en.wikipedia.org/wiki/ISO_3166-1_alpha-2#Officially_assigned_code_elements).
* `.key` — Any header ending in `.key` is treated as a "custom key" or "extra", where the key is the section of the header preceding .key (e.g., the key for custom.key would be "custom"). The value in each row represents the localized information that you want to pass to the key.
**Column headers for Banner, Modal, and Fullscreen messages:**
* `header` — Sets value for Header text.
* `body` — (Required) — Sets value for Body text.
* `media` — Sets URL for Media field. HTTPS required. URL must be accessible by your mobile audience.
* Image formats: JPEG, JPG, PNG, GIF
* Video formats: MPEG, MPEG2, MP4, YouTube
> **Note:** If you intend to use uploaded media in your message, enter a placeholder URL in your CSV file, then use the *Upload* option for media in the Content step after uploading the CSV. See: [Localization for In-App Automation](https://www.airship.com/docs/guides/messaging/in-app-experiences/in-app-automation/localization/).
* `footer` — Sets value for Footer text. **Fullscreen and Modal styles only.**
* `footer.` — Associates an action with tapping the footer. Deep Link and Link actions are supported for the footer. **Fullscreen and Modal styles only.**
* `button` — Sets value for Nth button text. The number of supported buttons varies per layout. At least one is required for all layouts.
* `button.` — Associates an action with the Nth button. The number of supported buttons varies per layout. At least one is required for all layouts.
**Column headers for Custom HTML messages:**
See: [Format localization CSV and HTML](#html-formatting).
### Upload localization CSV
Follow these steps to enable localization and upload your CSV in the **In-App Automation composer**.
> **Note:** **These steps cover enabling localization and adding content only** — see the [In-App Automation composer documentation](https://www.airship.com/docs/guides/messaging/in-app-experiences/in-app-automation/create/) for the full process.
In the *Settings* step, enable *Localization*:

*Enabling Localization in the Settings step*
In the *Content* step, upload your CSV:
1. Select a [layout](https://www.airship.com/docs/guides/features/messaging/in-app-automation/#layouts) to determine the order of content elements (media, header, body/text). Layout options vary by message style.
1. Click **Choose File** and select the CSV file containing your localizations.
1. Click **Create Localizations**.
1. Select from the dropdown menu to view content for each localization and edit as necessary. Available fields and options vary per message style.
-
Text — Enter text for the header, body, and footer.
The footer is for fullscreen messages only. It is designed to link to your Terms and Conditions, Privacy Policy, or additional information to help the user make a more informed decision about the actions they could take in this message. The footer inherits the styling of the body text and functions as a button.
-
Media — Enter an HTTPS URL that will be accessible by your mobile audience.
If your Airship plan includes CDN support, you can also upload media or select from previous uploads in your project’s media library. See Insert media in message content in Media library.
-
Buttons — Enter button label text and click Add button. Banner and modal messages support up to two buttons. Fullscreen messages support up to five buttons. If there are two buttons total, choose a button layout: separate, joined, or stacked.
-
[Custom Keys](https://www.airship.com/docs/reference/glossary/#custom_keys) — Optional. Enter a key and value. Click Add another for additional keys.
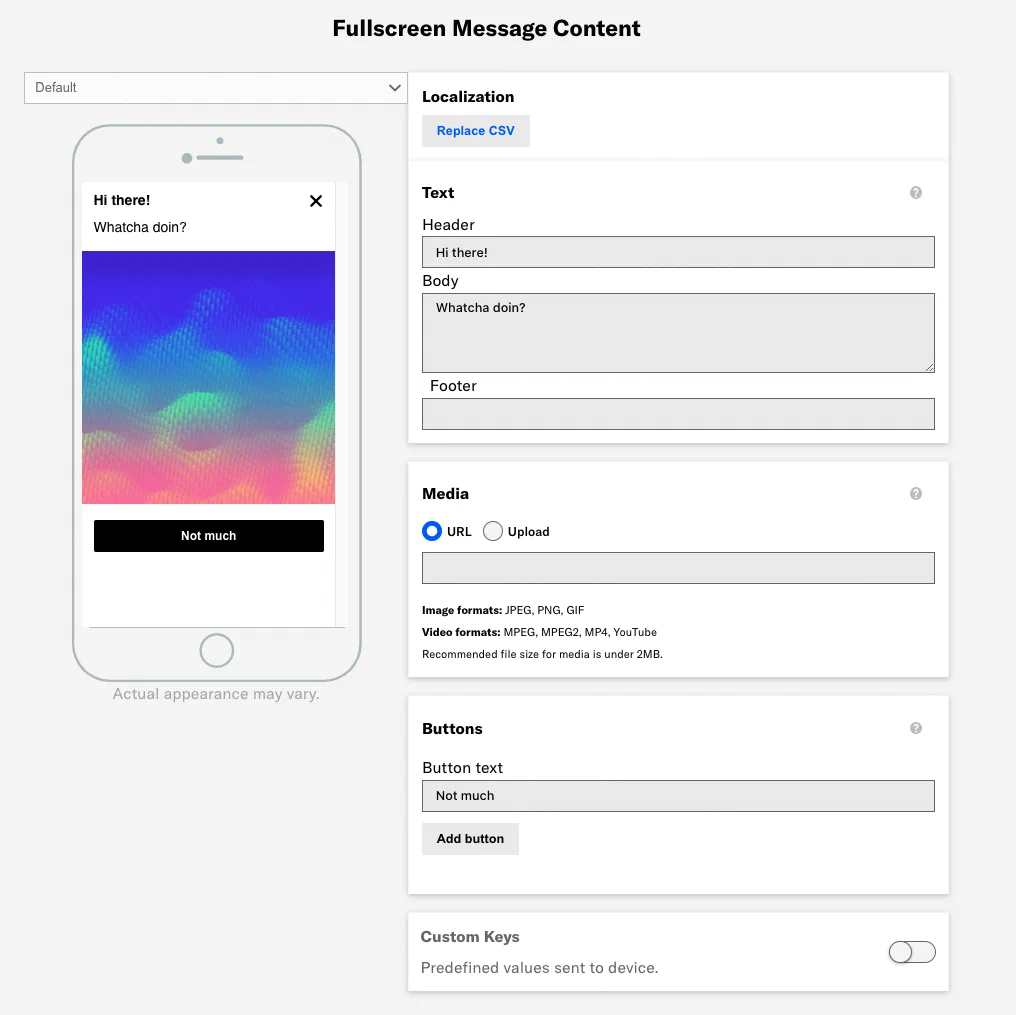
*Editing content for each localization in the In-App Automation composer*
When you have finished adding localizations, click the right arrow icon (caret-circle-right) in the header and complete the rest of the steps in the composer.
## Create localized content for Custom HTML
You can localize Custom HTML messages for In-App Automation. You will need to format your HTML with `data-ua-id` attributes representing the parts of your message you want to localize, and you will need a CSV file containing your translations.
### Format localization CSV and HTML {#html-formatting}
When building your Custom HTML message, you will assign a `data-ua-id` attribute with a unique string value to any element that you want to localize. You will then represent your `data-ua-id` attributes as column headings in your localization CSV; Airship uses these `data-ua-id` values to associate localized text or values with your Custom HTML. For example, you can populate localized text for an `h2` element with `data-ua-id="flooble"` by placing a `flooble` heading in your CSV.
By default, Airship treats elements with `data-ua-id` as text, but you can also add additional "type" attributes to elements to tell Airship how to render localized values in your HTML message.
* `data-ua-text` — Airship inserts the localized value as a plain text node into the parent element, with new lines converted into `
` elements.
* `data-ua-link` — Indicates that the element supports "actions". This places an anchor tag (``) immediately inside the element, wrapping the contents of the element. You determine the type of action and the action value in your CSV. You can combine this with other attribute types, wrapping the total contents of the element in an anchor tag.
* `data-ua-image` — Airship will insert an `![]() ` tag in the parent element, using the translated value as the `src`.
* `data-ua-video` — Airship will insert a `
` tag in the parent element, using the translated value as the `src`.
* `data-ua-video` — Airship will insert a `