# Learning the UI
Get to know the Airship Wallet web interface.
# The Airship dashboard
> {{< glossary_definition "dashboard" >}}
The dashboard is where you create and access projects, containers for the settings, certificates, reports, and other details related to your messages and mobile wallet passes.
The dashboard has two levels:
- A list of all your messaging and mobile wallet projects.
- An individual project after opening it from the list of all projects.
Almost everything you do with Airship happens inside a project, including creating messages and wallet pass templates.
Viewing and finding your projects
At the top level of the dashboard, tiles display each messaging and mobile wallet project. Messaging projects list their name, environment, and channels. Mobile wallet projects list their name and pass type.
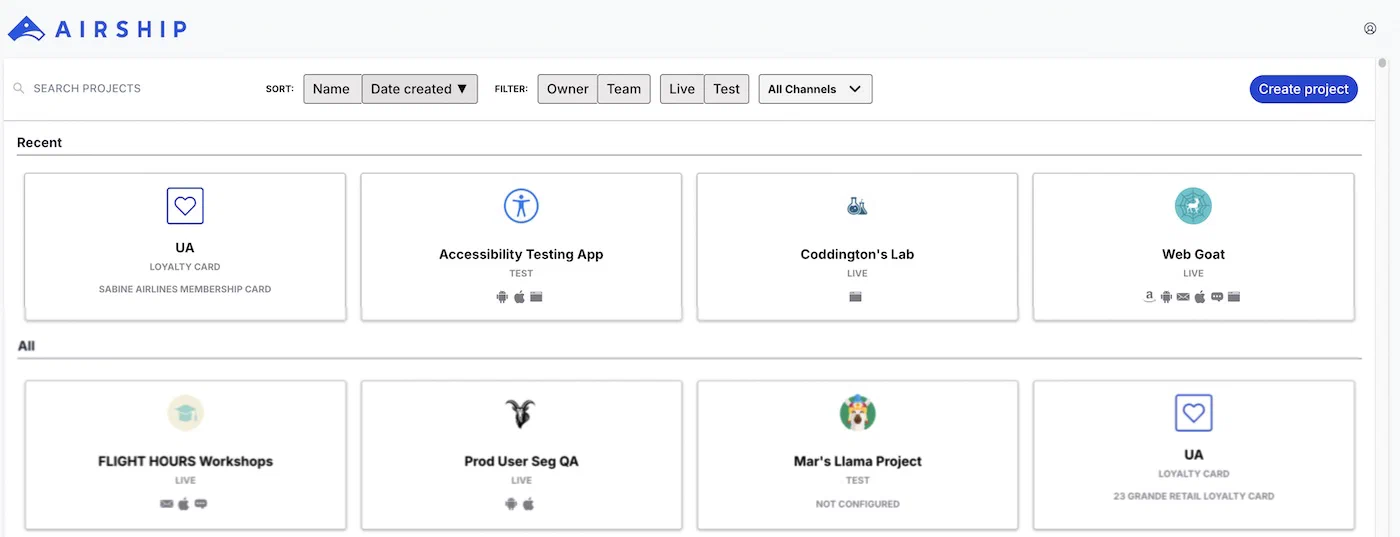
*The top-level dashboard in Airship*
If you have more than eight projects, up to four of your most recently accessed projects appear under Recent. Recent projects are not shown when sort, filter, or search are applied.
The default view is sorted by creation date, newest projects first. Select Name or Date Created to sort. Select again to toggle ascending/descending order. You can search for projects by complete or partial name.
Use filters to toggle views:
| Filter |
Description |
| Owner/Team |
Toggle between projects you own and projects you have non-owner access to. See Managing project access in Manage Messaging teams and access. All mobile wallet projects appear for Owner. |
| Live/Test |
Toggle between projects by environment type. All mobile wallet projects appear for Live. |
| Channel |
Select a channel configured for your account: Mobile apps, Web, SMS, Email, and Mobile wallet. After selecting Mobile apps you can filter again by platform. After selecting Mobile wallet you can further filter by pass type and company. |
## Navigating individual projects
From the top-level dashboard, select a tile to open a project. The header shows the project name and the pass type name and icon. To switch between your six most recent projects, select the down arrow (▼) next to the project name, then select from the list. A link to return to the top-level dashboard is at the bottom of the list. You can also select the Airship logo in the header to return to the top-level dashboard.
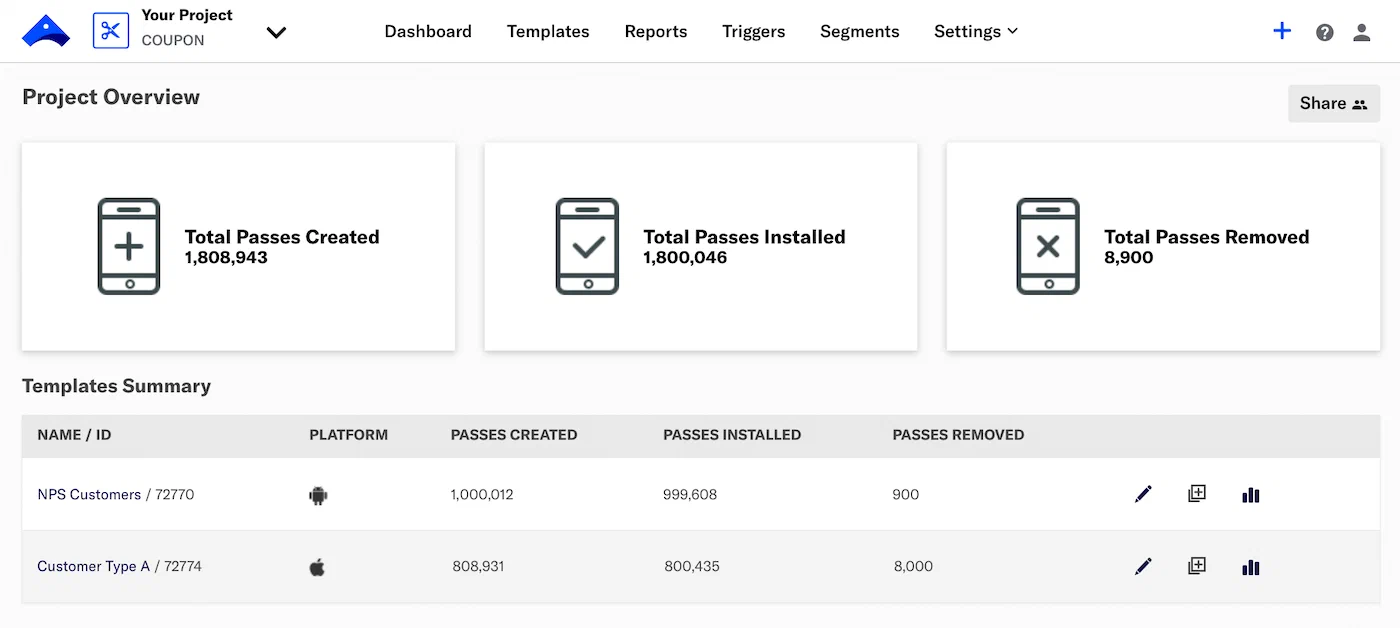
*A mobile wallet project dashboard*
Mobile wallet project menus:
| Menu | Description |
| --- | --- |
| **Templates** | The basis of the graphic interface of the mobile wallet template editor, and they control the layout of fields |
| **Reports** | Analysis of each template |
| **Triggers** | Display content based on location or date |
| **Segments** | Update passes based on user tags |
| **Settings** | Manage the project's details, barcode, certificates, and Associated App IDs, and access its API key and secret |
Counts are provided for the following:
| Count | Description |
| --- | --- |
| **Passes Created** | The pass has been created but has not yet been added or deleted. Apple Wallet passes only. |
| **Passes Installed** | The pass has been installed by the end user and has not been removed or deleted. |
| **Passes Removed** | The pass has been removed by the end user and not deleted. Deleted passes are removed from the mobile wallet platform but remain on the end user's device. Only end users can remove the pass. If a pass has been deleted, you will not have the ability to send any updates to the pass. |
Pass counts reflect the current count of passes rather than net pass activity. For example, if a user adds a pass, then removes the same pass, then adds the pass again, the Passes Installed count increases by one, while the Passes Removed count stays constant.
The Passes Installed count may exceed the Passes Created count due to families operating a shared iCloud account or individuals backing up their phones and/or upgrading their phones. The same pass can be copied across multiple devices, each counting as a separate installation. The most common case is transferring data from an old iPhone to a new one. Wallet passes will automatically be added to the new iPhone after the data transfer, resulting in a copy of the pass on both the new and old phones. When the old phone is discarded (turned off), no events from Apple will remove or delete the pass from the inactive old phone, thus Airship will keep old devices' passes in the installed state.
**Templates Summary** lists each template in the project and its ID, platform, and pass counts. Select the edit icon (
) to [edit the template design](https://www.airship.com/docs/guides/wallet/user-guide/design-template/template-design/#editing-template-designs). Select the duplicate icon (
) to [duplicate the template](https://www.airship.com/docs/guides/wallet/user-guide/design-template/manage/#duplicate-a-wallet-template). Select a template name or the report icon (
) to open its [Template Report](https://www.airship.com/docs/guides/wallet/user-guide/reporting/template-reports/).
# The Template Editor
> The Wallet Template Editor is the web tool used to configure a pass's appearance and fields.
If you just [created a new template](https://www.airship.com/docs/guides/wallet/getting-started/project-template/#create-a-template) and clicked **Start Building**, your screen will be open to the template editor.
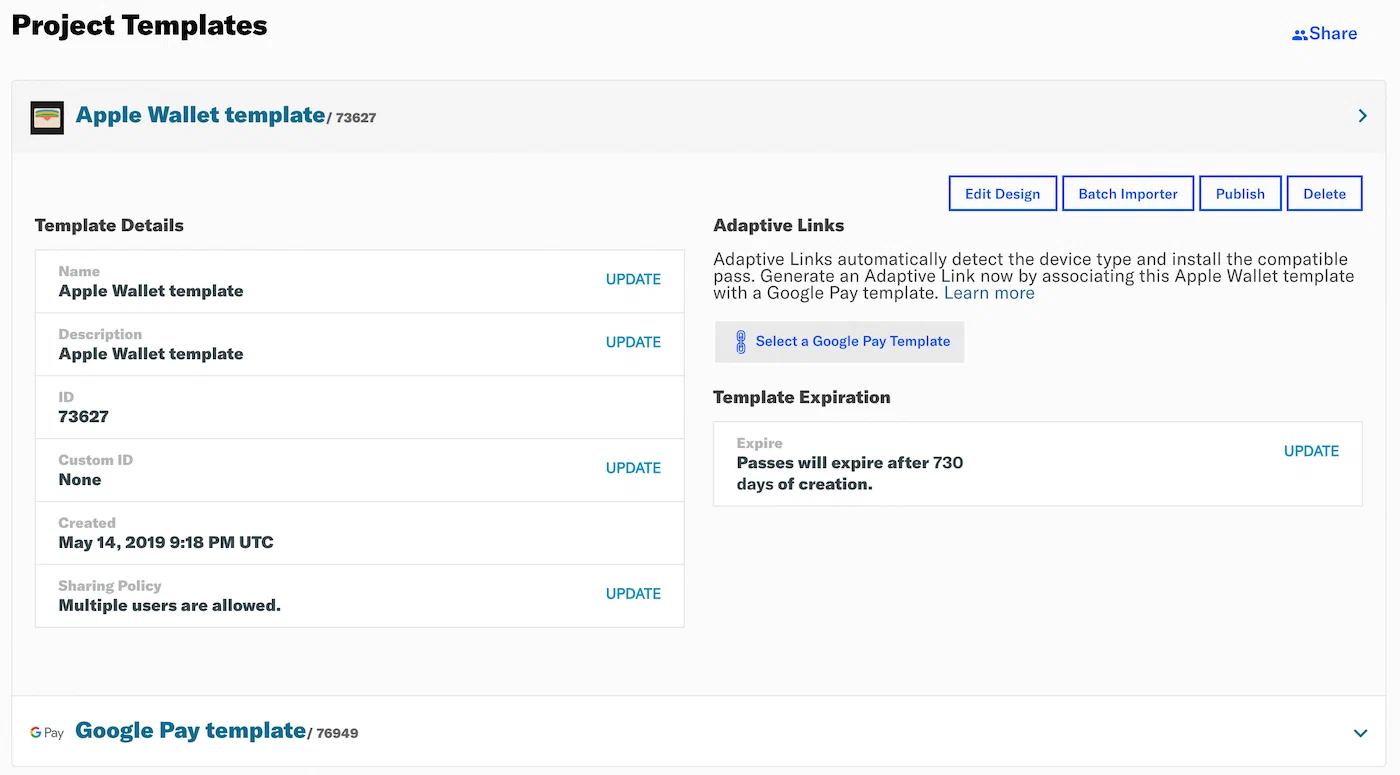
To edit an existing template:
1. Go to *Templates*.
1. Click anywhere in a template's row to see its expanded view, then click
**Edit Design**. If you have only one template in the project, the
initial view is expanded.
*Template list with pass preview*
## Header {#editor-header}
As you design a template, information and options are displayed in the header.

*The template editor header*
At left are the template name and ID, along with its pass type name and icon.
At right are three buttons:
* **Exit** returns you to the project dashboard *without saving anything*.
Make sure to first click **Save** before exiting.
* **Test Pass** lets you email the pass to yourself so you can preview it on
a mobile device. Follow the steps in
[Send a Test Pass](https://www.airship.com/docs/guides/wallet/user-guide/design-template/test-pass/).
* **Save** saves any changes you have made to the template.
## Layout
The pass preview is on the left side of the page.
[General Settings](#general-settings)
and field configuration are on the right. As you design the pass, the changes
are reflected in the preview. See also:
[Mobile Wallet Reference: Layout: Schematics](https://www.airship.com/docs/guides/wallet/user-guide/reference/#schematics).
*Pass layout overview in the template editor*
## General Settings
*General Settings* are properties that apply to the entire template rather than
to a single field. Available properties vary per pass type. Return to these
settings at any time by clicking the paint brush icon in the upper right corner
of the pass preview.
### Background and Text Colors
**Apple Wallet:** Set *Background and Text Colors*.

*Setting background and text colors for Apple Wallet*
> **Note:** When using Event Type templates with iOS, foreground color behavior varies
> depending on background and strip images:
>
> * When a background or strip image **is not** included in the pass, field
> label and value colors **are** applied.
>
> * When a background or strip image **is** included in the pass, the field
> value color is automatically set to white unless the image is white, in
> which case the value is set to black.
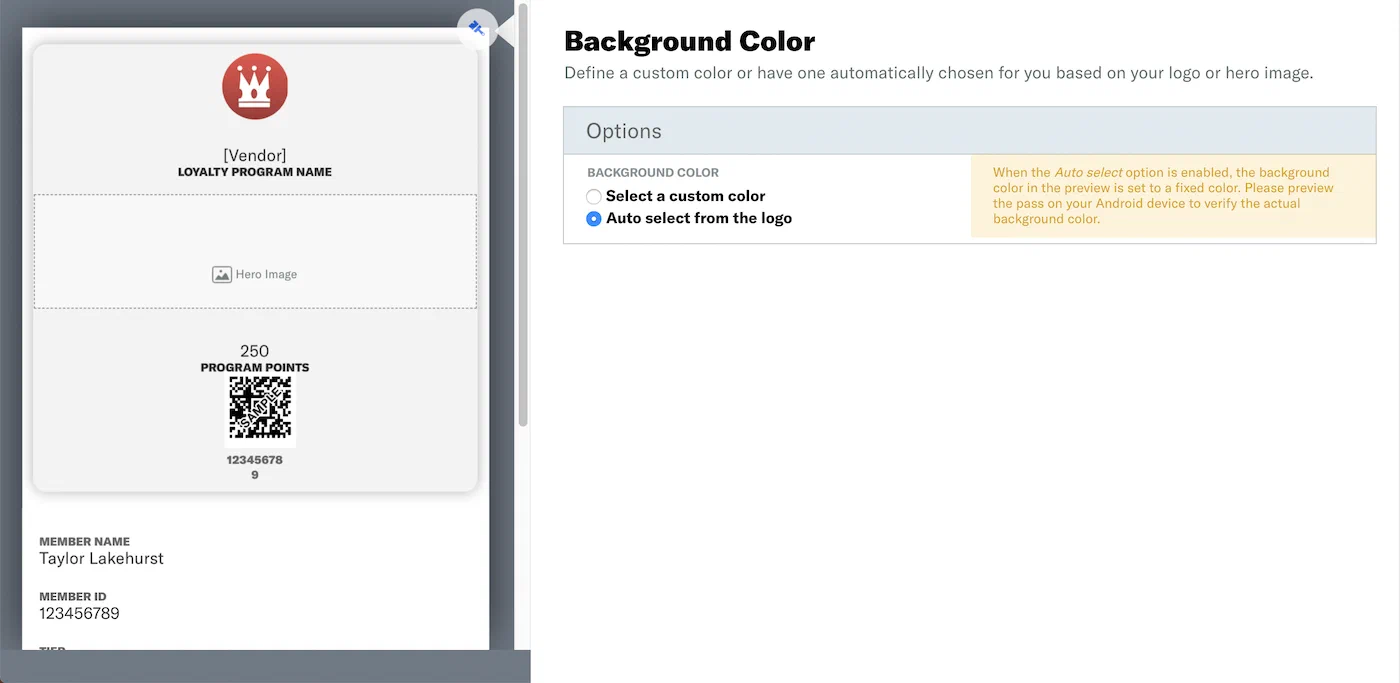
**Google Wallet:** Choose a *Background Color* manually or via auto select.
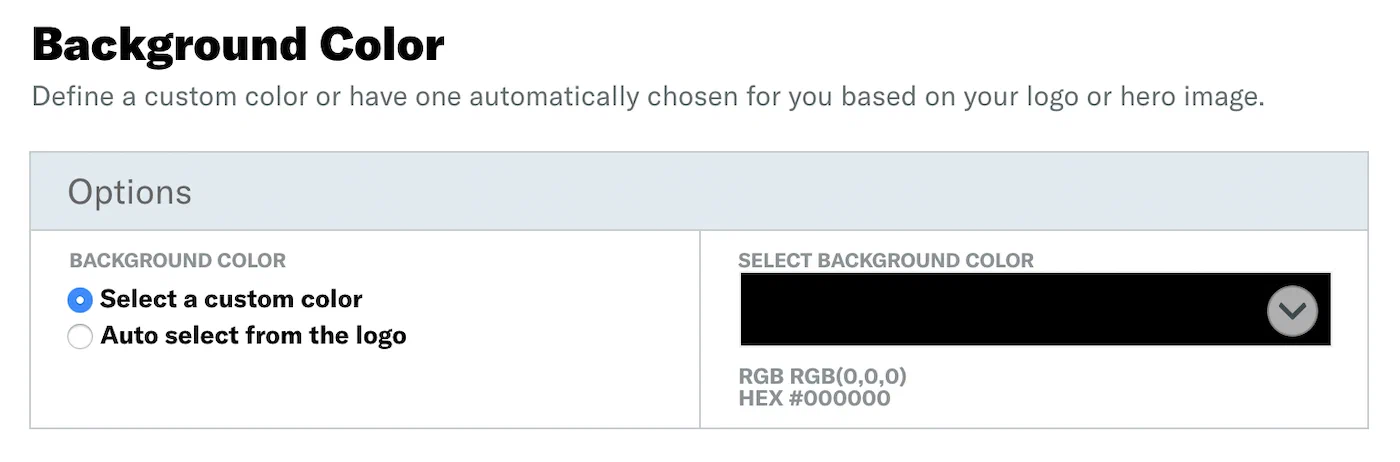
*Choosing a background color for Google Wallet*
When the *Auto select* option is enabled, the background color will be set
to the prominent color from images you've included in the templates,
however the color will not be displayed in the preview. Please preview
the pass on your Android device to verify the actual background color.
### Color Selection
Selecting a color is the same for both Apple and Google templates. Click
▼ in the color field to display the color options. You may click
to select a color, or enter hexadecimal or RGB color values.
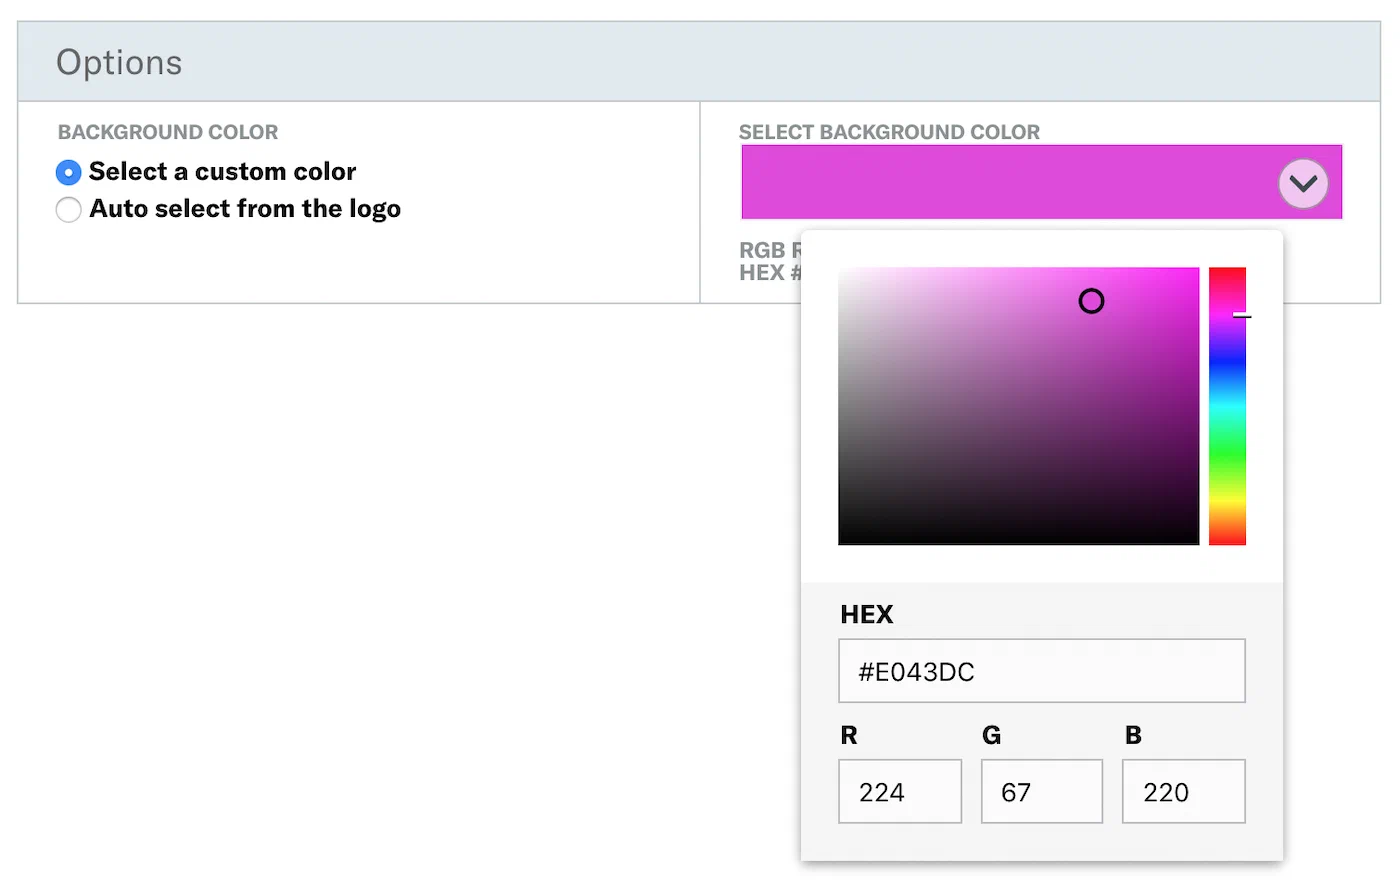
*Selecting a color using the color picker*
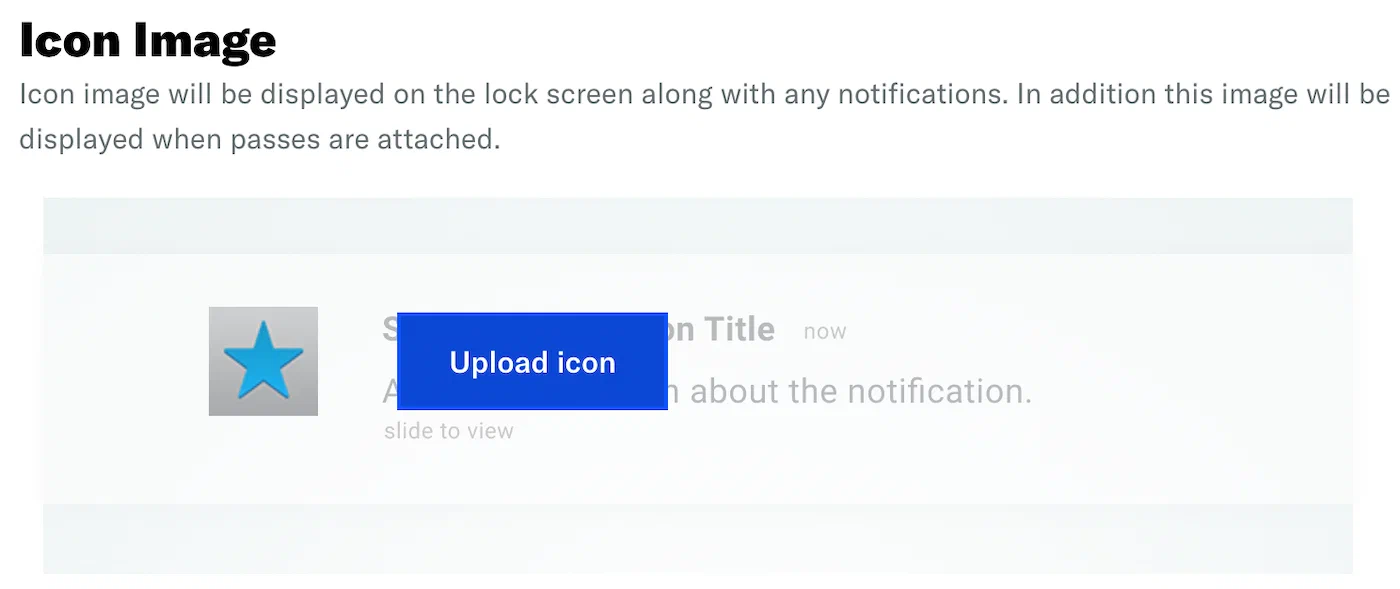
### Icon Image
Apple passes have an *Icon image* that is displayed on the lock screen along
with any notifications. It is also displayed when a pass is provided by an app,
e.g., a mail attachment.
Click the image icon pane and a modal window will open, specifying
requirements and options. For requirements per image type, see:
[Mobile Wallet Reference: Layouts: Images](https://www.airship.com/docs/guides/wallet/user-guide/reference/#images).
*Configuring the icon image*
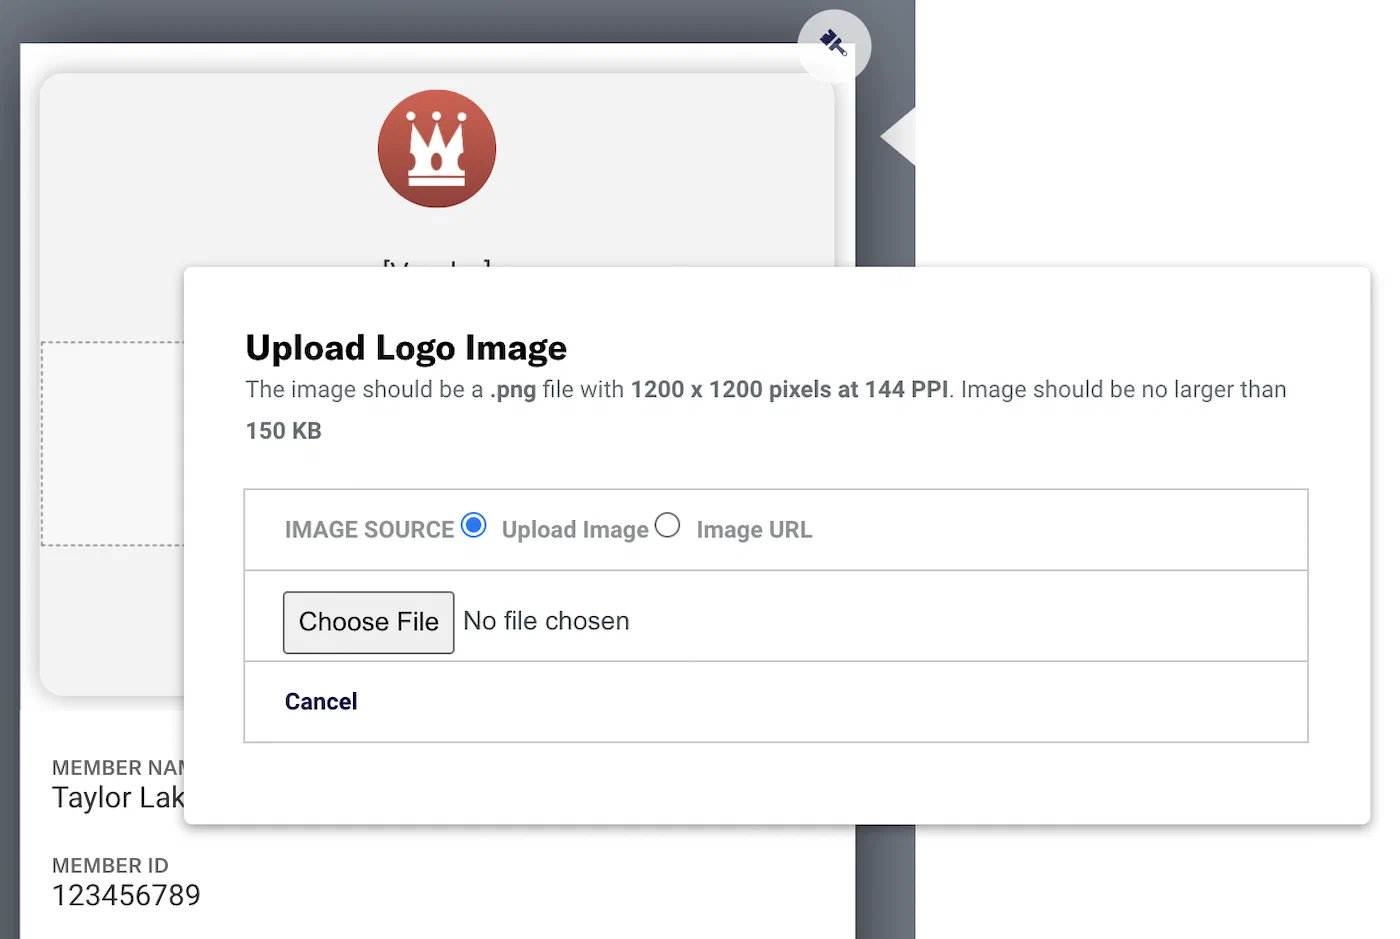
## Images
Click in the preview to select an image. A modal window will open, specifying
requirements and options. For requirements per image type, see:
[Mobile Wallet Reference: Layouts: Images](https://www.airship.com/docs/guides/wallet/user-guide/reference/#images).
*Adding images to a pass template*
## Fields
Fields are the placeholders for the key pieces of relevant information for each
pass. Pass type determines the number of fields that appear on the front of a pass.
The number of fields on a pass also depends on the text in each field. If there
is too much text in a field, some fields will not be displayed. See:
[Mobile Wallet Reference: Layouts: Fields](https://www.airship.com/docs/guides/wallet/user-guide/reference/#fields).
Click in the preview to select a field and its configuration pane will
display on the right side of the screen. The field type is listed in the header.
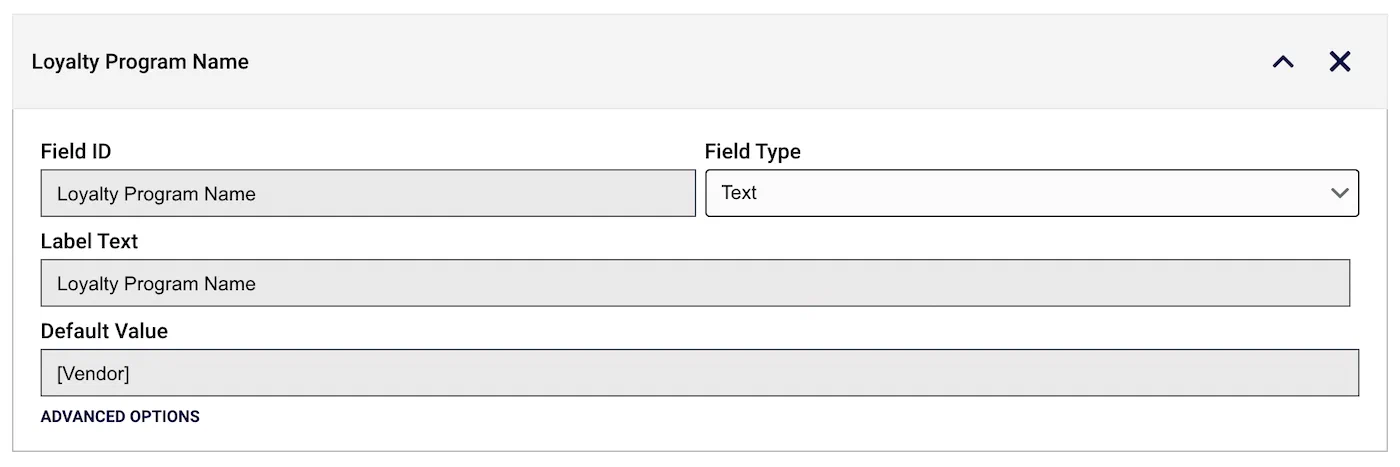
*Editing a pass field in the template editor*
Hover over the field to expose action icons in the header:
* ▼ or ▲ = Click to move the field to a new position in the layout. You can also change a field's position via the preview. See: [Fields: Position](#position).
* ◀ or ▶ = In Google Generic Passes and Boarding Passes, click to move the field to a new position in the layout.
To move a field to another row, first remove it, then select **+ Add another field** in another row, and search for and select the field ID in the search bar.
* × = Remove field from layout.
> **Important:** If you edit a field ID, make sure to update any API calls referring to the field.
> **Important:**
> Google Wallet *Class* fields are edited inline in the preview. Clicking on a class field
> will not expose a configuration pane. See
> [Google Class Fields](#class-fields)
> below.
> **Note:** When displayed on an end user's device, text fields on an Google Wallet pass
> will be truncated to the first four lines. The user must click on the field
> to display the full string. When editing templates, the preview will always
> display the full text.
### Field Sets
Different pass types have different field sets depending on the purpose,
e.g., a *Loyalty* pass might have a Point Balance field but not a Gate
Number field like a *Boarding Pass* pass would. See:
[Mobile Wallet Reference: Layouts: Fields](https://www.airship.com/docs/guides/wallet/user-guide/reference/#fields)
Google Boarding Pass field sets can display the contents of two fields in a single location, separated by a slash, e.g., `Content 1 / Content 2`.
Click **+ Add another field** to add a secondary field.
### Advanced Options
Click *Advanced Options* at the bottom of a field's configuration pane to
show/hide additional options. Check the box to enable.

*Advanced field options*
* **Hide this field if the label and value are blank:** This will retain the
space dedicated for the field. In order to remove the space allocation, you
must remove the field from the layout.
* **Notify the user when this value changes:** Each field object on an
Apple Wallet pass can include an optional *change message* value. A change
message is the text that appears in an alert that is displayed when a pass
field's value is changed. **Apple Wallet only.**
> **Important:** The change message must include the escape value `%@`, which is replaced when
> the field's value is changed. See
> [Pass Update Notifications](https://www.airship.com/docs/guides/wallet/user-guide/notifications/pass-updates/)
> for details.
> **Note:** * If you don't specify a change message, the pass holder isn't notified when
> the field value changes.
>
> * Setting a change message will not trigger sending a notification — the
> notification is triggered when you change the field value.
>
> * When multiple fields with change messages are updated at the same time, we
> cannot control the processing order. That is handled by Apple.
### Adding Fields
Field placement behaviors and options vary. Be sure to verify the design on a
mobile device.
* Some field placements allow up to four fields in a single row.
* Some field placements allow multiple full-width fields in a pass.
* Adding more fields than can be displayed across the device's screen will
introduce scrolling within each placement.
### Position
When you hover over a field in the preview, its boundary will highlight. If the field can be
moved, arrows will appear at the edge of the field's boundaries, depending on
its current placement. Click an arrow to move the field in that direction.
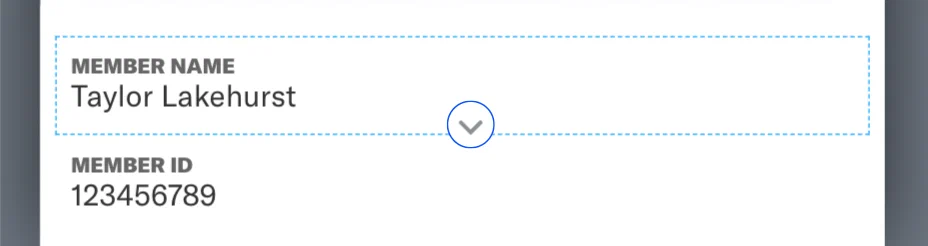
*Moving a field to a different position*
### Apple Back of Pass {#back-of-pass}
Apple Wallet passes include fields on the back of the pass. Click **See back of the pass** to access the fields.

*Editing back-of-pass fields for Apple Wallet*
Use HTML to create clickable links. Example formats:
* **URL** — `www.airship.com`
* **Phone** — `800-720-2098`
* **Email** — `support@airship.com`
* **SMS** — `Text us`
### Google Class Fields {#class-fields}
Google Wallet passes will automatically update with any changes made to *class*
fields. How it works:
* If a class value `class.*` is changed, all passes will be changed.
* On [Update Pass](https://www.airship.com/docs/developer/rest-api/wallet/operations/passes/#updatepass), only that
pass is updated. Class values are not sent with the update object when
updating passes, so there is no effect on other passes.
Any field preceded by `class` constitutes a class field. For a full list of
class fields, please visit the
[Google Wallet documentation](https://developers.google.com/pay/save/guides/loyalty/design).