`.
If you want to take advantage of external IDs for some assets, you should plan to take advantage of them for all assets. Items with external IDs have their own endpoints in the Wallet API, and it can be difficult or confusing to switch between standard Wallet IDs and your own external IDs.
In general, Airship expects external IDs to be unique to their parent. Templates should have unique IDs within their project. Adaptive links and passes should have IDs unique to their template(s).
## The Wallet API
You can use the [Wallet API](https://www.airship.com/docs/developer/rest-api/wallet/) to create Apple Wallet and Google Wallet passes, and also for creating callbacks for pass events, like installation and uninstallation. For information about authenticating with the Wallet API, see [Wallet API Security](https://www.airship.com/docs/guides/wallet/api-security/).
Wallet template and pass payloads are largely based on Apple Wallet and Google Wallet specifications. Passes for each platform have similar objects, but the arrangement of objects on the pass differs by pass type. See the [Mobile Wallet Reference](https://www.airship.com/docs/guides/wallet/user-guide/reference/) for more information about pass layouts.
Because passes typically include fields that must be updated dynamically and programmatically, e.g., by user, location, or as other events occur, it can be helpful to create and manage your passes through the API.
> **Note:** While the Wallet API can be used to create pass templates and URLs, passes are **not distributed** to recipients via the Wallet API. See the various [pass distribution methods](https://www.airship.com/docs/guides/wallet/user-guide/updating-passes/).
# Semantic tags for Apple Wallet boarding passes
> Add metadata to Apple Wallet boarding passes to enrich the user experience. Semantic tags enable iOS to surface travel insights, such as Live Activities, in‑pass UI enhancements like airport maps and baggage tracking, and deeper Wallet interactions.
## About semantic tags
Semantic tags augment standard boarding pass fields without requiring changes to your existing template structure. Passes with semantic tags automatically deliver the appropriate experience based on the user's iOS version.
Using the tags in boarding passes can transform your travelers' experiences by enabling:
- **Live Activities** give real-time flight updates and can be shared so friends and family can follow along.
- **Enhanced pass UI** with airport maps, baggage tracking, and contextual information
- **Intelligent notifications** powered by structured flight and passenger data
- **Seamless compatibility**, where passes automatically provide the enhanced experience on iOS 26 while maintaining full backward compatibility with earlier iOS versions
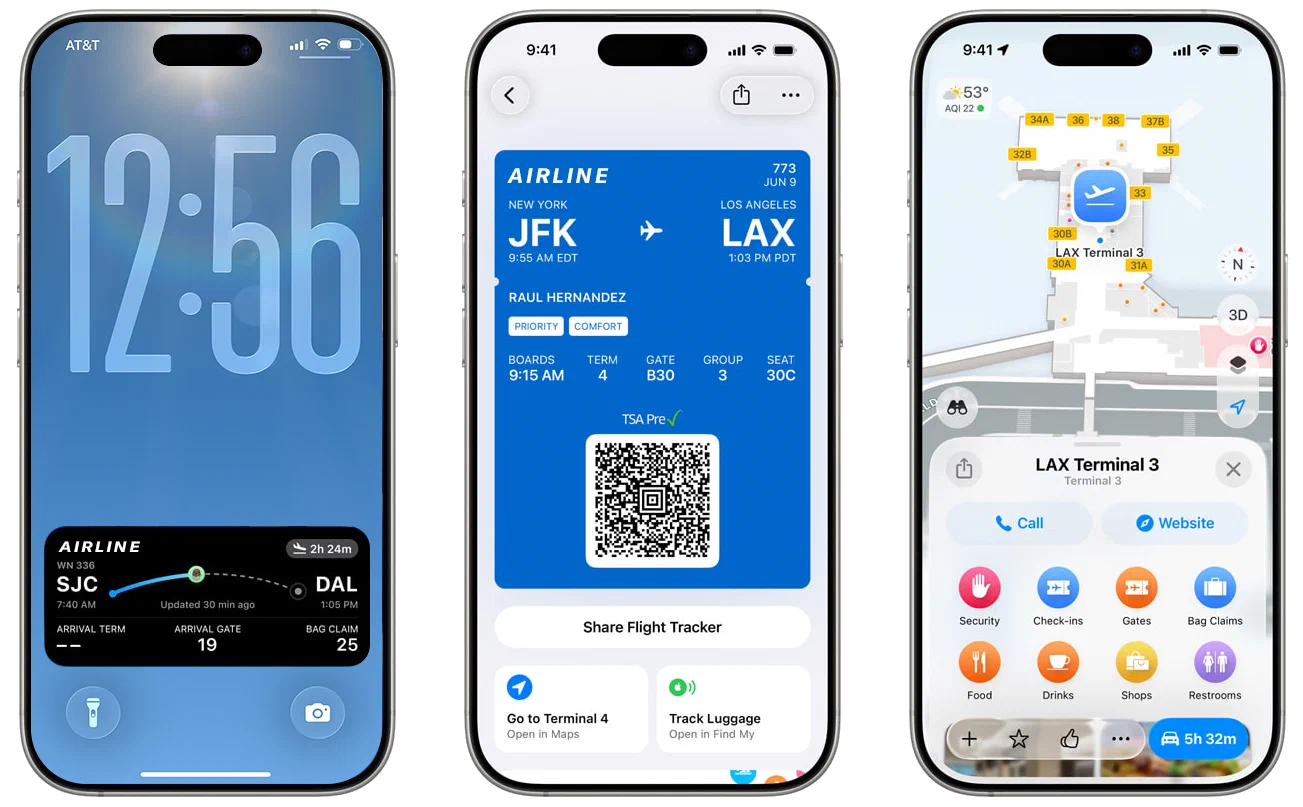
*Semantic tags for Apple boarding passes enable enhanced user experiences.*
Semantic tags are supported on devices running iOS 26 or later. On older versions, the semantic data is not rendered.
For more information, see [Supporting semantic tags in Wallet passes](https://developer.apple.com/documentation/walletpasses/supporting-semantic-tags-in-wallet-passes) and the [SemanticTags](https://developer.apple.com/documentation/walletpasses/semantictags) object in Apple's developer documentation.
### iOS 26 boarding pass design and backward compatibility
Apple refreshed the boarding pass layout, behavior, and functionality for iOS 26. The updated design depends on the presence of semantic tags. Without them, your Apple boarding passes will render using the legacy design.
To preserve backward compatibility, design your boarding passes using standard (legacy) field data to support their appearance on devices running iOS versions lower than iOS 26.
### Automatic tag mapping
Airship can automatically map standard boarding pass fields to semantic tags, so you can take advantage of Apple’s refreshed boarding pass experience immediately, without modifying your Wallet API integration.
These flight-level field names map to semantic tags:
| Flight field name | Semantic tag name |
| :--- | :--- |
| `airlineCode` | `airlineCode` |
| `flightNumber` | `flightNumber` |
| `departureAirport`1 | `departureAirportCode`, `departureCityName` |
| `departureTerminal` | `departureTerminal` |
| `departureGate` | `departureGate` |
| `departureTime` | `originalDepartureDate` |
| `boardingTime` | `originalBoardingDate` |
| `departureLocation` | `departureLocation` |
| `departureLocationTimeZone`2 | `departureLocationTimeZone` |
| `arrivalAirport`1 | `destinationAirportCode`, `destinationCityName` |
| `arrivalTerminal` | `destinationTerminal` |
| `arrivalGate` | `destinationGate` |
| `arrivalTime` | `originalArrivalDate` |
| `destinationLocation` | `destinationLocation` |
| `destinationLocationTimeZone`2 | `destinationLocationTimeZone` |
| `actualDepartureTime` | `currentDepartureDate` |
| `actualArrivalTime` | `currentArrivalDate` |
1. Mapped from the field value and label.
2. Optional flight fields. If not set, the time zone of the airport is used.
These passenger-level field names map to semantic tags:
| Passenger field name | Semantic tag name |
| :--- | :--- |
| `passengerName` | `passengerName` |
| `confirmationCode` | `confirmationNumber` |
| `seatNumber` | `seat` |
| `boardingGroup` | `boardingGroup` |
| `boardingPosition` | `boardingPosition` |
| `boardingZone` | `boardingZone` |
To enable or disable the feature, go to **Settings**, then **Project Details**, and toggle **Semantic tag auto-mapping for Apple Wallet**.
You can keep auto-mapping enabled indefinitely. However, when you're ready to unlock the full range of Apple's capabilities, extend your Wallet API calls with additional semantic tag data. API-set values override auto-mapped ones.
The remainder of this guide walks you through using semantic tags in API calls.
## Using semantic tags with boarding passes
First, define the flight in your project and design the pass's visual appearance. Then you can generate [Adaptive Links](https://www.airship.com/docs/reference/glossary/#adaptive_link) to distribute to users.
### Create a flight
You can add semantic tags as key-value pairs within the `semantics` object at two levels:
- **Top level** — Within the `fields` object, provide flight-wide information like airport codes, gates, and departure times
- **Field level** — For individual fields, provide additional context such as whether a time is estimated or confirmed
A flight serves as the foundation that all boarding passes will reference, so when creating the object:
* Include semantic tags that apply to the entire flight experience, plus any field-level semantic tags you need.
* Populate canonical values wherever possible: IATA airport codes, ISO timestamps, marketing versus operating carrier, etc.
For a list of supported semantic tags, see the properties for the [Flight semantics object](https://www.airship.com/docs/developer/rest-api/wallet/schemas/flights-and-boarding-passes/#flightsemantics) in the Wallet API reference.
Include the flight object in the request body of a flight creation operation:
* [Create flight](https://www.airship.com/docs/developer/rest-api/wallet/operations/flights/#createflight)
* [Create flight with external ID](https://www.airship.com/docs/developer/rest-api/wallet/operations/flights/#createflightexternalid)
Note the `flightId` or `flightExternalId` in the response for reference when creating pass links.
#### Example flight object
The following example flight object contains these semantic tags:
- **Field-level semantic tags** — Individual field properties that provide context for specific values:
- `boardingTime` with `isEstimated: false` indicates the boarding time is confirmed.
- `arrivalTime` with `isScheduled: true` marks this as the scheduled arrival time.
- `boardingPolicy` with `priorityBoarding: true` enables priority boarding features.
- `seatingPolicy` with `seatAssignmentRequired: true` indicates seat assignments are required.
- **Top-level flight semantic tags** — Flight-wide information that enables iOS features:
- Basic flight details: airline code, flight number, airport codes
- Location details: terminal, gate, departure and destination cities
- Time zone information for accurate time display
- Original scheduled times for comparison with any updates
**Example flight object with top- and field-level semantic tags**
```json
{
"fields": {
"airlineCode": { "value": "OA" },
"flightNumber": { "value": "1219" },
"departureAirportCode": { "value": "SEA" },
"arrivalAirportCode": { "value": "SFO" },
"boardingTime": {
"value": "2025-09-05T16:10:00-07:00",
"semantics": { "isEstimated": false }
},
"arrivalTime": {
"value": "2025-09-05T18:20:00-07:00",
"semantics": { "isScheduled": true }
},
"boardingPolicy": {
"value": "zoneBased",
"semantics": { "priorityBoarding": true }
},
"seatingPolicy": {
"value": "cabinBased",
"semantics": { "seatAssignmentRequired": true }
},
"semantics": {
"airlineCode": "OA",
"flightNumber": "1219",
"departureAirportCode": "SEA",
"destinationAirportCode": "SFO",
"departureTerminal": "A25",
"departureGate": "A21",
"departureLocationTimeZone": "America/Los_Angeles",
"departureCityName": "Seattle",
"originalBoardingDate": "2025-09-05T16:10:00-07:00",
"originalDepartureDate": "2025-09-05T16:30:00-07:00",
"originalArrivalDate": "2025-09-05T18:20:00-07:00",
"destinationCityName": "San Francisco",
"destinationLocationTimeZone": "America/Los_Angeles"
}
}
}
```
### Create a template
Your boarding pass requires a visual design. If you do not already have Apple template for the pass, create it now. See [Designing and managing templates](https://www.airship.com/docs/guides/wallet/user-guide/design-template/).
Semantic tags are not reflected in previews when designing boarding pass templates in the Airship dashboard.
### Create pass links
After creating your flight and template, you can create [Adaptive Links](https://www.airship.com/docs/reference/glossary/#adaptive_link) for the boarding passes. You will refer to both the template and flight when creating the links.
You can add semantic tags as key-value pairs within the `semantics` object at two levels:
- **Top level** — Within the `fields` object, provide passenger information like name and seat assignment
- **Field level** — For individual fields, provide additional context such as a seat row or a passenger's loyalty level
You must use the `/links/adaptive/multiple/project/{projectId}` endpoint, not the standard `/links/adaptive` endpoint. See [Create boarding pass Adaptive Links](https://www.airship.com/docs/developer/rest-api/wallet/operations/adaptive-links/#createboardingpassoreventticketadaptivelinks) in the Wallet API reference. The request generates a separate Adaptive Link for each passenger in the `passengers` array. Each Adaptive Link references a flight and includes passenger-specific information.
For a list of supported semantic tags, see the properties for the [Passenger semantics object](https://www.airship.com/docs/developer/rest-api/wallet/schemas/flights-and-boarding-passes/#passengersemantics) in the Wallet API reference.
For comprehensive boarding pass guidance, see [Adaptive Links for Boarding Passes](https://www.airship.com/docs/guides/wallet/user-guide/create-links/flights-boarding-passes/#adaptive-links-for-boarding-passes) in *Flights and boarding passes*. For request schema details, see [Boarding pass Adaptive Link request](https://www.airship.com/docs/developer/rest-api/wallet/schemas/flights-and-boarding-passes/) in the Wallet API reference.
#### Example boarding pass Adaptive Link request
The following example contains these semantics:
- **Field-level semantic tags**: The `seatNumber` field includes detailed seat information: row and type.
- **Top-level passenger semantic tags**: Top-level passenger information enables iOS to recognize the traveler and provide personalized features, including loyalty program status.
**Example boarding pass Adaptive Link request object with field- and passenger-level semantic tags**
```json
{
"payload": {
"flights": [
{
"flightExternalId": "SABINE1219-2025-09-05",
"passengers": [
{
"fields": {
"givenName": { "value": "Casey" },
"familyName": { "value": "Lee" },
"seatNumber": {
"value": "12A",
"semantics": {
"seat": {
"seatNumber": "12A",
"seatRow": "12",
"seatType": "window"
}
}
},
"sequenceNumber": {
"value": "007",
"semantics": { "frequentFlyerTier": "GOLD" }
}
},
"semantics": {
"passenger": {
"givenName": "Casey",
"familyName": "Lee",
"loyaltyProgram": "Sabine Rewards",
"loyaltyId": "SR123456"
}
}
}
]
}
]
}
}
```
## Live flight information exclusions
Apple Wallet uses semantic tags to identify the flight associated with a boarding pass and automatically subscribe to live flight updates. These updates power features like Apple's Flight Tracker and dynamically populate key details on the pass, including times, gates, terminals, and baggage information. When live flight data is available, Apple Wallet uses it as the authoritative source. If live data is not available for a given flight, values provided for semantic tags appear on the pass instead.
When you need to ensure passes always reflect your own data, override specific live flight fields by listing them in `liveDataConfiguration.excludedSemantics`. Any excluded semantics will display your provided values and will not be updated by Apple's live flight information. Semantics exclusion is supported for iOS 26.1 and later.
The `liveDataConfiguration` block is included inside the `semantics` block. The following semantic fields can be excluded from live flight information updates:
| Live flight information | Semantic fields |
| :--- | :--- |
| Departure/arrival times | `currentDepartureDate`, `currentArrivalDate` |
| Departure/arrival terminal | `departureTerminal`, `destinationTerminal` |
| Departure/arrival gate | `departureGate`, `destinationGate` |
| Arrival baggage claim | `arrivalBaggageClaim` |
**Example excluding departure gate and terminal from live data**
```json
{
"fields": {
"semantics": {
"departureGate": "16",
"departureTerminal": "7",
// ... other semantic tags
"liveDataConfiguration": {
"excludedSemantics": [
"departureGate",
"departureTerminal"
]
}
}
}
}
```
# Mobile Wallet Reference
> Design and usage reference for Airship Mobile Wallet passes.
## Supported Platforms
| Pass type | Apple Wallet | Google Wallet |
| --- | :---: | :---: |
| Member card1 | ✓ | |
| Gift card1 | ✓ | ✓ |
| Loyalty1 | ✓ | ✓ |
| Coupon2 | ✓ | ✓ |
| Event ticket | ✓ | ✓ |
| Boarding pass3 | ✓ | ✓ |
| Generic | ✓ | ✓ |
1. Member card, Gift card, and Loyalty passes for Apple Wallet are based on Apple's Store Card pass style.
2. Coupon passes for Google Wallet are based on Google's Offer pass style.
3. Also supports ferry, bus, and train tickets.
## Supported Countries and Regions
Feature support by country and region is determined by Apple and Google. All Airship supported wallet pass types, while not necessarily tied to payment transactions, are bound to the same regional restrictions that apply to the Apple and Google payment ("Pay") platforms. See:
* [Countries and regions that support Apple Pay](https://support.apple.com/en-us/HT207957)
* [Countries or regions where you can use Google Wallet](https://support.google.com/wallet/answer/12060037)
## Location and Date Triggers
**For use with:**
* **Dashboard:** [Adding a Relevant Location trigger](https://www.airship.com/docs/guides/wallet/user-guide/notifications/triggers/#add-a-relevant-location-trigger)
* **API:** [Setting locations array for an Adaptive Link](https://www.airship.com/docs/developer/rest-api/wallet/schemas/adaptive-links/#adaptivelinkrequest)
Location radius is the minimum required proximity to a defined location for Relevant Location text to appear. For date triggers, you can set a date window, which is the period before and after a defined date and time when Relevant Date text will appear.
Date triggers are supported for Apple Wallet only. The table below shows location support, location radius, and date support for each pass type:
| Pass type | Location support | Location radius | Date support |
| --- | --- | --- | --- |
| Member card | Apple | Small (100 m) | |
| Gift card | Apple, Google | Small (100 m for both platforms) | |
| Loyalty | Apple, Google | Small (100 m for both platforms) | |
| Coupon | Apple, Google | Small (100 m for both platforms) | |
| Event ticket1 | Apple, Google | Large (Google: 250 m, Apple: 1,000 m) | ✓ |
| Boarding pass2 | Apple, Google | Large (Google: 250 m, Apple: 1,000 m) | ✓ |
| Generic3 | Apple, Google | Small (100 m for both platforms) | ✓ |
1. For Apple Wallet Event tickets, Date can be used alone, but Location cannot be used without Date.
2. For Apple Wallet Boarding passes, you can specify a Date, a Location, or both.
3. For Apple Wallet Generic passes, Location can be used alone, but Date cannot be used without Location.
See also [Relevance Information Displays Passes on the Lock Screen](https://developer.apple.com/library/archive/documentation/UserExperience/Conceptual/PassKit_PG/Creating.html#//apple_ref/doc/uid/TP40012195-CH4-SW53), including Table 4-2, in the Apple Wallet Developer Guide, and [Nearby Notifications](https://developers.google.com/wallet/retail/loyalty-cards/use-cases/trigger-push-notifications#nearby-notifications) in the Google Wallet Developer Guide.
## Layouts
In addition to the layout information provided here, please also refer to Apple and Google developer documentation for the position of fields, images, and other design elements for each pass type.
* [Apple Wallet Developer Guide: Pass Design and Creation](https://developer.apple.com/library/archive/documentation/UserExperience/Conceptual/PassKit_PG/Creating.html#//apple_ref/doc/uid/TP40012195-CH4-SW1)
* [Google Wallet API for Passes: Generic](https://developers.google.com/wallet/generic/resources/template)
* [Google Wallet API for Passes: Gift cards](https://developers.google.com/pay/passes/guides/pass-verticals/pass-template?vertical=gift-cards#pass-vertical)
* [Google Wallet API for Passes: Loyalty](https://developers.google.com/pay/passes/guides/pass-verticals/pass-template?vertical=loyalty#pass-vertical)
* [Google Wallet API for Passes: Offer/Coupon](https://developers.google.com/pay/passes/guides/pass-verticals/pass-template?vertical=offers#pass-vertical)
* [Google Wallet API for Passes: Boarding passes](https://developers.google.com/pay/passes/guides/pass-verticals/pass-template?vertical=boarding-passes#pass-vertical)
* [Google Wallet API for Passes: Event tickets](https://developers.google.com/pay/passes/guides/pass-verticals/pass-template?vertical=event-tickets#pass-vertical)
### Fields
* Most passes can have up to three *header fields*, a single *primary field*, up to four *secondary fields* and up to four *auxiliary fields*.
* **Boarding passes** use two *primary fields* to show origination and destination. They also can have up to five *auxiliary fields*.
* **Coupons** and **Member Cards** combine *secondary* and *auxiliary fields* onto a single line, for up to four fields total.
* **Event Tickets** with a background image and **Generic** passes with a square bar code (QR code or Aztec) will not use *auxiliary fields*.
* Google Wallet **Loyalty passes** will display the content of the [MemberID/AccountID fields](https://developers.google.com/pay/passes/guides/pass-verticals/pass-template?vertical=loyalty#default-template) where the barcode should be if a barcode is missing. To avoid this you can leave the fields blank and check the [Hide this field if the label and value are blank](https://www.airship.com/docs/guides/wallet/user-guide/ui/template-editor/#advanced-options) option in the template.
* Google Wallet **Generic passes** have two required fields, `header` and `cardTitle`, and an optional `subheader` field.
* The number of fields on a pass also depends on the text in each field. If there is too much text in a field, some fields will not be displayed.
### Images
Pass type also determines the types of images that will appear on the pass. Event Ticket passes have two different layouts, determined by the type of images and/or barcode types that are selected.
| Pass Type | Fields |
| --- | --- |
| Loyalty | Icon1, Logo, Strip, Hero2 |
| Coupon | Icon1, Logo, Strip, Hero2 |
| Gift Card | Icon1, Logo, Strip, Hero2 |
| Member Card | Icon1, Logo, Thumbnail |
| Event Ticket (Layout 1) | Icon1, Logo, Background, Thumbnail |
| Event Ticket (Layout 2) | Icon1, Logo, Strip |
| Boarding Pass | Icon1, Logo, Strip, Hero2, Footer |
| Generic | Icon1, Logo, Thumbnail, Hero2 |
1. Icon images are available on iOS only.
2. Hero images are available on Android only.
#### Image Sizes {#reference-image-sizes}
For Apple Wallet, each image type should adhere to the specifications below.
| Image type | Width | Height | Maximum file size |
| --- | --- | --- | --- |
| Hero | 1032 px | 336 px | 200 KB |
| Thumbnail | 180 px | 180 px | 100 KB |
| Background | 360 px | 400 px | 250 KB |
| Icon | 58 px | 58 px | 50 KB |
| Logo | 660 px | 660 px | 150 KB |
| Strip | 624 px | 246 px | 450 KB |
| Footer | 572 px | 30 px | 50 KB |
Always send and install a [test pass](https://www.airship.com/docs/guides/wallet/user-guide/design-template/test-pass/), and verify the pass's appearance prior to distribution to end users.
Image file size limits are enforced when uploading [via the dashboard](https://www.airship.com/docs/guides/wallet/user-guide/ui/template-editor/#images) or the API.
### Schematics
The images below indicate where each field appears on the pass. In some cases, field placement is determined by the images selected.
| Pass type | Apple Wallet | Google Wallet |
| --- | --- | --- |
| Loyalty | 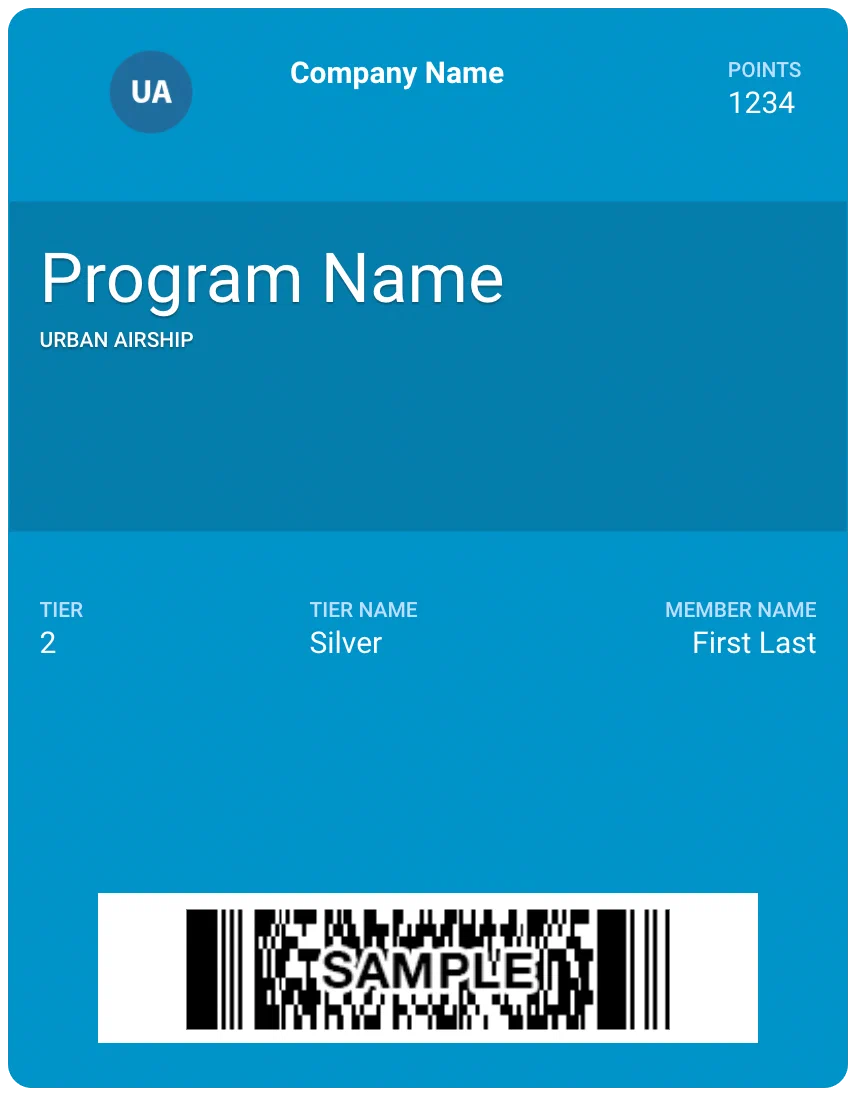 | 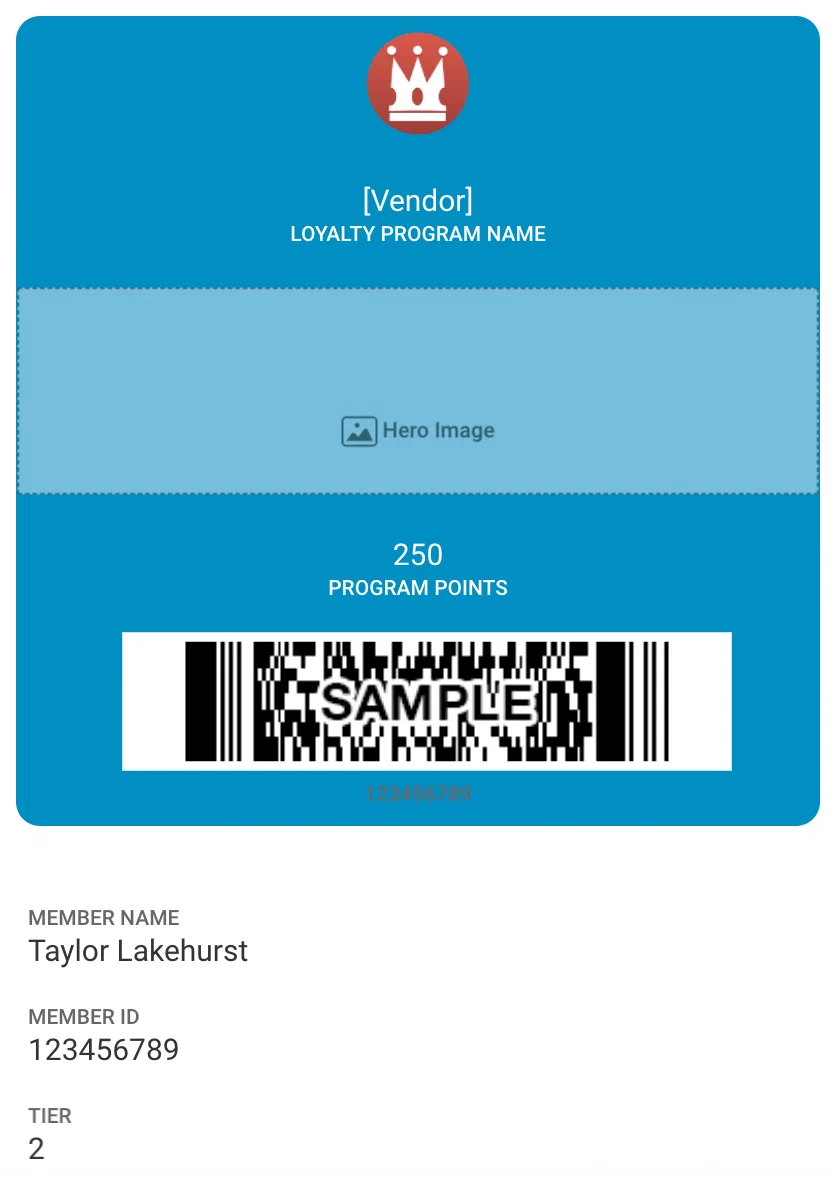 |
| Coupon | 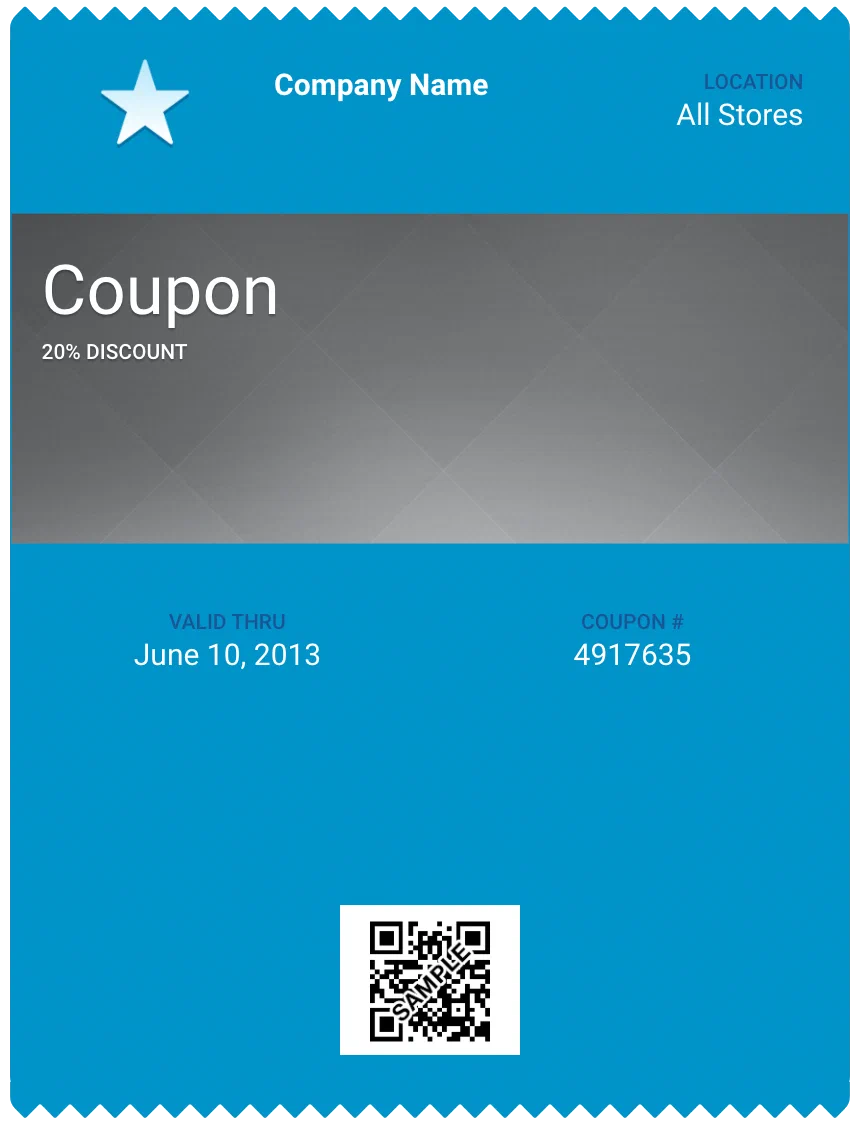 | 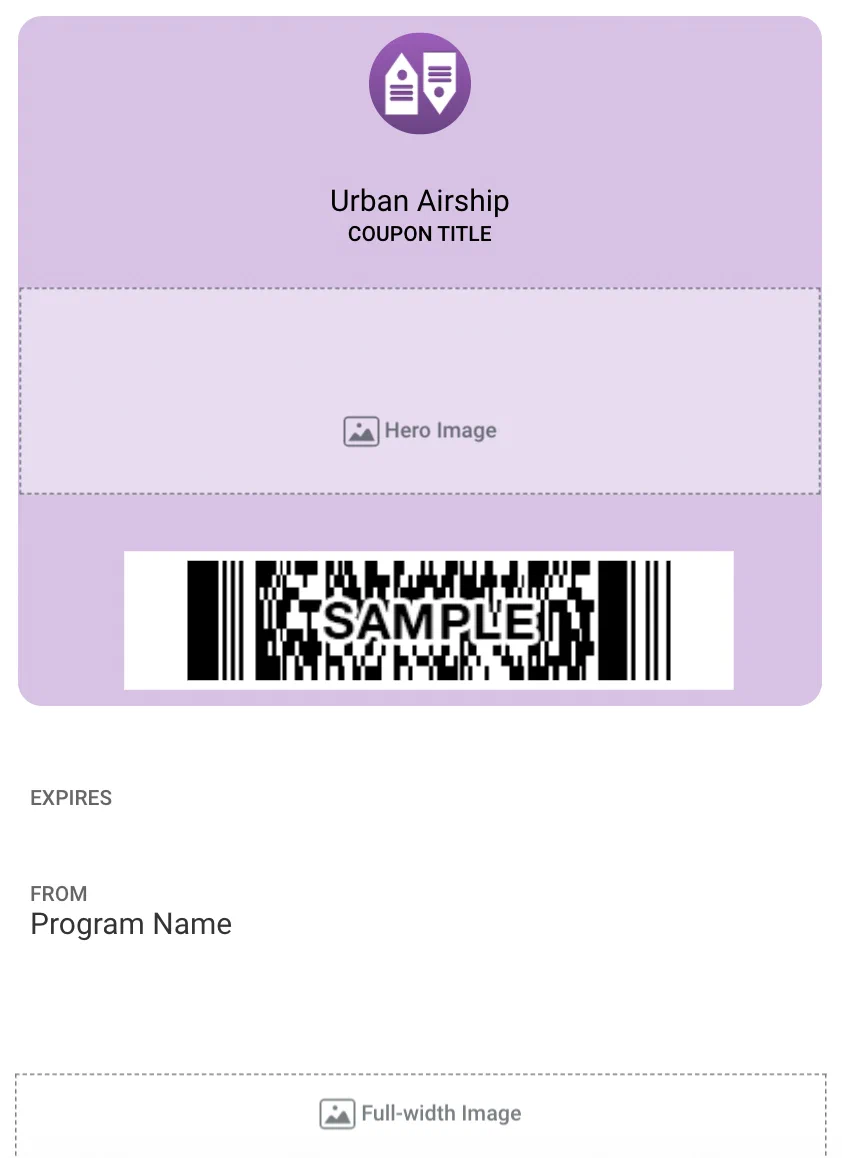 |
| Gift card | 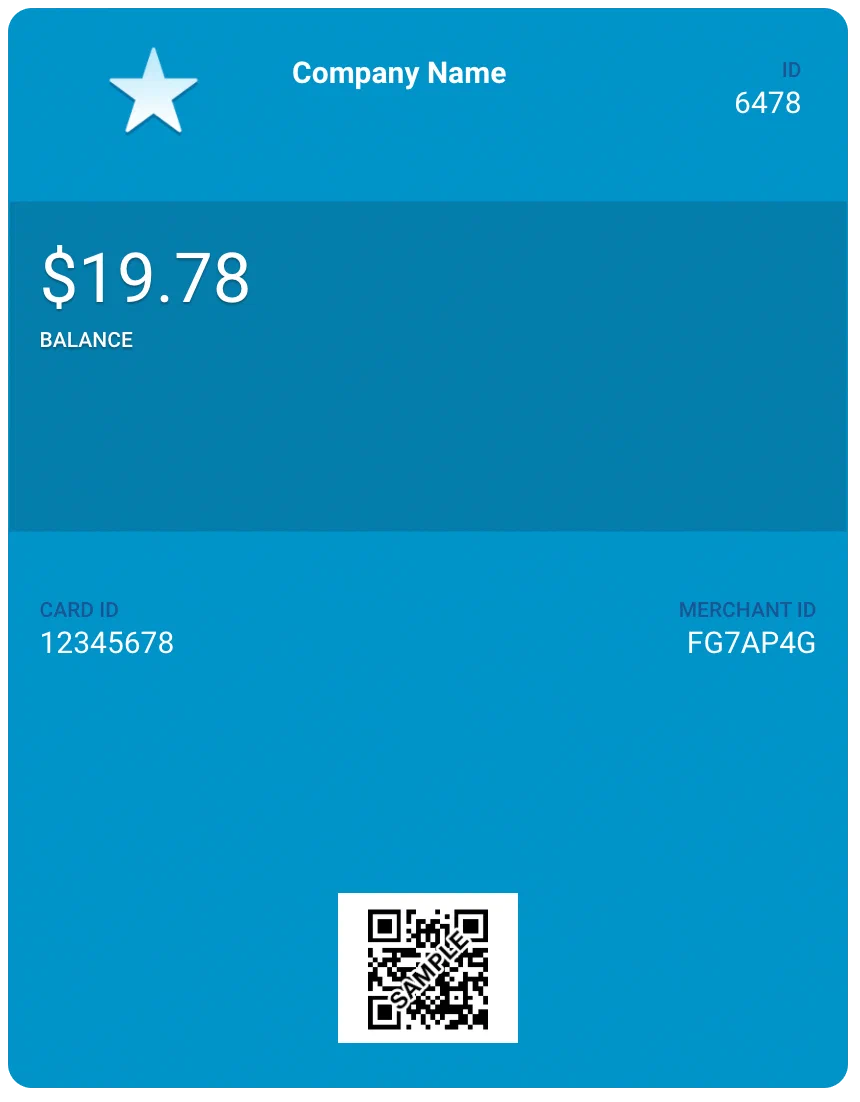 | 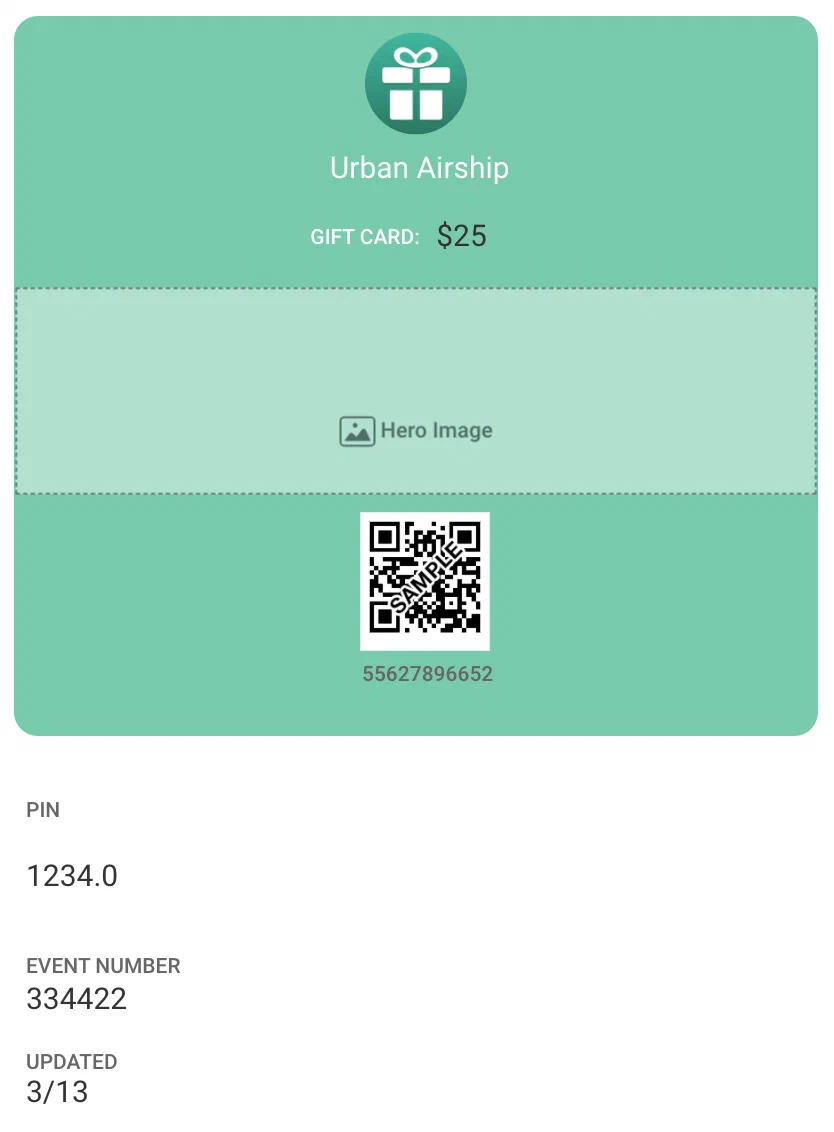 |
| Member card | 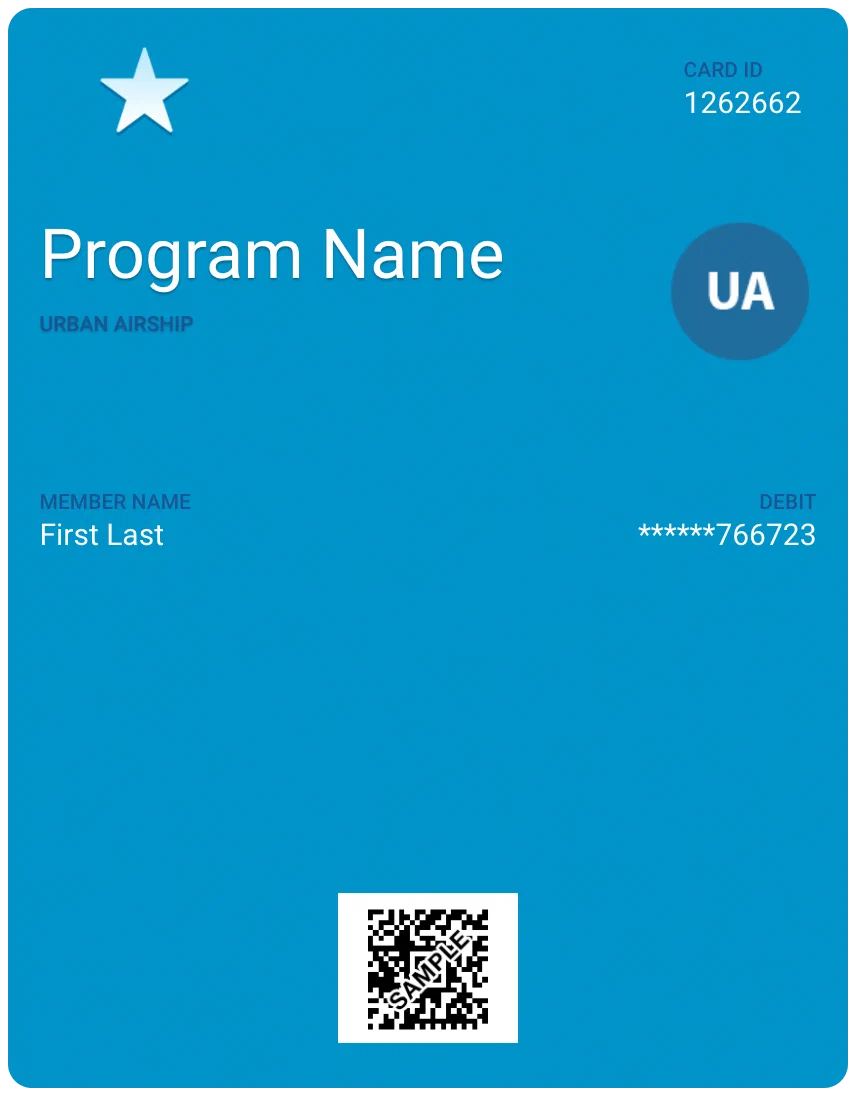 | |
| Event ticket (Layout 1) | 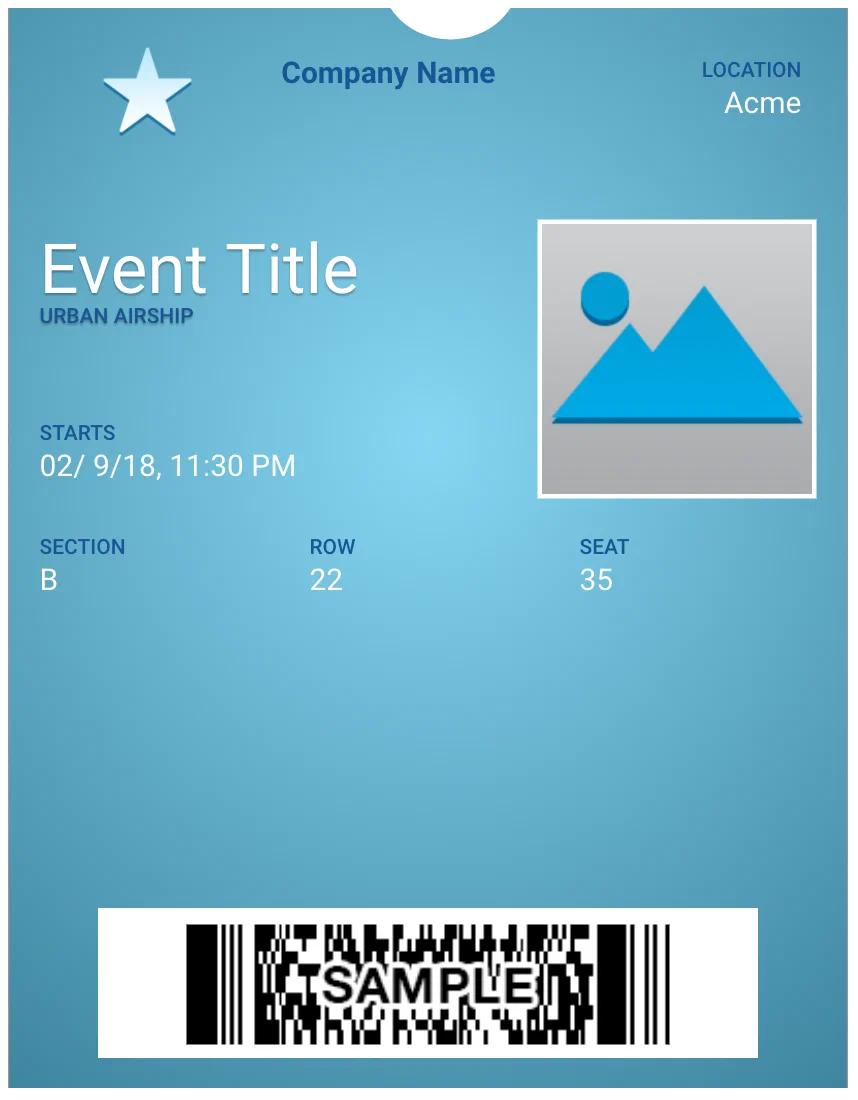 |  |
| Event ticket (Layout 2) | 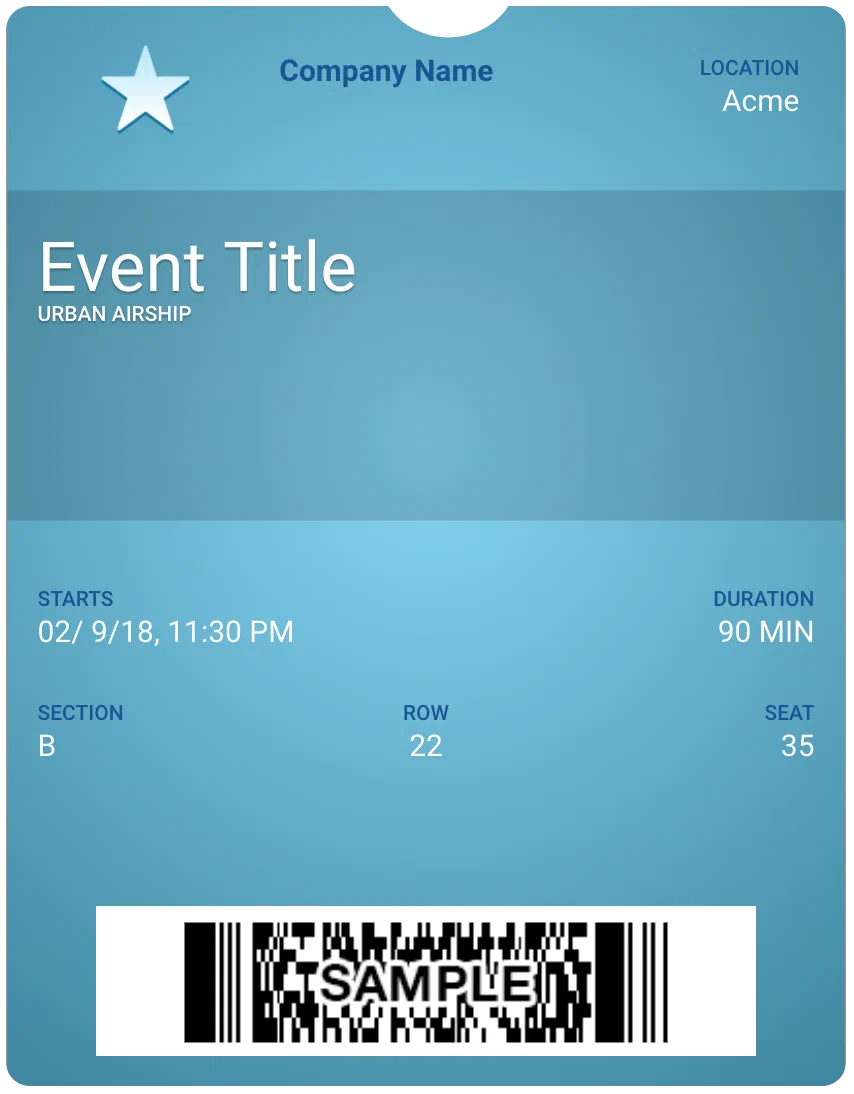 | |
| Boarding pass | 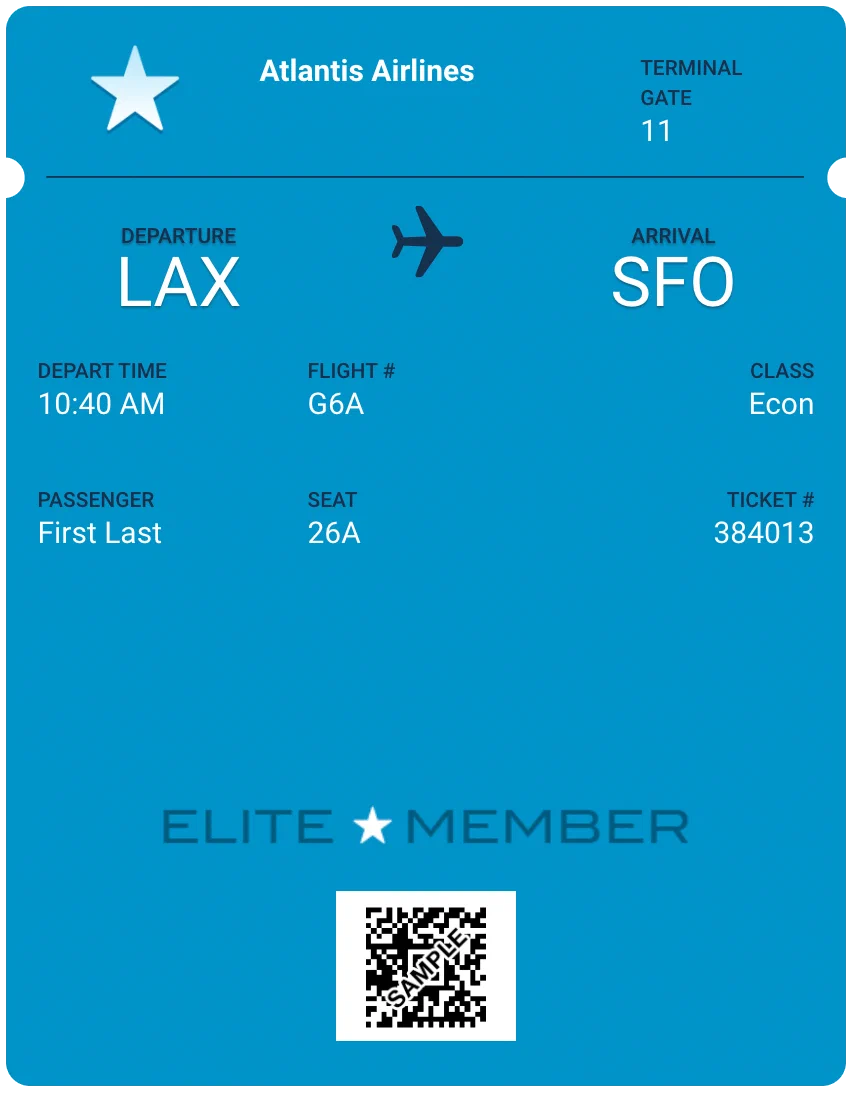 | 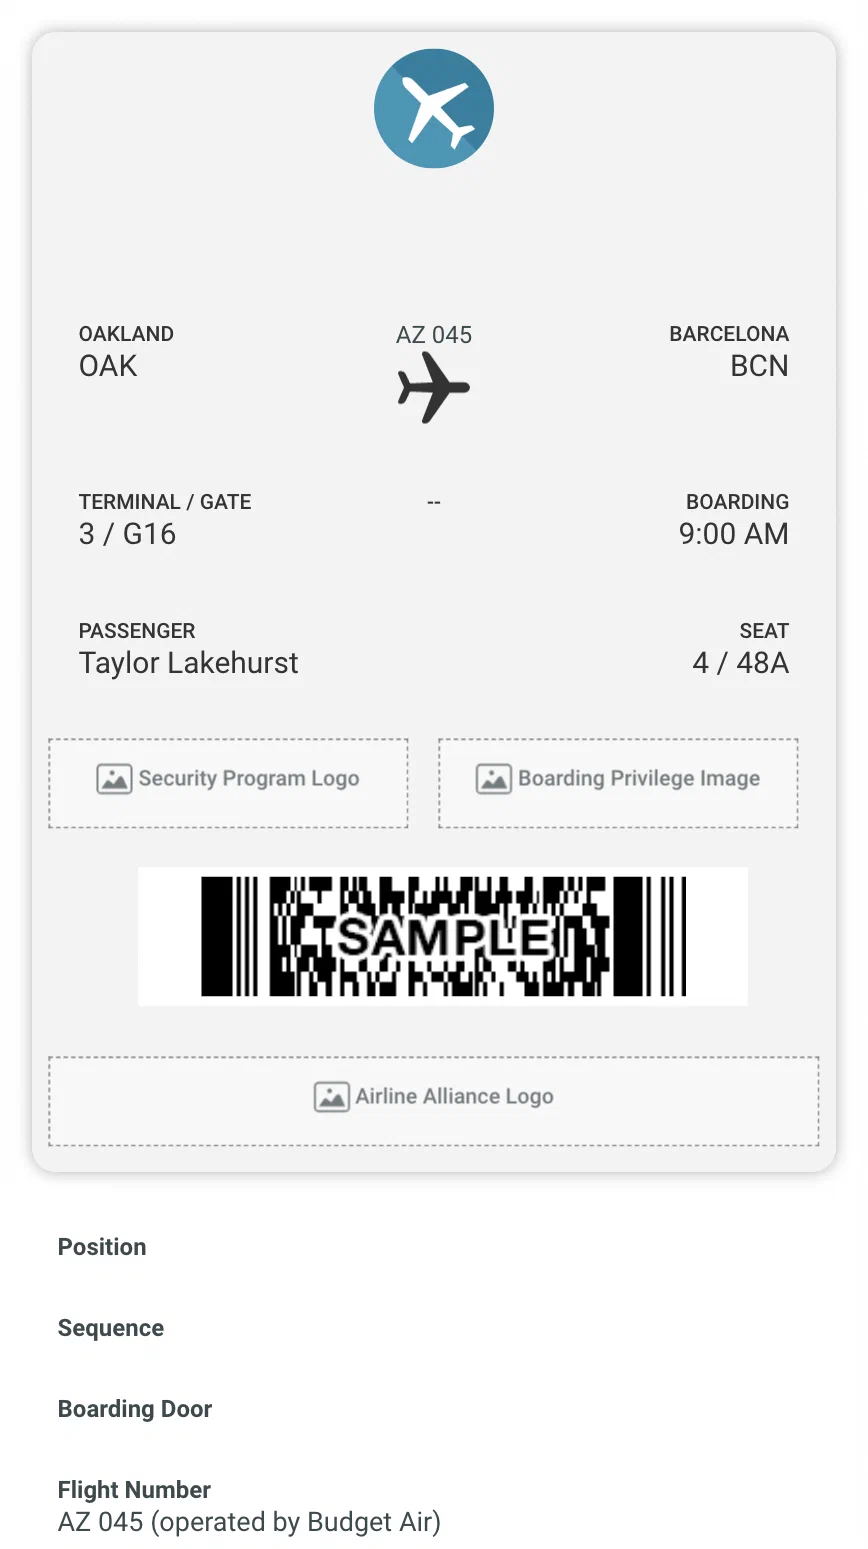 |
| Generic | 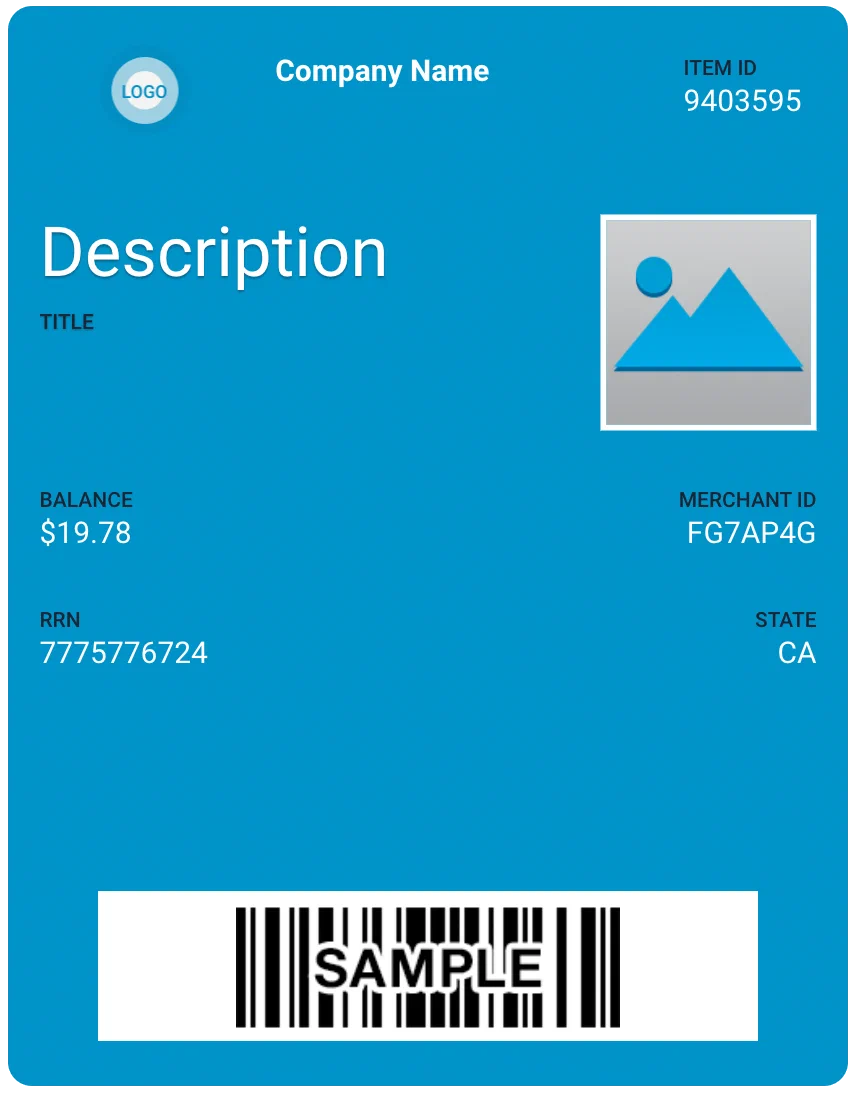 | 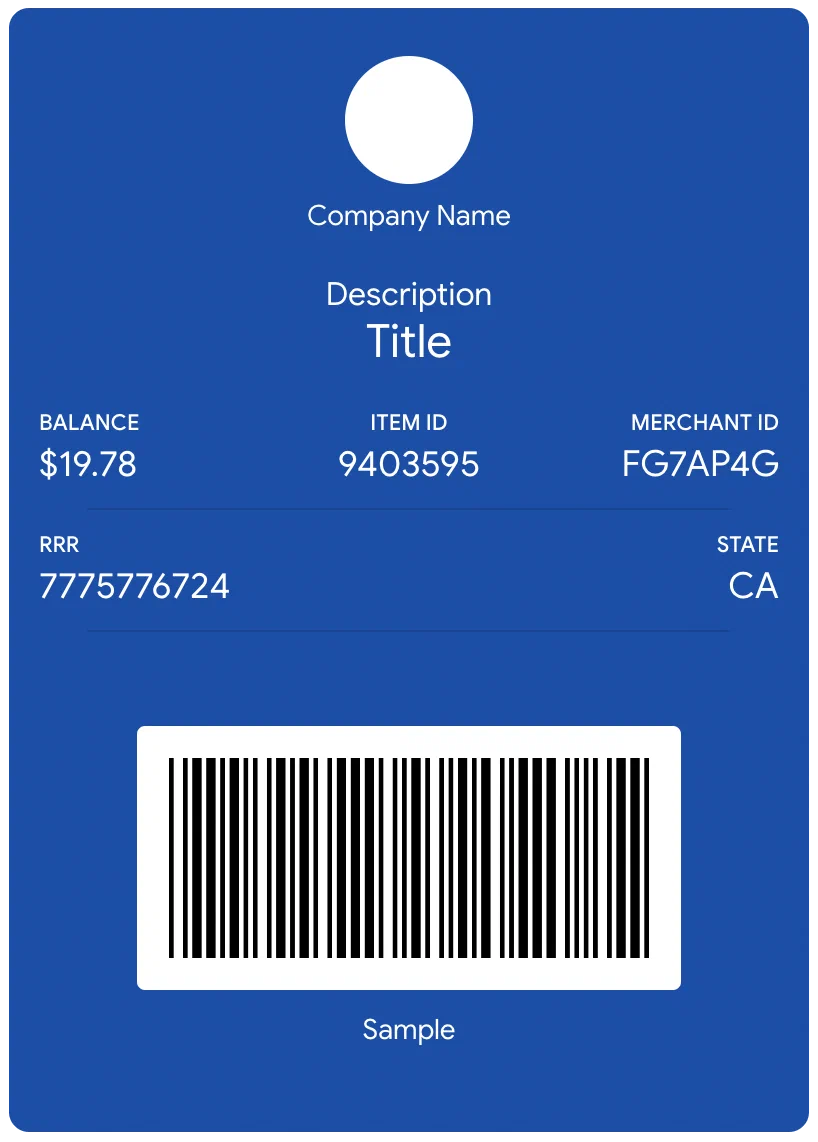 |
## Barcode Types {#ws-barcode-types}
| Type | Display | API associated strings | Apple Wallet | Google Wallet |
| --- | --- | --- | :---: | :---: |
| PDF417 |  | `"PKBarcodeFormatPDF417"` | ✓ | ✓ |
| Aztec |  | `"PKBarcodeFormatAztec"` | ✓| ✓ |
| QR |  | `"PKBarcodeFormatQR"` | ✓ | ✓ |
| Code 128 |  | `"PKBarcodeFormatCode128"` | ✓ | ✓ |
| UPC-A |  | `"UPC_A"` | | ✓ |
| EAN-13 |  | `"EAN_13"` | | ✓ |
| Code 39 |  | `"CODE_39"` | | ✓ |
## Sharing Policy {#sharing-policy}
By default, templates allow pass sharing across users and devices. You can change
the sharing policy for templates from the Templates menu for a mobile wallet project.
Apple Wallet and Google Wallet support slightly different sharing settings.
| Sharing policy |
Apple |
Google |
| Multiple users and devices (Default) |
✓ |
✓ |
| One user on multiple devices |
|
✓ |
| One user on one device |
✓ |
✓1 |
1. Intended for use in limited circumstances.
Contact Airship Support for additional information.
## Apple vs Google URL Differences
From the user’s perspective, the pass installation experience is similar on either iOS
or Android — the pass is ultimately downloaded directly to either the Apple Wallet or
Google Wallet app. However, there are differences between the pass URLs:
-
Apple Wallet: Pass URLs generated from Apple Wallet templates point to
a stored .pkpass file. A .pkpass file can be considered similar to a PDF or
any other document that you might link to.
-
Google Wallet: Pass URLs generated from Google Wallet templates provide a
deep link from Google into the Google Wallet app so that the pass can be
downloaded directly without requiring a browser window to facilitate the
request.
For additional detail about the publicUrl object and pass deep linking, see:
API: Passes.
## Single- vs Multi-Use Public URL {#single-vs-multi-use-public-url}
When generating a pass via the
API, you can
create a publicly accessible URL for the pass, hosted at
https://wallet-api.urbanairship.com. The Public URL can be either a single
or multiple (multi-use) pass type, referring to the number of times the pass
can be be downloaded.
-
Use the Single option if you are creating a unique pass. A Single Public
URL can only be downloaded once, but the user can share the pass from the
Apple Wallet directly.
-
Use the Multiple option if the pass is non-unique and can be downloaded
by multiple devices and shared many times.
> **Important:** A public URL is required for Android and optional for iOS.
> **Note:** The URLs returned by the [CSV Batch Importer](https://www.airship.com/docs/guides/wallet/user-guide/create-links/csv-batch-import/)
> are multi-use passes — they can be downloaded by multiple devices.
## Adaptive Link Expiration
Adaptive Links automatically expire after a period that begins upon creation and ends after a duration determined by its associated pass type:
- Boarding pass: 30 days
- Event ticket: 30 days
- Coupon: 365 days
- Generic: 730 days
- Gift card: 730 days
- Loyalty: 730 days
- Member card: 730 days
For additional details, including setting custom expiration dates, see [Expiration](https://www.airship.com/docs/guides/wallet/user-guide/create-links/adaptive-links/#expiration) in *About Adaptive Links*.
## Troubleshooting Apple Wallet Passes
In rare instances, some passes created in Airship Wallet projects will not load in Apple Wallet. Here are some probable causes:
1. We've found inconsistent support of PNG image bit-depths by Apple Wallet
and OS X PassViewer. 8-bit .png images are not currently supported by
Apple Wallet. We recommend that you re-create your PNG at 24-bits (in
Photoshop use *Save for Web*, and choose PNG-24), then re-upload your
image in Airship Wallet.
1. Corrupt graphics will sometimes cause an image to not appear on the
pass. Regenerate your graphics using your favorite graphics editor
(you can use Apple’s Preview.app if you prefer) as 24-bit PNGs and
re-upload them to your Airship Wallet project.
### Pass Design Elements
Pass appearance is dependent on the template design, but all passes have the same primary elements:
* Background color
* Images
* Data fields
* Barcode (optional)
For Apple Wallet passes, you can also set:
* Text color
* Icon image: This is displayed on the lock screen along with any
notifications. It is also displayed when a pass is provided by an app, e.g.,
a mail attachment.
* Data fields on the back of the pass
See [Layouts](#layouts) for more information. These are iOS examples of a boarding pass, a coupon, and a loyalty card.
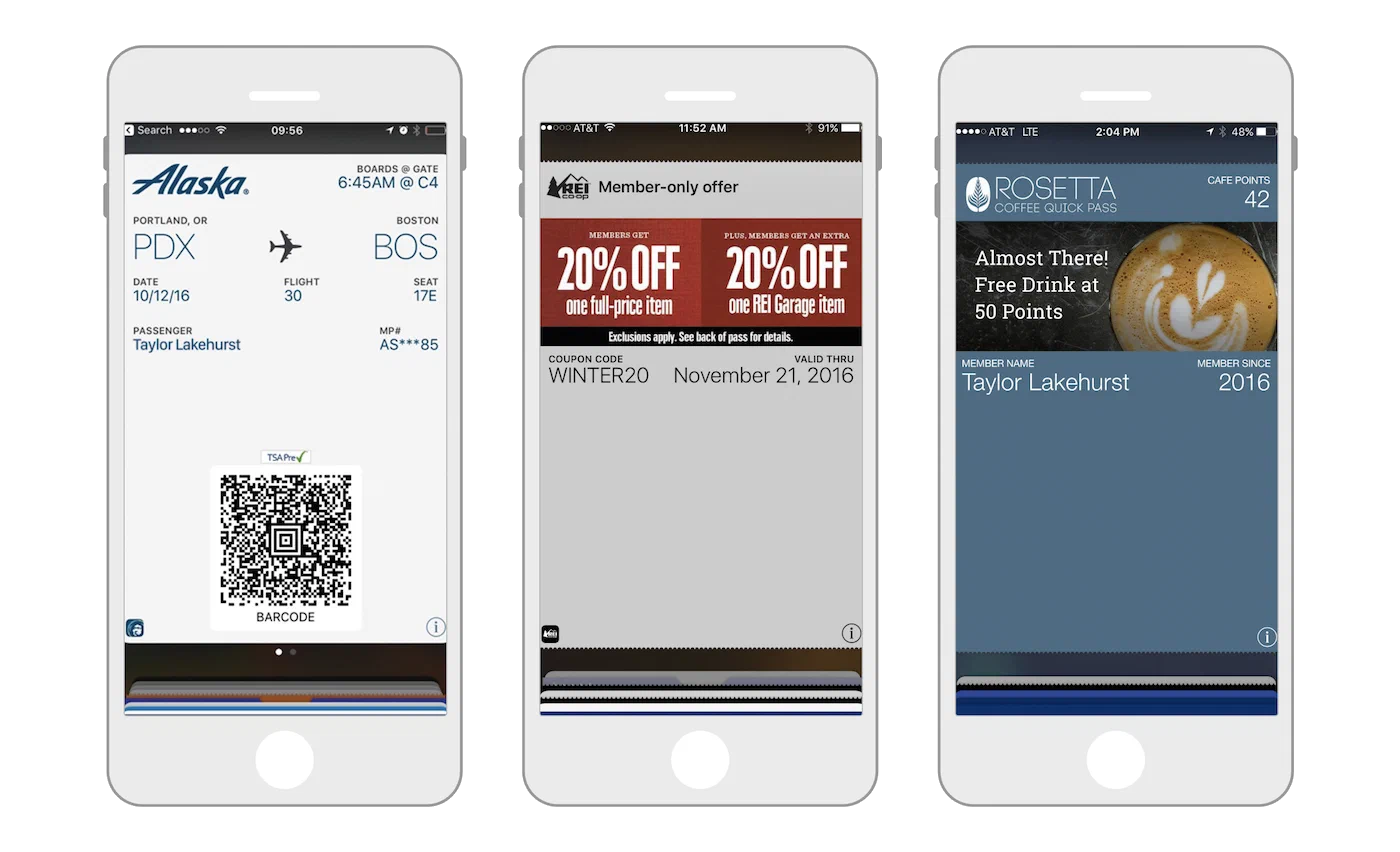
*Examples of a boarding pass, coupon, and loyalty card on iOS*
### Learning the UI
Get to know the Airship Wallet web interface.
# The Airship dashboard
> {{< glossary_definition "dashboard" >}}
The dashboard is where you create and access projects, containers for the settings, certificates, reports, and other details related to your messages and mobile wallet passes.
The dashboard has two levels:
- A list of all your messaging and mobile wallet projects.
- An individual project after opening it from the list of all projects.
Almost everything you do with Airship happens inside a project, including creating messages and wallet pass templates.
Viewing and finding your projects
At the top level of the dashboard, tiles display each messaging and mobile wallet project. Messaging projects list their name, environment, and channels. Mobile wallet projects list their name and pass type.
*The top-level dashboard in Airship*
If you have more than eight projects, up to four of your most recently accessed projects appear under Recent. Recent projects are not shown when sort, filter, or search are applied.
The default view is sorted by creation date, newest projects first. Select Name or Date Created to sort. Select again to toggle ascending/descending order. You can search for projects by complete or partial name.
Use filters to toggle views:
| Filter |
Description |
| Owner/Team |
Toggle between projects you own and projects you have non-owner access to. See Managing project access in Manage Messaging teams and access. All mobile wallet projects appear for Owner. |
| Live/Test |
Toggle between projects by environment type. All mobile wallet projects appear for Live. |
| Channel |
Select a channel configured for your account: Mobile apps, Web, SMS, Email, and Mobile wallet. After selecting Mobile apps you can filter again by platform. After selecting Mobile wallet you can further filter by pass type and company. |
## Navigating individual projects
From the top-level dashboard, select a tile to open a project. The header shows the project name and the pass type name and icon. To switch between your six most recent projects, select the down arrow (▼) next to the project name, then select from the list. A link to return to the top-level dashboard is at the bottom of the list. You can also select the Airship logo in the header to return to the top-level dashboard.
*A mobile wallet project dashboard*
Mobile wallet project menus:
| Menu | Description |
| --- | --- |
| **Templates** | The basis of the graphic interface of the mobile wallet template editor, and they control the layout of fields |
| **Reports** | Analysis of each template |
| **Triggers** | Display content based on location or date |
| **Segments** | Update passes based on user tags |
| **Settings** | Manage the project's details, barcode, certificates, and Associated App IDs, and access its API key and secret |
Counts are provided for the following:
| Count | Description |
| --- | --- |
| **Passes Created** | The pass has been created but has not yet been added or deleted. Apple Wallet passes only. |
| **Passes Installed** | The pass has been installed by the end user and has not been removed or deleted. |
| **Passes Removed** | The pass has been removed by the end user and not deleted. Deleted passes are removed from the mobile wallet platform but remain on the end user's device. Only end users can remove the pass. If a pass has been deleted, you will not have the ability to send any updates to the pass. |
Pass counts reflect the current count of passes rather than net pass activity. For example, if a user adds a pass, then removes the same pass, then adds the pass again, the Passes Installed count increases by one, while the Passes Removed count stays constant.
The Passes Installed count may exceed the Passes Created count due to families operating a shared iCloud account or individuals backing up their phones and/or upgrading their phones. The same pass can be copied across multiple devices, each counting as a separate installation. The most common case is transferring data from an old iPhone to a new one. Wallet passes will automatically be added to the new iPhone after the data transfer, resulting in a copy of the pass on both the new and old phones. When the old phone is discarded (turned off), no events from Apple will remove or delete the pass from the inactive old phone, thus Airship will keep old devices' passes in the installed state.
**Templates Summary** lists each template in the project and its ID, platform, and pass counts. Select the edit icon (
) to [edit the template design](https://www.airship.com/docs/guides/wallet/user-guide/design-template/template-design/#editing-template-designs). Select the duplicate icon (
) to [duplicate the template](https://www.airship.com/docs/guides/wallet/user-guide/design-template/manage/#duplicate-a-wallet-template). Select a template name or the report icon (
) to open its [Template Report](https://www.airship.com/docs/guides/wallet/user-guide/reporting/template-reports/).
# The Template Editor
> The Wallet Template Editor is the web tool used to configure a pass's appearance and fields.
If you just [created a new template](https://www.airship.com/docs/guides/wallet/getting-started/project-template/#create-a-template) and clicked **Start Building**, your screen will be open to the template editor.
To edit an existing template:
1. Go to *Templates*.
1. Click anywhere in a template's row to see its expanded view, then click
**Edit Design**. If you have only one template in the project, the
initial view is expanded.
*Template list with pass preview*
## Header {#editor-header}
As you design a template, information and options are displayed in the header.

*The template editor header*
At left are the template name and ID, along with its pass type name and icon.
At right are three buttons:
* **Exit** returns you to the project dashboard *without saving anything*.
Make sure to first click **Save** before exiting.
* **Test Pass** lets you email the pass to yourself so you can preview it on
a mobile device. Follow the steps in
[Send a Test Pass](https://www.airship.com/docs/guides/wallet/user-guide/design-template/test-pass/).
* **Save** saves any changes you have made to the template.
## Layout
The pass preview is on the left side of the page.
[General Settings](#general-settings)
and field configuration are on the right. As you design the pass, the changes
are reflected in the preview. See also:
[Mobile Wallet Reference: Layout: Schematics](https://www.airship.com/docs/guides/wallet/user-guide/reference/#schematics).
*Pass layout overview in the template editor*
## General Settings
*General Settings* are properties that apply to the entire template rather than
to a single field. Available properties vary per pass type. Return to these
settings at any time by clicking the paint brush icon in the upper right corner
of the pass preview.
### Background and Text Colors
**Apple Wallet:** Set *Background and Text Colors*.

*Setting background and text colors for Apple Wallet*
> **Note:** When using Event Type templates with iOS, foreground color behavior varies
> depending on background and strip images:
>
> * When a background or strip image **is not** included in the pass, field
> label and value colors **are** applied.
>
> * When a background or strip image **is** included in the pass, the field
> value color is automatically set to white unless the image is white, in
> which case the value is set to black.
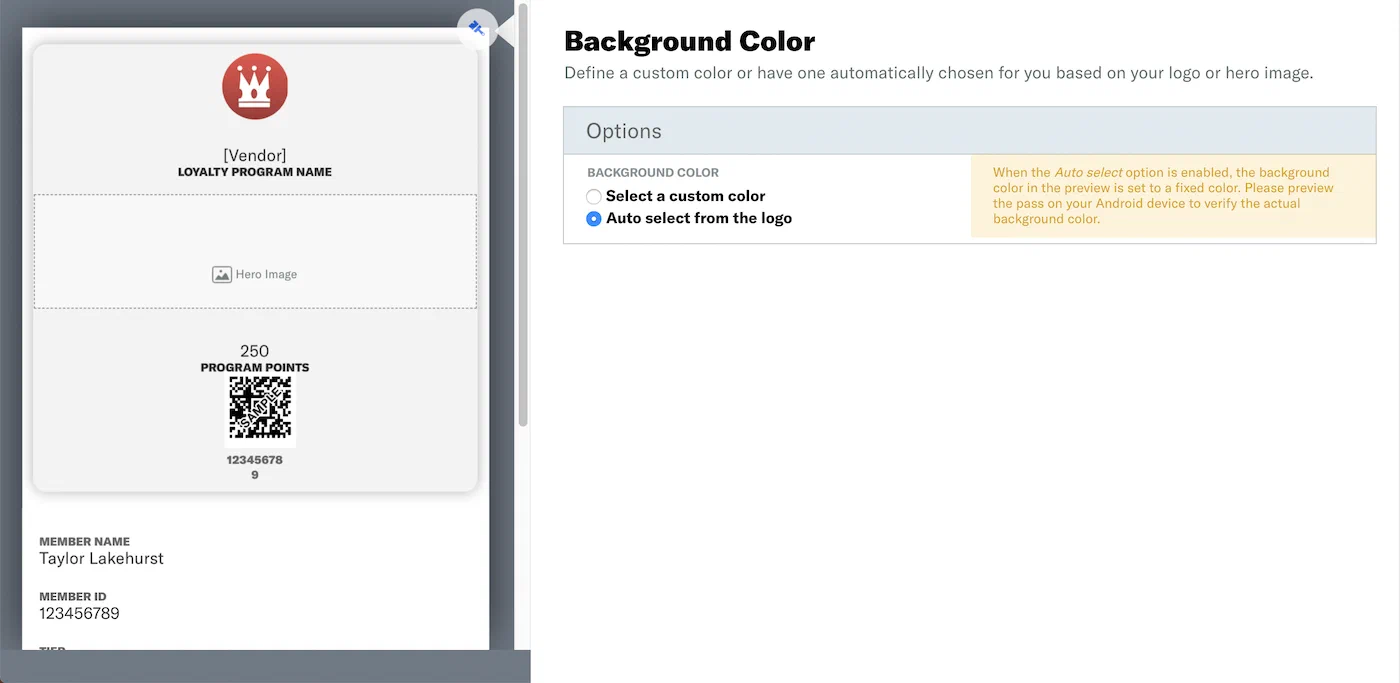
**Google Wallet:** Choose a *Background Color* manually or via auto select.
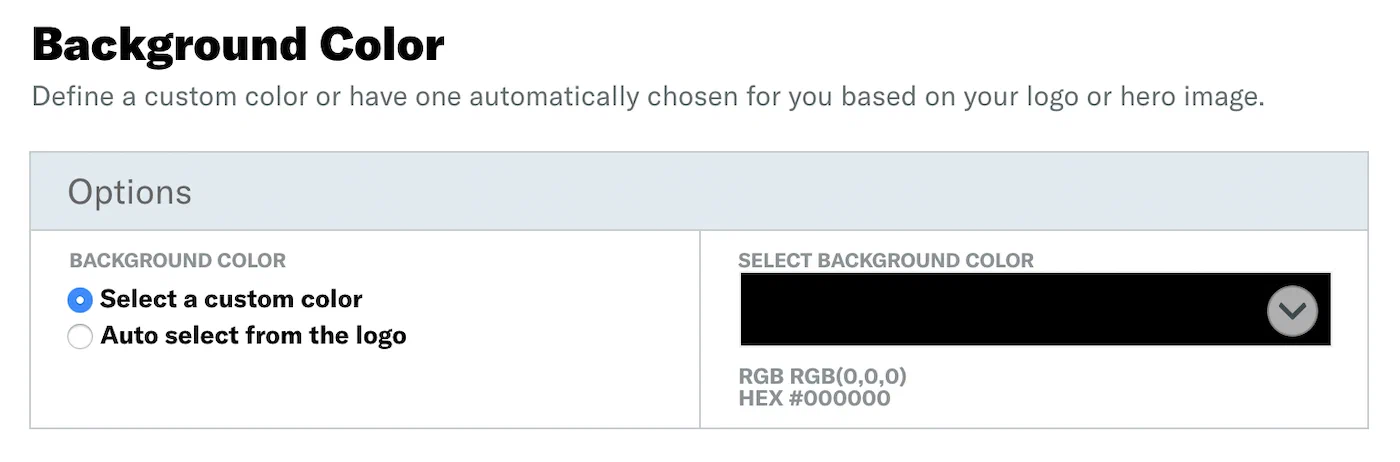
*Choosing a background color for Google Wallet*
When the *Auto select* option is enabled, the background color will be set
to the prominent color from images you've included in the templates,
however the color will not be displayed in the preview. Please preview
the pass on your Android device to verify the actual background color.
### Color Selection
Selecting a color is the same for both Apple and Google templates. Click
▼ in the color field to display the color options. You may click
to select a color, or enter hexadecimal or RGB color values.
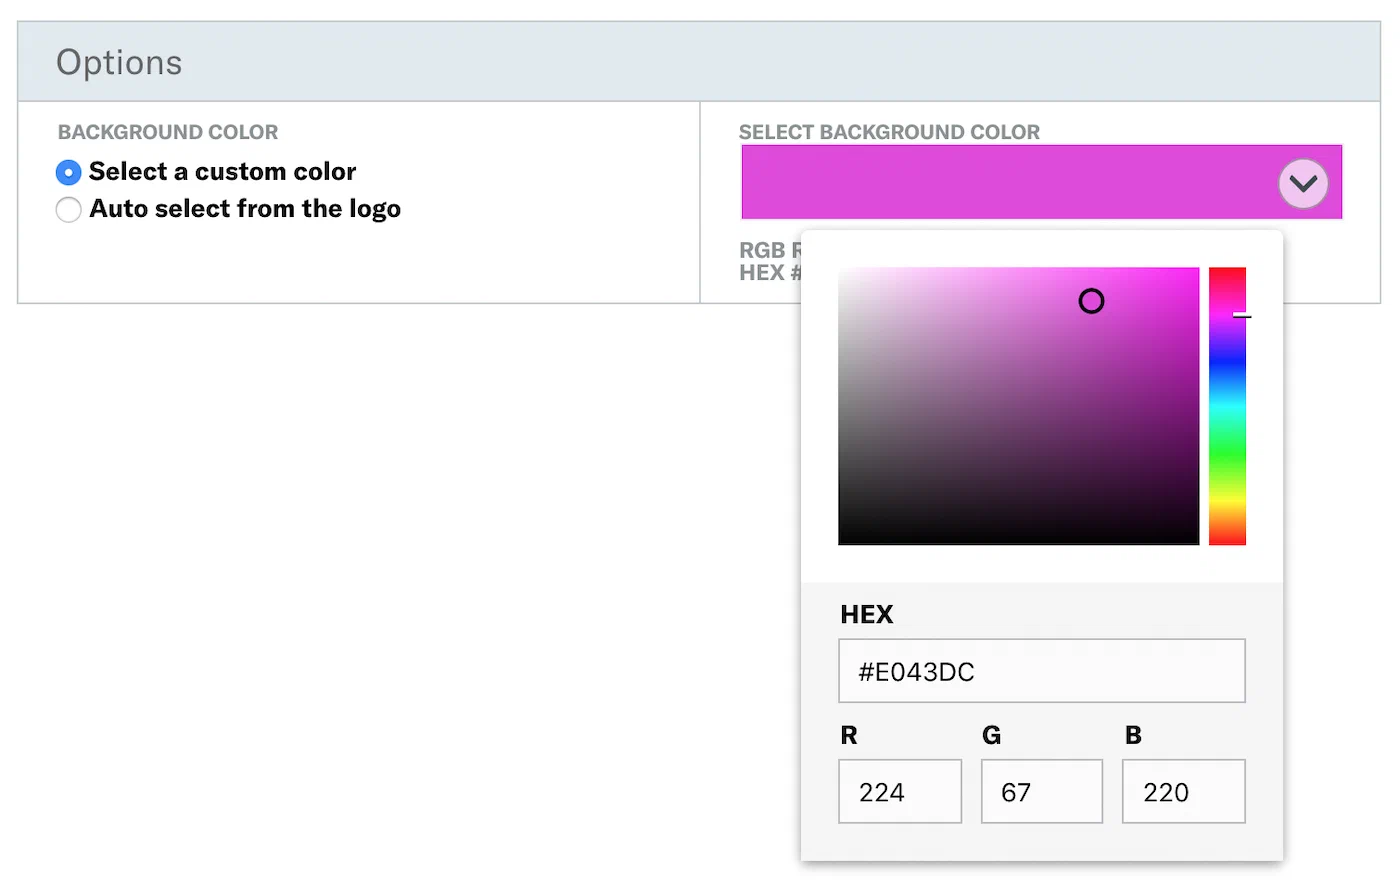
*Selecting a color using the color picker*
### Icon Image
Apple passes have an *Icon image* that is displayed on the lock screen along
with any notifications. It is also displayed when a pass is provided by an app,
e.g., a mail attachment.
Click the image icon pane and a modal window will open, specifying
requirements and options. For requirements per image type, see:
[Mobile Wallet Reference: Layouts: Images](https://www.airship.com/docs/guides/wallet/user-guide/reference/#images).
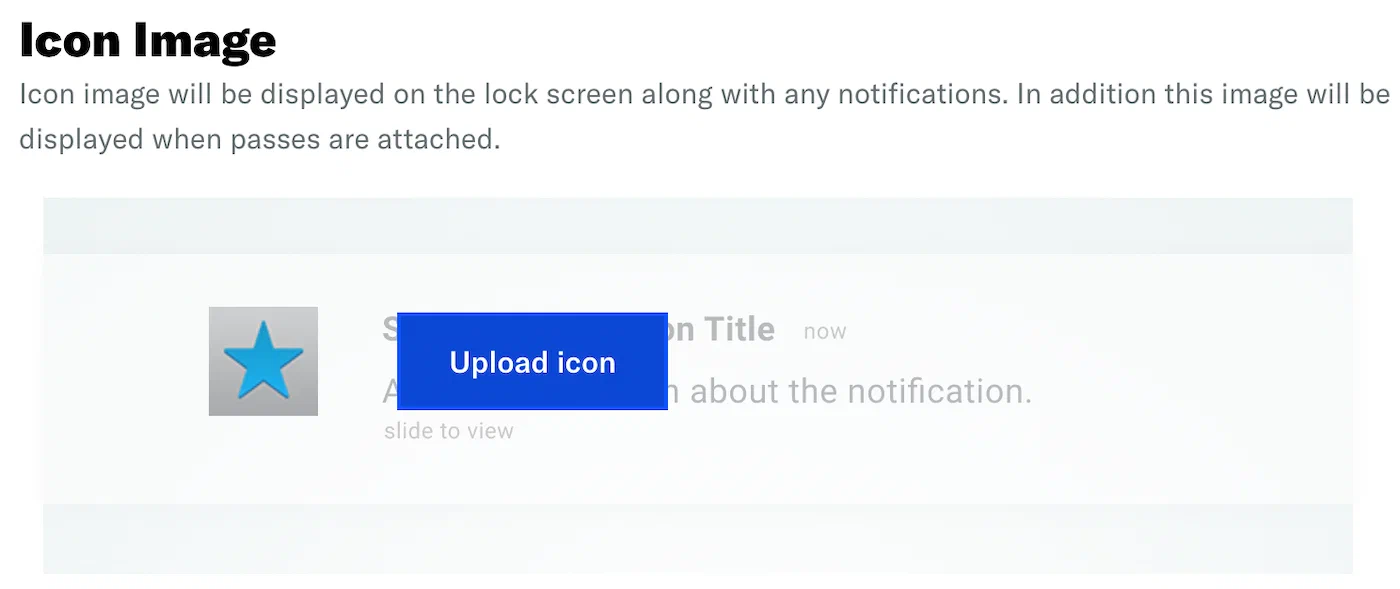
*Configuring the icon image*
## Images
Click in the preview to select an image. A modal window will open, specifying
requirements and options. For requirements per image type, see:
[Mobile Wallet Reference: Layouts: Images](https://www.airship.com/docs/guides/wallet/user-guide/reference/#images).
*Adding images to a pass template*
## Fields
Fields are the placeholders for the key pieces of relevant information for each
pass. Pass type determines the number of fields that appear on the front of a pass.
The number of fields on a pass also depends on the text in each field. If there
is too much text in a field, some fields will not be displayed. See:
[Mobile Wallet Reference: Layouts: Fields](https://www.airship.com/docs/guides/wallet/user-guide/reference/#fields).
Click in the preview to select a field and its configuration pane will
display on the right side of the screen. The field type is listed in the header.
*Editing a pass field in the template editor*
Hover over the field to expose action icons in the header:
* ▼ or ▲ = Click to move the field to a new position in the layout. You can also change a field's position via the preview. See: [Fields: Position](#position).
* ◀ or ▶ = In Google Generic Passes and Boarding Passes, click to move the field to a new position in the layout.
To move a field to another row, first remove it, then select **+ Add another field** in another row, and search for and select the field ID in the search bar.
* × = Remove field from layout.
> **Important:** If you edit a field ID, make sure to update any API calls referring to the field.
> **Important:**
> Google Wallet *Class* fields are edited inline in the preview. Clicking on a class field
> will not expose a configuration pane. See
> [Google Class Fields](#class-fields)
> below.
> **Note:** When displayed on an end user's device, text fields on an Google Wallet pass
> will be truncated to the first four lines. The user must click on the field
> to display the full string. When editing templates, the preview will always
> display the full text.
### Field Sets
Different pass types have different field sets depending on the purpose,
e.g., a *Loyalty* pass might have a Point Balance field but not a Gate
Number field like a *Boarding Pass* pass would. See:
[Mobile Wallet Reference: Layouts: Fields](https://www.airship.com/docs/guides/wallet/user-guide/reference/#fields)
Google Boarding Pass field sets can display the contents of two fields in a single location, separated by a slash, e.g., `Content 1 / Content 2`.
Click **+ Add another field** to add a secondary field.
### Advanced Options
Click *Advanced Options* at the bottom of a field's configuration pane to
show/hide additional options. Check the box to enable.

*Advanced field options*
* **Hide this field if the label and value are blank:** This will retain the
space dedicated for the field. In order to remove the space allocation, you
must remove the field from the layout.
* **Notify the user when this value changes:** Each field object on an
Apple Wallet pass can include an optional *change message* value. A change
message is the text that appears in an alert that is displayed when a pass
field's value is changed. **Apple Wallet only.**
> **Important:** The change message must include the escape value `%@`, which is replaced when
> the field's value is changed. See
> [Pass Update Notifications](https://www.airship.com/docs/guides/wallet/user-guide/notifications/pass-updates/)
> for details.
> **Note:** * If you don't specify a change message, the pass holder isn't notified when
> the field value changes.
>
> * Setting a change message will not trigger sending a notification — the
> notification is triggered when you change the field value.
>
> * When multiple fields with change messages are updated at the same time, we
> cannot control the processing order. That is handled by Apple.
### Adding Fields
Field placement behaviors and options vary. Be sure to verify the design on a
mobile device.
* Some field placements allow up to four fields in a single row.
* Some field placements allow multiple full-width fields in a pass.
* Adding more fields than can be displayed across the device's screen will
introduce scrolling within each placement.
### Position
When you hover over a field in the preview, its boundary will highlight. If the field can be
moved, arrows will appear at the edge of the field's boundaries, depending on
its current placement. Click an arrow to move the field in that direction.
*Moving a field to a different position*
### Apple Back of Pass {#back-of-pass}
Apple Wallet passes include fields on the back of the pass. Click **See back of the pass** to access the fields.

*Editing back-of-pass fields for Apple Wallet*
Use HTML to create clickable links. Example formats:
* **URL** — `www.airship.com`
* **Phone** — `800-720-2098`
* **Email** — `support@airship.com`
* **SMS** — `Text us`
### Google Class Fields {#class-fields}
Google Wallet passes will automatically update with any changes made to *class*
fields. How it works:
* If a class value `class.*` is changed, all passes will be changed.
* On [Update Pass](https://www.airship.com/docs/developer/rest-api/wallet/operations/passes/#updatepass), only that
pass is updated. Class values are not sent with the update object when
updating passes, so there is no effect on other passes.
Any field preceded by `class` constitutes a class field. For a full list of
class fields, please visit the
[Google Wallet documentation](https://developers.google.com/pay/save/guides/loyalty/design).
### Designing and managing templates
Design and manage Wallet pass templates.
# Design a template
> Configure a template's appearance and fields.
After you [create a new template](https://www.airship.com/docs/guides/wallet/getting-started/project-template/), you are prompted to start building the template design. Also follow these steps when editing an existing template.
> **Note:** The sample images on this page are for Google Wallet templates. Please refer to each step's linked documentation for full detail for both Apple Wallet and Google Wallet template options.
If you just created a new template
and clicked **Start Building**, your screen will be open to the
template editor. If not, first open an existing template: Go to *Templates*, click anywhere in a template's row to see its expanded view, then click **Edit Design**.
Now you can design your template:
1. Configure the **general settings** that apply to the entire template rather than
to a single field. Available properties vary per pass type. Return to these settings at any time by clicking the paintbrush icon in the upper right corner of the pass preview. [Read more about general settings.](https://www.airship.com/docs/guides/wallet/user-guide/ui/template-editor/#general-settings)

*Configuring general settings in the template editor*
1. Add **images**. Click in the preview to select each image. A modal window will open, specifying requirements and options. [Read more about images.](https://www.airship.com/docs/guides/wallet/user-guide/ui/template-editor/#images)

*Adding images to a pass template*
1. Edit the content and placement of the pass **fields**. Click in the preview to
select a field and its configuration pane will display on the right side of the screen. You can edit the field ID, delete the field, change the position of the field on the pass, or remove the field from the layout. [Read more about pass fields.](https://www.airship.com/docs/guides/wallet/user-guide/ui/template-editor/#fields)

*Editing a pass field in the template editor*
> **Important:** Google Wallet *Class* fields are edited inline in the preview. Clicking on a class field
> will not expose a configuration pane. See:
> [Template Editor Overview: Google Class Fields](https://www.airship.com/docs/guides/wallet/user-guide/ui/template-editor/#class-fields).
1. Click **Save** at any point in the design process.
Now that you have a saved template, you are ready for the next steps:
* **Send the pass to yourself** so you can preview it on a mobile device. See:
[Send a Test Pass](https://www.airship.com/docs/guides/wallet/user-guide/design-template/test-pass/).
* **Generate pass links** based on your template. See: [About Adaptive Links](https://www.airship.com/docs/guides/wallet/user-guide/create-links/adaptive-links/).
* **Set the sharing policy** for your passes. See: [Set the sharing policy for a Wallet pass ](https://www.airship.com/docs/guides/wallet/user-guide/design-template/manage/#set-the-sharing-policy-for-a-wallet-pass) in *Manage Wallet templates*.
## Editing Template Designs
When you modify the design of a template, any new passes created from the template use the new and updated design, but you only affect currently installed passes if:
* You add or remove a field on the pass. Airship automatically pushes the template update to installed passes to ensure that all passes contain the same fields as the template.
* You [publish your template changes](#publish) to installed passes. You can schedule this operation or publish changes immediately, but this operation updates currently-installed passes to match the template.
> **Note:** Contact your Airship account manager if you want to update your template design but *do not* want new passes to use the new design yet (e.g., scheduling a branding change).
### Publish Template Updates to Passes {#publish}
When updating a template, if you don't add or remove a field, your changes do not modify passes that were already generated from the template. To update current passes to match your template, you must publish changes to passes.
To publish template design changes to your existing passes:
1. Click **Templates** and select the template you want to edit.
1. Click **Publish**.
1. Select the audience of passes you want to affect. You can publish your template design update to all users or a segment of passes.
1. Determine when to publish template design updates — now, or a date and time in the future.
1. Click **Confirm Publish**.
### Use the Wallet API to Publish Template Updates
After you update a template, you can publish template design updates to existing passes using the wallet API.
* Publish immediately: use the `/template/{template_id}/passes` API.
* Schedule Updates: use the `/schedules/{project_id}` API.
You update field values on passes when you publish changes to a template. However, because you're updating fields on an audience of passes, you should restrict field updates to information that you want to be uniform across passes in your audience segment.
**Publish a template update immediately**
```http
PUT /v1/template/(templateId)/passes HTTP/1.1
Content-Type: application/json
Authorization: Basic
Api-Revision: 1.2
{
"fields": {
"Loyalty Name": {
"value": "Cool new loyalty program"
}
}
}
```
**Publish a template update on a schedule**
```http
POST /v1/schedules/12345 HTTP/1.1
Authorization: Basic
Content-Type: application/json
Api-Revision: 1.2
{
"template": "12345",
"name": "Loyalty program rebrand",
"schedule": {
"scheduled_time": "2020-07-25T00:00:00"
},
"update": {
"audience": {
"tag": "TZ_ET"
},
"pass": {
"fields": {
"Loyalty Name": {
"value": "Cool new loyalty program"
}
}
}
}
}
```
# Boarding pass overrides
> Boarding pass overrides customize the placement and order of fields in Google boarding passes.
You can configure boarding pass overrides through the [wallet template editor](https://www.airship.com/docs/guides/wallet/user-guide/ui/template-editor/) or the [Wallet API](https://www.airship.com/docs/developer/rest-api/wallet/).
> **Note:** Boarding pass overrides only work with Google passes. Apple passes do not support this functionality.
If you are using the Update Template API to override the layout of a pass, it may help you to first view the template in the template editor to better understand its current layout.
## Google Pass Layout
Google passes are organized into sections, each of which has a default layout. You can pass `overrides` when creating your boarding pass template to customize the labels and layout of fields in the sections listed below.
When you override the label or position of a field in one of these sections, you must override all the fields in that section.
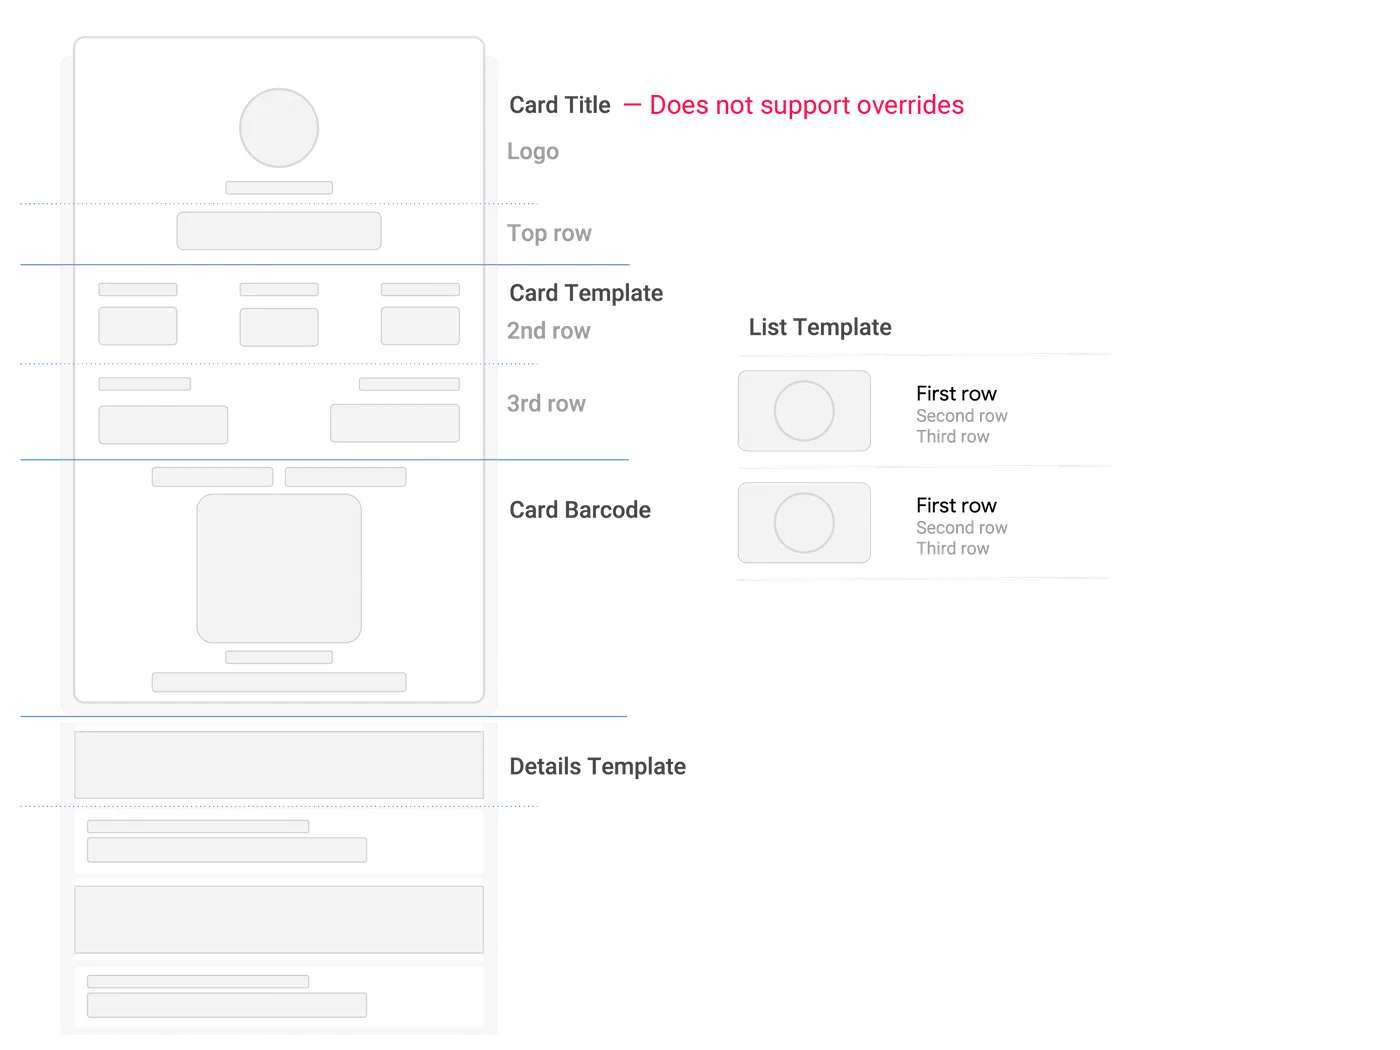
*Boarding pass template sections that support overrides*
You can override the following sections:
1. `cardTemplate`: Supports 2 rows, 3 columns of information. You can override the area in this part of the template.
1. `barcodeSection`: The barcode area of the template.
1. `detailsTemplate`: A list of pass details below the barcode.
1. `listTemplate`: The pass details that users see in their wallet before they open their pass.
### The Card Title
**You cannot override fields in the Card Title section of a boarding pass template**. This includes the fields shown below. In the case of the `departureAirport`, and `arrivalAirport`, we show both the `label` and `value` on the pass.
Fields on the card template are all populated from the flight object — either in the `/flights` API or as a part of an object within an array of `payload.flights` in an adaptive link request. The table below lists the items on the template and the flight object values that populate the template field when you create a pass.
*Required* items in the table below represent the required properties in the adaptive link payload, and are therefore required to be on a pass. While other fields may not be required, and you can hide them if empty, you may want to leave them blank and populate them as the `departureTime` approaches so your passengers know where to look on the pass to find new information.
Moving a template on a field moves both the `label` and `value` keys, if both keys exist, for a flight or passenger.
> **Note:** While the API allows for `label` values at the template field and flight object level, Google does not typically allow you to override field labels for boarding passes. In most cases, `label` overrides at the flight level apply to Apple Wallet passes only.
The table below relates template field names to the keys that populate the template in the adaptive link `payload.flights[]` array of objects.

*The Card Title section of a boarding pass*
| # | Template field | Adaptive Link key
`payload.flights[]` | Required |
| --- | --- | --- | :---: |
| 1 | `image` | | ✓ |
| 2 | `airlineName` | `fields.airlineName.value` | ✓ |
| 3 | `flightNumber`1 | `fields.flightNumber.value` | ✓ |
| 4 | `departureAirport` | `fields.departureAirport.label`2 | ✓ |
| 5 | ↳ | `fields.departureAirport.value` | ✓ |
| 6 | `arrivalAirport` | `fields.arrivalAirport.label`2 | ✓ |
| 7 | ↳ | `fields.arrivalAirport.value` | ✓ |
{class="table-col-1-compact"}
1 This field also appears in the `detailsTemplate`. You can override this field to change its placement elsewhere on the pass, but you cannot remove or change its placement on the card title.
2 Typically set by the corresponding `value` property. You can override the Airport name using the `label` field, but you don't have to set this value manually when creating flights.
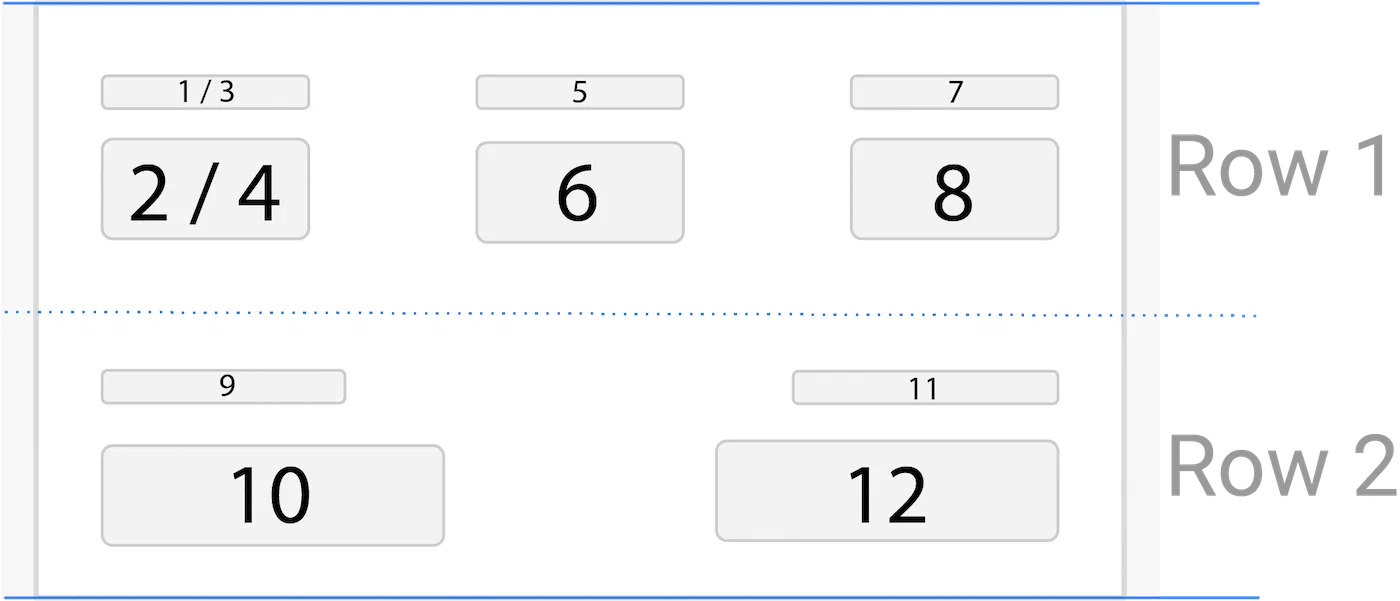
### The Card Template
The Card Template consists of 2 rows. The first row supports three columns. The second row supports 2 columns. All `row`/`col` combinations support `subcol`, allowing for 2 template fields per rectangle in the image below.
*Required* items in the table below represent the required properties in the adaptive link payload, and are therefore required to be on a pass. While other fields may not be required, and you can hide them if empty, you may want to leave them blank and populate them as the `departureTime` approaches so your passengers know where to look on the pass to find new information.
Moving a template on a field moves both the `label` and `value` keys, if both keys exist, for a flight or passenger.
> **Note:** While the API allows for `label` values at the template field and flight object level, Google does not typically allow you to override field labels for boarding passes. In most cases, `label` overrides at the flight level apply to Apple Wallet passes only.
The table below relates template field names to the keys that populate the template in the adaptive link `payload.flights[]` array of objects.
*The Card Template section of a boarding pass*
| # | Template field | Adaptive Link key
`payload.flights[]` | Default label | Required |
| --- | --- | --- | :---: | :---: |
| 1 | `departureTerminal` | `fields.departureTerminal.label` | TERMINAL | |
| 2 | ↳ | `fields.departureTerminal.value` | | |
| 3 | `departureGate` | `fields.departureGate.label` | GATE | |
| 4 | ↳ | `fields.departureGate.value` | | |
| 5 | `seatClassPolicy`1 | `fields.seatClass.label` | CABIN | |
| 6 | `seatClass` | `passengers[].fields.seatClass` | | |
| 7 | `boardingTime`2 | `fields.boardingTime.label` | | |
| 8 | ↳ | `fields.boardingTime.value` | | |
| 9 | `passengerName` | `passengers[].fields.passengerName.label` | PASSENGER | |
| 10 | ↳ | `passengers[].fields.passengerName.value` | | ✓ |
| 11 | `boardingGroup` | `passengers[].fields.boardingGroup.label` | GROUP | |
| 12 | ↳ | `passengers[].fields.boardingGroup.value` | | |
| 13 | `seatNumber` | `passengers[].fields.seatNumber.label` | SEAT | |
| 14 | ↳ | `passengers[].fields.seatNumber` | | |
{class="table-col-1-compact"}
1 The label changes based on the `seatClassPolicy` set on the flight.
2 This field also appears on the `detailsTemplate`.
### The Barcode Template
The barcode template consists of four rows. You can set default values for a few items on the template, but the barcode value itself is populated from the `headers` in your template or adaptive link with a `confirmationCode` value set for each passenger.
*Required* items in the table below represent the required properties in the adaptive link payload, and are therefore required to be on a pass. While other fields may not be required, and you can hide them if empty, you may want to leave them blank and populate them as the `departureTime` approaches so your passengers know where to look on the pass to find new information.
Moving a template on a field moves both the `label` and `value` keys, if both keys exist, for a flight or passenger.
> **Note:** While the API allows for `label` values at the template field and flight object level, Google does not typically allow you to override field labels for boarding passes. In most cases, `label` overrides at the flight level apply to Apple Wallet passes only.
The table below relates template field names to the keys that populate the template in the adaptive link `payload.flights[]` array of objects.
*The Barcode section of a boarding pass*
| # | Template field | Adaptive Link key
`payload.flights[]` | Required |
| --- | --- | --- | :---: |
| 1 | `headers.securityProgramLogo` | | |
| 2 | `headers.boardingPrivilegeImage` | | |
| 3 | `headers.barcode_value` | `passengers[].fields.confirmationCode` | ✓ |
| 4 | | `headers.barcodeAltText` | |
| 5 | `headers.airlineAllianceLogo` | `fields.airlineAllianceLogo` | |
{class="table-col-1-compact"}
### The Details Template
The `detailsTemplate` supports a number of single-column rows, each supporting `subcol` — two items separated by a `/`. Generally, website and image rows on the details template, are set at the template level, though you can set them within an adaptive link payload by providing a field object (with `label` and/or `value` keys) outside of the flights object.
*Required* items in the table below represent the required properties in the flight or passenger objects when creating adaptive links, and are therefore required to be on a pass. While other fields may not be required, and you can hide them if empty, you may want to populate these fields as the `departureTime` approaches.
Moving a template on a field moves both the `label` and `value` keys, if both keys exist, for a flight or passenger.
> **Note:** While the API allows for `label` values at the template field and flight object level, Google does not typically allow you to override field labels for boarding passes. In most cases, `label` overrides at the flight level apply to Apple Wallet passes only.
The table below relates template field names to the keys that populate the template in the adaptive link `payload.flights[]` array of objects.
*The Details Template section of a boarding pass*
| # | Template field | Adaptive Link key
`payload.flights[]` | Default label | Required |
| --- | --- | --- | :---: | :---: |
| 1 | `boardingPosition` | | Position | |
| 2 | ↳ | `passengers[].fields.boardingPosition.value` | | |
| 3 | `sequenceNumber` | | Sequence | |
| 4 | ↳ | `passengers[].fields.sequenceNumber.value` | | |
| 5 | `boardingDoor` | | Boarding Door | |
| 6 | ↳ | `passengers[].fields.boardingDoor.value` | | |
| 7 | `flightNumber` | | Flight Number | |
| 8 | ↳ | `fields.flightNumber.value` | | ✓ |
| 9 | `confirmationCode` | | Confirmation Code | |
| 10 | ↳ | `passengers[].fields.confirmationCode.value` | | ✓ |
| 11 | `eticketNumber` | | Ticket Number | |
| 12 | ↳ | `passengers[].fields.eticketNumber.value` | | ✓ |
| 13 | `frequentFlyerNumber`
`frequentFlyerProgramName` | | Frequent Flyer Number1 | |
| 14 | ↳ | `passengers[].fields.frequentFlyerProgramName.value`
`passengers[].fields.frequentFlyerNumber.value` | | |
| 15 | `boardingTime` | `fields.boardingTime.label` | Boarding Time | |
| 16 | ↳ | `fields.boardingTime.value` | | |
| 17 | `gateClosingTime` | `fields.gateClosingTime.label` | Gate Closes | |
| 18 | ↳ | `fields.gateClosingTime.value` | | |
| 19 | `departureTime` | `fields.departureTime.label` | Scheduled | |
| 20 | ↳ | `fields.departureTime.value` | | |
| 21 | `actualDepartureTime` | `fields.actualDepartureTime.label` | Estimated Departure | |
| 22 | ↳ | `fields.actualDepartureTime.value` | | |
| 23 | `arrivalTime` | `fields.arrivalTime.label` | Scheduled | |
| 24 | ↳ | `fields.arrivalTime.value` | | |
| 25 | `actualArrivalTime` | `fields.actualArrivalTime.label` | Estimated Arrival | |
| 26 | ↳ | `fields.actualArrivalTime.value` | | |
| 27 | `arrivalTerminal` | `fields.arrivalTerminal.label` | Arrival Terminal | |
| 28 | ↳ | `fields.arrivalTerminal.value` | | |
| 29 | `arrivalGate` | `fields.arrivalGate.label` | Gate | |
| 30 | ↳ | `fields.arrivalGate.value` | | |
| 31 | `boardingPrivilegeImage` | | | |
| 32 | `Random Information`1 | | | |
| 33 | `Website`1 | | | |
{class="table-col-1-compact"}
1 These fields are part of default templates created through the Airship user interface. You can set their values at the template level or set them at the adaptive link level, if you want the value(s) should change.
### Template Overrides
You can override the order of items in a section of your template, or the information in a template section, by specifying an `overrides` object. This object contains the section(s) that you want a field to appear in and the order or placement of a field in that section using `row`, `col`, and `subcol` properties.
Two fields can occupy the same `row` and `col`. Use the `subcol` to determine the order of fields in the same row and column positions.
In the example below, we'll move the `boardingTime` and `departureGate` to the second row (index 1) and first column on the card template. Because these two fields will occupy the same space on the template, we'll also set the `subcol` to ensure that the boarding time appears first.
> **Note:** If you override a field in a template section, you must set overrides for all fields in that section. Fields without an override in a section that uses overrides will not appear in a section or on your passes.
**Set overrides for boarding pass fields**
```json
{
"boardingTime": {
"fieldType": "flightModule",
"value": "",
"formatType": "String",
"label": "",
"hideEmpty": false,
"required": false,
"overrides": {
"cardTemplate": {
"row": 1,
"col": 0,
"subCol": 0,
"dateStyle": "timeOnly"
}
}
},
"departureGate": {
"fieldType": "flightModule",
"value": "",
"formatType": "String",
"label": "",
"hideEmpty": false,
"required": false,
"overrides": {
"cardTemplate": {
"row": 1,
"col": 0,
"subCol": 1
}
}
}
}
```
| | |
| --- | --- |
| 
*Boarding pass with default fields* | 
*Boarding pass with overrides applied* |
{class="table-bare"}
## Override a Template
The card template consists of up to two rows, with up to three items per row (left, center, and right). You can add or move fields around the `cardTemplate` to better organize your passes.
> **Note:** We recommend testing overrides with a duplicate template before modifying a template that is associated with live passes. The steps here include duplication, creating an [Adaptive Link](https://www.airship.com/docs/reference/glossary/#adaptive_link), and viewing the passes on local devices to verify that your overrides perform the way you expect.
>
> You must have at least one Apple Wallet and one Google Wallet template to create an adaptive link.
1. Duplicate an Apple Wallet or Google Wallet template you want to override, and use its `templateId` in the following steps.
1. Use the [/templates](https://www.airship.com/docs/developer/rest-api/wallet/operations/templates/#gettemplate) API to get your template payload. This call, as opposed to the `/v1/template` endpoints, returns a template payload in exactly the same format as you would use in a `POST` or `PUT` operation.
**Get template payload**
```http
GET /templates/160571 HTTP/1.1
Authorization: Basic
Content-Type: application/json
```
1. Update your template with `overrides` using a `PATCH` against the [/templates/{templateId}](https://www.airship.com/docs/developer/rest-api/wallet/operations/templates/#patchtemplates) endpoint. In the payload, you only need to provide the fields in your template that you want to override.
> **Note:** If your template contains fields that aren't a part of the default template design, like `fareType` or `departureGate`, they must contain `label` and `value` keys. You can set empty strings in your template and replace these values when you generate passes, but failing to set `label` or `value` keys will prevent those fields from rendering properly on your pass.
**Update template with overrides**
```http
PATCH /templates/ HTTP/1.1
Authorization: Basic
Content-Type: application/json
{
"fields": {
"passengerInfo": {
"fieldType": "infoModuleData",
"value": "First/Last",
"formatType": "String",
"label": "PASSENGER",
"order": 5,
"overrides": {
"cardTemplate": {
"row": 0,
"col": 0
}
}
},
"boardingPosition": {
"fieldType": "flightModule",
"value": "___",
"formatType": "String",
"label": "POSITION",
"hideEmpty": false,
"required": false,
"overrides": {
"cardTemplate": {
"row": 0,
"col": 1
}
}
},
"departureGate": {
"fieldType": "flightModule",
"value": "__",
"formatType": "String",
"label": "",
"hideEmpty": false,
"required": false,
"overrides": {
"cardTemplate": {
"row": 0,
"col": 2
}
}
},
"fareType": {
"fieldType": "infoModuleData",
"value": "__",
"formatType": "String",
"label": "FARE",
"hideEmpty": false,
"required": false,
"order": 2,
"overrides": {
"cardTemplate": {
"row": 1,
"col": 0
}
}
},
"boardsOrEmptyInfo": {
"fieldType": "infoModuleData",
"value": "",
"formatType": "String",
"label": "BOARDS",
"hideEmpty": false,
"required": false,
"order": 6,
"overrides": {
"cardTemplate": {
"row": 1,
"col": 1
}
}
},
"boardsOrSecurityInfo": {
"fieldType": "infoModuleData",
"value": "__",
"formatType": "String",
"label": "__",
"hideEmpty": false,
"required": false,
"order": 7,
"overrides": {
"cardTemplate": {
"row": 1,
"col": 2
}
}
}
}
}
```
1. Repeat steps 2 and 3 for the other platform so that you have will have updated templates for both Apple Wallet and Google Wallet.
1. Create an adaptive link for the updated template IDs, [using the API](https://www.airship.com/docs/guides/wallet/user-guide/create-links/api/) or [dashboard](https://www.airship.com/docs/guides/wallet/user-guide/create-links/dashboard/). Your adaptive link must include passenger information:
* For `passengers`, both `passengerName` and `confirmationCode` are required fields.
* For `flights`, `departureTime`, `departureAirport`, `arrivalAirport`, `flightNumber`, and `airlineCode` are required fields.
1. Paste the adaptive link in local Android and iOS devices, save the passes, and confirm they appear as you expected.
1. If the passes appear as expected, repeat steps 1-2 for your original templates.
1. (Optional) Confirm the appearance of the passes based on your original templates, and delete the duplicate templates you used for testing.
## Reverting Boarding Pass Template Overrides {#revert}
If you want to revert a template section to the default layout, update your template with an empty `overrides` object.
**Empty overrides object using default layout**
```json
{
"departureGate": {
"fieldType": "flightModule",
"value": "",
"formatType": "String",
"label": "",
"hideEmpty": false,
"required": false,
"overrides": {}
}
}
```
## Override properties
The `overrides` object contains properties that represent an individual override for the field. Properties with Integer values are 0-indexed.
`overrides`: an object with child properties for each section where a field will appears on a pass. Supported child objects: `cardTemplate`, `barcodeSection`, `detailsTemplate`, `listTemplate`. Set an empty object to reset a field to the default layout.
`row`: Integer; the row the field should appear in. The number of available rows depends on the template `type`.
`col`: Integer; the column the field should appear in. There are three columns in the card template, 0 is the left column, 1 is the center, and 2 is the right column.
`subcol`: Integer, 0 or 1; when multiple fields use the same `row` and `col`, this determines whether a field appears on the left or the right in the column.
`dateStyle`: String; for fields that take ISO date-times, use `dateStyle` to override the default format for dates and times. Different fields have different default date styles. Accepted values:
* `date-time`: Show both date and time
* `dateOnly`: Display only the date
* `timeOnly`: Display only the time
* `dateTimeYear`: Display the date, time, and year
* `dateYear`: Display the date and year
**Example field override**
```json
{
"boardingTime": {
"fieldType": "flightModule",
"value": "",
"formatType": "String",
"label": "",
"hideEmpty": false,
"required": false,
"overrides": {
"cardTemplate": {
"col": 0,
"row": 1,
"subcol": 0,
"dateStyle": "timeOnly"
}
}
}
}
```
### Date and Time Styles
Several fields in the flight object take date-time string values. By default board pass templates shape date-time values to fit their placement on the pass. For example, `boardingTime` only shows the time when the user boards a plane, rather than the full date and time. However, you can override the default date-time format for any field using the `dateStyle` key in an override object setting the following styles:
* `date-time`: Show both date and time
* `dateOnly`: Display only the date
* `timeOnly`: Display only the time
* `dateTimeYear`: Display the date, time, and year
* `dateYear`: Display the date and year
> **Important:** If you override the `dateStyle` for a field, you must also set overrides for all of the fields within a template section.
You can use `dateStyle` with the following boarding pass fields.
| Field | Default style |
|---|---|
|`boardingTime`|`timeOnly`|
|`arrivalTime`|`date-time`|
|`actualArrivalTime`|`timeOnly`|
|`departureTime`|`date-time`|
|`actualDepartureTime`|`timeOnly`|
# Send a Test Pass
> After saving your pass template, send yourself a test pass and verify its content and appearance.
## Send an Apple Wallet Test Pass {#test-apple}
You will send the pass to your email address, then install the pass on an iOS device.
1. Go to *Templates*.
1. Click anywhere in a template's row to see its expanded view, then click
**Edit Design**. If you have only one template in the project, the initial view is already expanded.
1. Click **Test Pass** in the project header.
1. Enter your email address and click **Send**.
1. Open your mail app on your iOS device, and open the "New Pass Generated..." email.
1. Tap the wallet attachment to view the pass, then tap *Add* to install it to your iOS Wallet.
1. Open the Wallet app on your device and open your test pass.
## Send a Google Wallet Test Pass {#test-google}
You will save the pass to Google Wallet on the web, then view the pass on your Android device. Make sure you are first logged in to your Google account before attempting to save the pass.
1. Go to *Templates*.
1. Click anywhere in a template's row to see its expanded view and click
**Edit Design**. If you have only one template in the project, the initial view is already expanded.
1. Click **Test Pass** in the project header,then click the *Save the pass to your Google Wallet App* link in the confirmation box that appears.
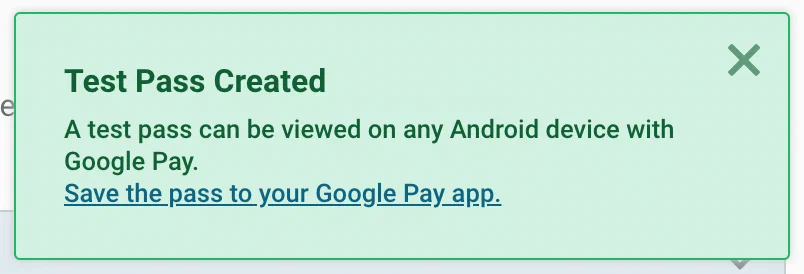
*Saving a test pass to Google Wallet*
The pass will open in Google Wallet in a new browser tab. If not yet logged in, Google
will prompt you to do so.
1. Click **Save** to save the pass to your Google Wallet app.
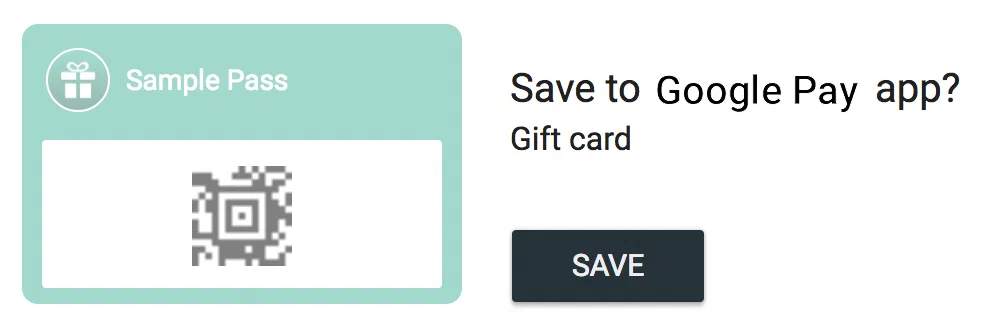
*Confirming the test pass in Google Wallet*
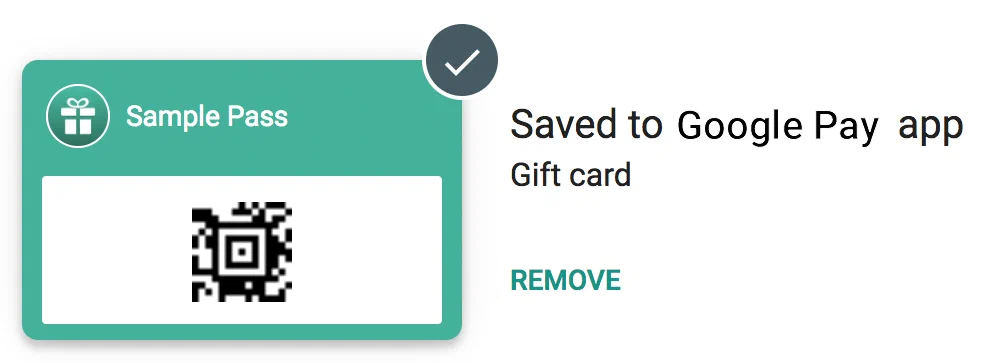
*Test pass saved to Google Wallet*
1. Open the Google Wallet app on your device.
1. Open your saved test pass.
# Manage Wallet templates
> Manage your Wallet templates.
## Edit a Wallet template name or description
Change the name or description of a template:
1. Go to **Templates** and select the template you want to edit.
1. Select **Update** for Name or Description.
1. Make your changes and click **Save**.
## Set a Wallet template custom ID
Provide a custom ID that overrides the template's auto-generated default ID:
1. Go to **Templates** and select the template you want to edit.
1. Select **Update** for Custom ID.
1. Check the box for **Use a Custom ID** and enter your ID.
1. Select **Save**.
## Set the sharing policy for a Wallet pass
By default, templates allow pass sharing across users and devices. You can change
the sharing policy for templates from the Templates menu for a mobile wallet project.
Apple Wallet and Google Wallet support slightly different sharing settings.
| Sharing policy |
Apple |
Google |
| Multiple users and devices (Default) |
✓ |
✓ |
| One user on multiple devices |
|
✓ |
| One user on one device |
✓ |
✓1 |
1. Intended for use in limited circumstances.
Contact Airship Support for additional information.
1. Go to **Templates** and select the template you want to edit.
1. Select **Update** for Sharing Policy.
1. Choose a sharing policy.
1. Select **Save**.
## Duplicate a Wallet template
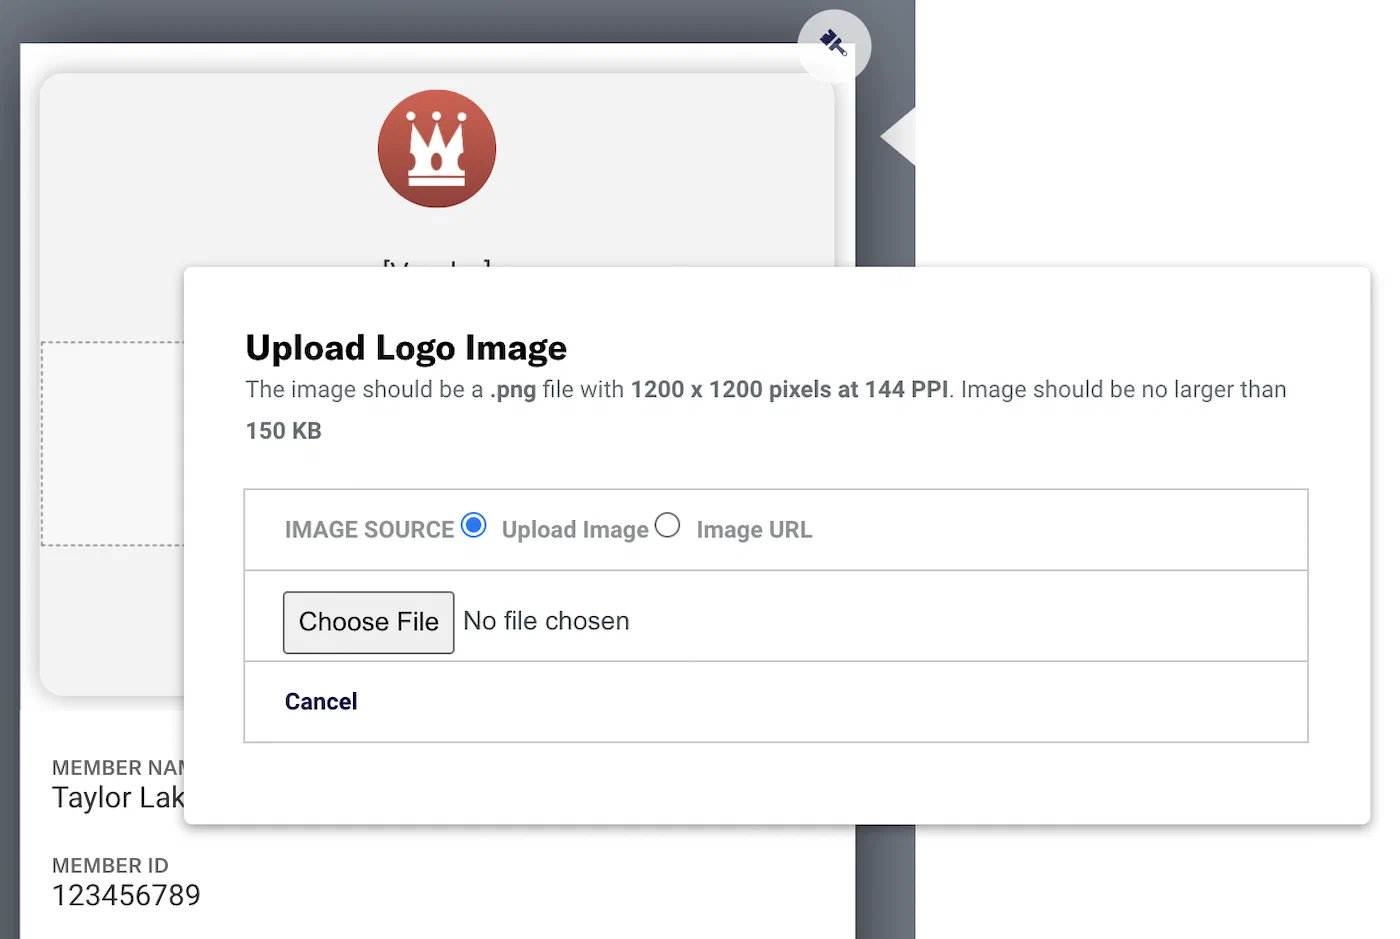
Copy a template to the same project or to another project of the same pass type. When duplicating a template with an [External ID](https://www.airship.com/docs/guides/wallet/user-guide/basics/#external-or-custom-ids) set, the external ID is not copied to the new template.
1. Go to **Dashboard** and select the duplicate icon (
) for a template.
1. Select where to save the new template. If duplicating to another project, also select the project name.
1. Select **Continue** and enter a name for the new template.
1. Select **Duplicate**.
1. Follow the link to open the duplicate in the template editor or select **Finish**.
## Delete a Wallet template
Remove a template from a project.
> **Important:** Before you can delete a template, you must expire or delete all passes associated with the template. See:
>
> * [Wallet API: Update Pass](https://www.airship.com/docs/developer/rest-api/wallet/operations/passes/#updatepass)
> * [Wallet API: Delete Pass](https://www.airship.com/docs/developer/rest-api/wallet/operations/passes/#deletepass)
1. Go to **Templates** and select the template you want to edit.
1. Select **Delete**.
# Enable NFC Support for your Passes
> Enable NFC support so that users can redeem passes by tapping their device to your card readers and other terminals.
[Near-field communication (NFC)](https://en.wikipedia.org/wiki/Near-field_communication) enables pass holders to tap their device on a compatible reader or terminal to redeem passes, consume point balances, use coupons, scan boarding passes, and more.
You can add NFC settings at the project level to support both your Apple and Google passes.
While Airship combines most of your NFC-enablement settings into a single object at the project level, you must make sure that your Google/Apple accounts are set up to use NFC, and make sure that your terminals are set up with appropriate private keys to decode NFC communications from your Airship-generated passes.
Airship supports NFC communications for:
* **Apple**: All pass types
* **Google**: All pass types
## Apple Wallet NFC requirements
You enable NFC support by requesting an NFC-enabled certificate from Apple. Providing your NFC-enabled certificate to Airship automatically enables NFC support for your iOS passes.
You set your private key on your terminal and provide your public key to Airship. You can provide your public key with NFC messages, and your terminal will decode the message using the private key.
Because iOS supports NFC at the certificate level, and iOS provides your public/private keys, you can only have one active NFC merchant configuration for your project. Airship will let you add multiple NFC merchants for Apple but will only use the most recently added NFC merchant configuration.
However, you can provide the public key your terminal uses at the pass/message level to override your project's global public NFC encryption key. You may want to do this if you support multiple vendors from a single Loyalty pass.
**Example object to override project's global public key at pass level**
```json
{
"fields" : {},
"nfc": {
"message": "",
"encryptionPublicKey":""
}
}
```
## Google Wallet NFC requirements
To enable NFC support for Google passes, you must send a `POST` to `/v1/project/{projectId}/nfcMerchants` or `/v1/projects/id/{projectExternalId}/nfcMerchants` with your merchant information. When you set up your account with Google, Google assigns you an Issuer ID and a Collector ID. As long as you have a valid Google Pay certificate, Airship will return the correct issuer and collector identifiers.
You can also use your own public/private encryption key pair or have Airship generate a key pair for you. If you already have a key pair, and your private key is already set up at your terminals, provide your public key when you set up NFC information. If you have not set up a key pair yet, do not provide a `publicKeyPem` in your `/nfcMerchants` payload, and Airship will generate both keys for you.
> **Note:** Airship only returns the private key with your `POST` payload. You cannot retrieve the private key or modify your key pair later, so be sure to copy it immediately.
**Enable NFC support for Google passes**
```http
POST /v1/project/13137/23c0da58-3b79-4d44-9191-b69faef7b24c HTTP/1.1
Authorization: Basic
Content-Type: application/json
{
"vendor": "GOOGLE",
"merchantName": "testMerchant5",
"merchantEmail": "test@example.com",
"terminalProvider": "Verifone",
"keyVersion": 1,
"publicKeyPem": ""
}
```
Unlike iOS, you can have multiple NFC merchant configurations per project. You may want to do this if your pass supports terminals in different businesses — like a loyalty program that supports multiple stores under the same parent organization.
If merchant terminal is already configured and there is a pre-existing `smartTapIssuerId` (also known as a redemption issuerId), it can be shared across clients, which can use the existing `smartTapIssuerId` to configure other projects using the following API call:
**Share a pre-existing `smartTapIssuerId` across clients**
```http
POST /v1/project/{secondProjectId}/nfcMerchants HTTP/1.1
Authorization: Basic
Content-Type: application/json
{
"vendor": "GOOGLE",
"smartTapIssuerId": "1234567890"
}
```
## Adding NFC support to your project
These examples use standard project IDs. If your project has an external ID, use the corresponding `/v1/project/id/{projectExternalId}/` endpoints.
For Apple, before you begin, make sure that you have requested certificate(s) supporting NFC and uploaded those certificates to Airship.
1. Make a call to the `/v1/project/{projectId}/nfcMerchants` API to add NFC information to your project.
1. Go to your Wallet dashboard and click **Templates**.
1. Select your template, click **Edit Design**, and then click **Save**. Despite making no changes, your template will now support NFC.
1. Update passes with NFC messages. The `nfc.message` contains values that your terminals and backend systems will use to identify and take actions against the pass, like a loyalty or coupon number.
**Update pass with NFC message**
```http
PUT /v1/pass/123 HTTP/1.1
Content-Type: application/json
Authorization: Basic
Api-Revision: 1.2
{
"fields" : {},
"nfc": {
"message": ""
}
}
```
### Terminals and Encryption keys
NFC uses SSL to authenticate transactions. You provide Airship your public key, and your terminals must have the private key.
You can provide your public key to Airship when you create an NFC merchant using `publicKeyPem`. If you exclude `publicKeyPem` from the payload, Airship will generate public and private SSL keys for you. If you let Airship generate keys for you, you must copy your private key from the response; Airship will not return your private key in any other payload.
For Google, you can add an NFC merchant for each key pair that you have. So, if you have a single pass that works at different merchants belonging to the same company, your project can contain all the different keys that you use across different NFC terminals.
For Apple, your project can contain a single NFC merchant. You should expect to use the same key pair across your terminals. Or, when you add an NFC message to a pass, you can override your `publicKeyPem` with an `encryptionPublicKey` whenever you set an NFC message on your pass.
**Override `publicKeyPem` with an `encryptionPublicKey` by adding an NFC message to a pass**
```http
PUT /v1/pass/123 HTTP/1.1
Content-Type: application/json
Authorization: Basic
Api-Revision: 1.2
{
"fields": {},
"nfc": {
"message": "125855|8BD29F182DE29848E5A02FAE749DA545",
"encryptionPublicKey": "MDkwEwYHKoZIzj0CAQYIKoZIzj0DAQcDIgAD0TDG7WzxFXJc9FZ0rE8qG5n6Z5voU5axJYDV5nViYEM="
}
}
```
### The NFC message
After you set up NFC merchants in Airship and your terminals, you can assign a `message` to your passes. The `message` conveys information that your terminal and/or backend systems use to identify and take advantage of the pass.
While the `message` takes a string, this can be any kind of delimited string or JSON string and may contain multiple values that are relevant to you.
For example, if you have a loyalty program, you may want the `message` to contain a value with the pass ID, loyalty points, and/or the loyalty ID for the pass. When a user taps their device to the appropriate terminal, the terminal gets this message and decodes it to perform actions with or against the pass.
You can apply NFC messages to passes using the `/pass` APIs.
**Set a comma-delimited NFC message on a pass**
```http
PUT /v1/pass/123 HTTP/1.1
Content-Type: application/json
Authorization: Basic
Api-Revision: 1.2
{
"fields": {},
"nfc": {
"message": ",,",
}
}
```
### Creating and distributing pass links
Generate links for your Wallet passes and distribute them to users.
# About Adaptive Links
> {{< glossary_definition "adaptive_link" >}}
After you create a pass template, you then generate URLs for the pass (create pass links) that you distribute to your users. When your audience clicks or taps the link, it displays the viewable pass generated from the template, and the user can then install it on their device. Adaptive Links are the preferred pass distribution method since you can distribute a single link to each recipient instead of needing separate pass URLs for Apple Wallet and Google Wallet.
You can set a limit on the number of passes that can be generated from an Adaptive Link. You can also create [multi-pass Adaptive Links](https://www.airship.com/docs/guides/wallet/user-guide/create-links/api/#creating-multi-pass-adaptive-links) that allow users to install up to 10 related passes at once.
## Link behavior
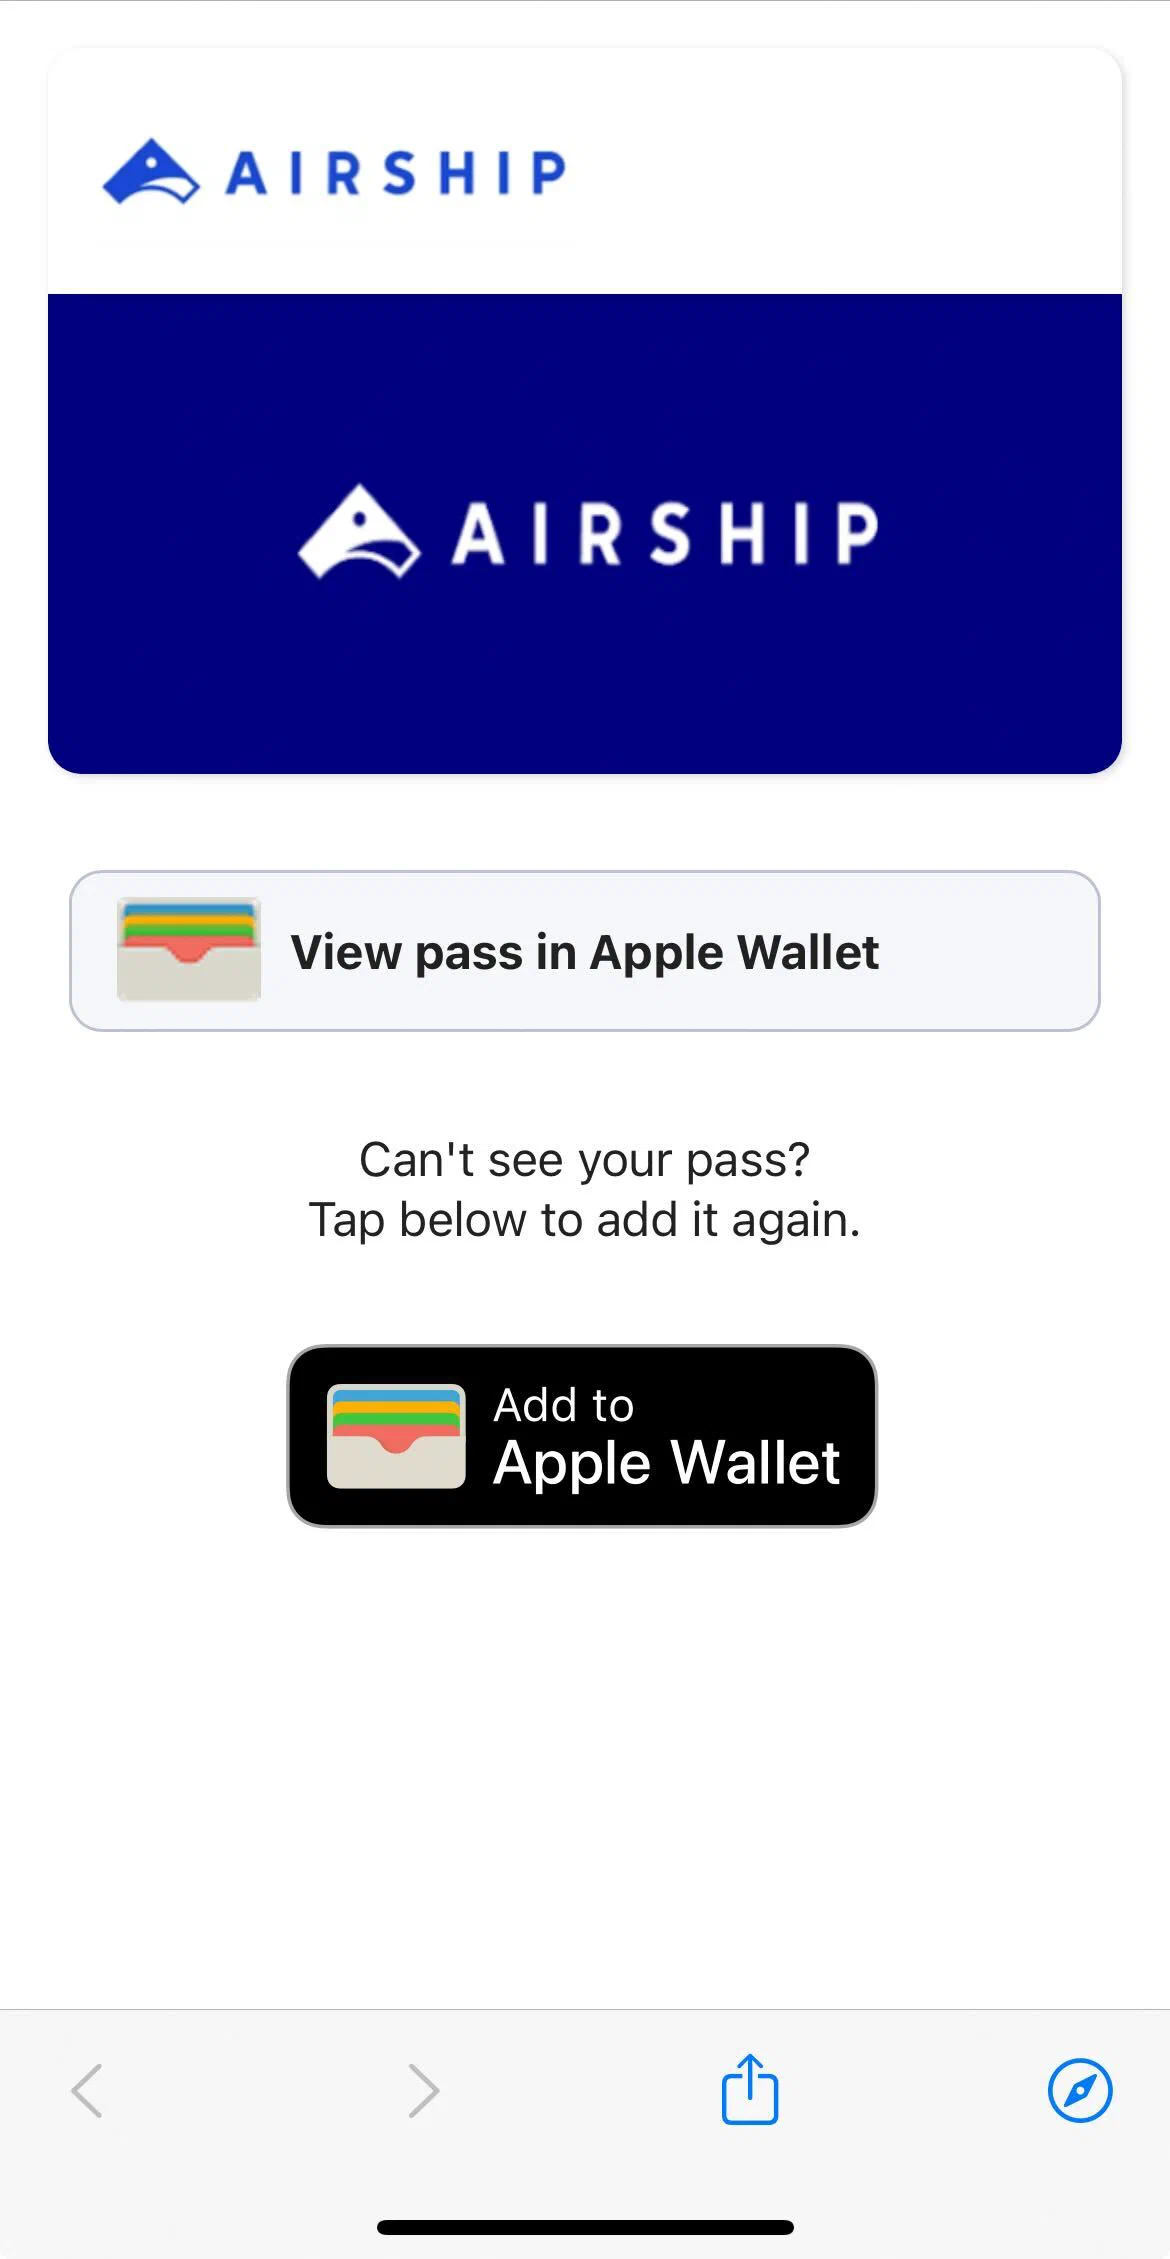
*An Adaptive Link landing page after installing a pass on iOS*
Adaptive Links behave differently on Android and iOS devices.
On an Android device, the user is redirected to a Google-hosted landing page, which displays a simple preview of the pass to be installed and buttons indicating the install status and deep linking to the pass in the users Google Wallet.
On iOS, the first time a user opens an Adaptive Link, they are prompted to add the pass to the Wallet app. After adding the pass or canceling, Wallet closes, and a landing page displays these elements:
* **Logo image** — The full pass rendering is replaced with its template's logo image laid over its background color. You can customize this to also add the strip image.
* **View prompt** — If the pass was already added to Wallet, selecting this prompt opens the pass in the app. If not added to Wallet, it opens the app's home screen.
* **Add prompt** — Selecting this prompt downloads the pass file and opens it in Wallet with a prompt to add it.
This is the default appearance and behavior for Adaptive Links opened on an iOS device for projects created after April 10, 2025. You can also enable it for older projects and disable it at any time: Go to **Settings**, then **Project Details**, and then toggle the **Adaptive Link Landing Pages** option. When disabled, the landing page displays a blank white screen after adding the pass or canceling.
## Error handling
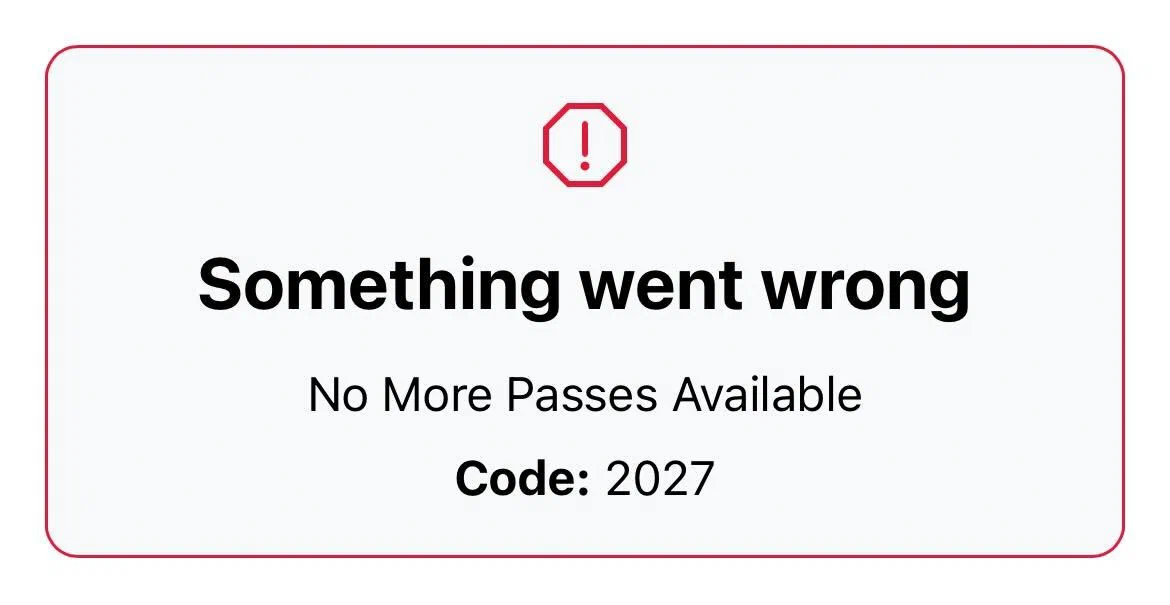
*The error shown on an Adaptive Link landing page when the link has reached its installation limit*
Error messages display when an Adaptive Link is opened on an unsupported platform, when a device type cannot be detected, a link has expired or reached its installation limit, and other error states.
### Redirecting unsupported platforms
Airship supports Android and iOS only. For unsupported platforms, instead of the default error handling, you can redirect users to a self-hosted landing page where you can provide custom content. For example, if your link is configured for Apple Wallet only, your landing page should include instructions for Android users.
To set up a redirect when creating an Adaptive Link using the API, use ID `null` for the second template, and make sure to include a value for `landingPageUrl`. When creating an Adaptive Link from the dashboard, select **Redirect to a landing page** and enter the URL that the pass link should redirect to.
## Personalization and location
Customize the user experience with these features:
* **URL-encoded pass personalization** — Add query parameters to your links to personalize passes for each user. This can help you leverage your CRM data to populate passes without performing additional API calls. See [Personalizing passes from Adaptive Links](https://www.airship.com/docs/guides/wallet/user-guide/create-links/distribute/#personalizing-passes-from-adaptive-links).
* **Location detection** — Define up to 10,000 locations per Adaptive Link, and a Wallet pass installed from that Adaptive Link will detect the 10 locations nearest the user and associate them with the pass. See the locations array for an [Adaptive Link request](https://www.airship.com/docs/developer/rest-api/wallet/schemas/adaptive-links/#adaptivelinkrequest) in our Wallet API reference.
Make pass-relevant text appear on a user's lock screen based on location or proximity to a beacon. See [Location-based pass alerts](https://www.airship.com/docs/guides/wallet/user-guide/notifications/triggers/).
## Expiration
> **Note:** Adaptive Link expiration is distinct from pass expiration, which determines when a pass will expire from the end user's mobile device wallet. For pass expiration default values and editing options, see [Editing Wallet Pass Expiration](https://www.airship.com/docs/guides/wallet/user-guide/updating-passes/edit-expiration/).
Adaptive Links automatically expire after a period that begins upon creation and ends after a duration determined by its associated pass type:
- Boarding pass: 30 days
- Event ticket: 30 days
- Coupon: 365 days
- Generic: 730 days
- Gift card: 730 days
- Loyalty: 730 days
- Member card: 730 days
This automatic expiration period is known as its time-to-live (TTL). Once the TTL for a link has elapsed, it is considered expired and will no longer generate new passes. After a 90-day grace period, the expired link is deleted permanently.
Creating a pass from an Adaptive Link or updating any part of the link causes its TTL to reset to its initial value. A TTL may be reset this way indefinitely.
Reset example for an Adaptive Link for a Coupon pass created on June 1st:
* The link has an initial TTL of 365 days.
* On June 22nd, a user follows the link to create the first pass. This resets the TTL from 344 days to 365 days.
* On May 1st of the following year, without additional passes created, an API call updates the payload on that link. This resets the TTL from 21 days to 365 days.
You can set a custom expiration date when creating Adaptive Links. Any link configured with a custom expiration date expires on that date regardless of its remaining TTL. This is useful if you want to guarantee a link will not generate any new passes after a specific date.
## Creating Adaptive Links
You can create Adaptive Links using the API or the dashboard. For event tickets and boarding passes, you must use the API.
User guides for each method:
* [Dashboard](https://www.airship.com/docs/guides/wallet/user-guide/create-links/dashboard/)
* [API](https://www.airship.com/docs/guides/wallet/user-guide/create-links/api/)
* [Event tickets](https://www.airship.com/docs/guides/wallet/user-guide/create-links/event-tickets/)
* [Flights and boarding passes](https://www.airship.com/docs/guides/wallet/user-guide/create-links/flights-boarding-passes/)
# Create Adaptive Links using the API
> Use the Airship Wallet API to create and configure Adaptive Links.
> **Note:** You must use the API to create Adaptive Links for event tickets and boarding passes. See:
> * [Adaptive Links for Event Tickets](https://www.airship.com/docs/guides/wallet/user-guide/create-links/event-tickets/#adaptive-links-for-event-tickets)
> * [Adaptive Links for Boarding Passes](https://www.airship.com/docs/guides/wallet/user-guide/create-links/flights-boarding-passes/#adaptive-links-for-boarding-passes)
> **Tip:** You can take advantage of Adaptive Links even when supporting a single platform. If a user on the unsupported platform attempts to install your pass, you can send the user to a landing page.
>
> When creating the Adaptive Link, use ID `null` for the second template, and make sure to include a value for `landingPageUrl`.
## Creating Adaptive Links
You must have at least one Apple Wallet and one Google Wallet template to create an Adaptive Link.
Perform a one-time `POST` API call to
`https://wallet-api.urbanairship.com/v1/links/adaptive`, referring to your
template ID. Sample data
and JSON parameters are below.
For more information, see [Create Adaptive Link](https://www.airship.com/docs/developer/rest-api/wallet/operations/adaptive-links/#createadaptivelink) in the Wallet API reference.
**Create Adaptive Link**
```http
POST /v1/links/adaptive HTTP/1.1
Authorization: Basic
Content-Type: application/json
{
"androidTemplateId": "610213",
"availablePasses": 100000,
"iosTemplateId": "581252",
"isPersonalized": "false",
"landingPageUrl": "https://airship.com",
"locationRadius": 10,
"maxResultLocations": 5,
"locations": [
{
"latitude": 45.5898,
"longitude": -122.5951,
"relevantText": "Welcome to Portland... Voodoo Donuts is near..."
},
{
"latitude": 37.7835926,
"longitude": -122.3982583,
"relevantText": "Hello Airship SF"
}
],
"payload": {
"externalId": null,
"fields": {
"offercode": {
"value": "MJ85SMR"
}
},
"headers": {
"barcodeAltText": {
"value": "MJ85SMR"
},
"barcode_value": {
"value": "MJ85SMR"
}
}
}
}
```
## Creating passes from Adaptive Links using URL query parameters
You can generate passes directly from your Adaptive Link with a `GET` call to `https://wallet-api.urbanairship.com/v1/pass/adaptive/{adaptiveLinkId}`.
Request parameters may be appended to the base URL to add or update values on the generated pass. For some specialized query parameters, see [Generate pass from Adaptive Link](https://www.airship.com/docs/developer/rest-api/wallet/operations/adaptive-links/#generatepassfromadaptivelink) in the Wallet API reference.
In addition to the specialized parameters, you may provide a URL parameter as `fieldName=value` for any field contained in the templates associated with the Adaptive Link. For example, if you wanted to add an offer code, barcode, tags for time zone and location, and a member ID using an external ID, you could append URL query parameters to a base Adaptive Link URL as follows:
```text
https://wallet-api.urbanairship.com/v1/pass/adaptive/QXynXTbMhS?offercode=AUGUST&barcode=A1234567&tags=PST~OR&exid=A1234567
```
> **Note:** You cannot personalize Google Wallet `class` fields with unique values. Any field preceded by `class` constitutes a class field. See [Google Wallet Pass Verticals documentation](https://developers.google.com/pay/passes/guides/overview/basics/about-google-pay-api-for-passes) for a full list of
> class fields for each pass type.
## Creating multi-pass Adaptive Links
Adaptive Links support generating multiple passes from a single URL. Combine passes from multiple templates in different projects, even if they are different pass types, to do things like:
* Provide multiple boarding passes at once for a group of travelers
* Bundle event tickets with parking passes
* Include a coupon with a loyalty card download
First, [create individual Adaptive Links](#creating-the-adaptive-link). Then append up to 10 comma-separated Adaptive Link IDs in this format: `https://wallet-api.urbanairship.com/v1/pass/adaptive?ids={adaptiveLinkId},{adaptiveLinkId},{adaptiveLinkId}`.
**Example multi-pass Adaptive Link URL**
```text
https://wallet-api.urbanairship.com/v1/pass/adaptive?ids=7XRMaSpcEQk,Y0E6EXuTx5i,XGMuDpx2RDs
```
You can distribute the URL to users in the above format. As with any other pass link, you can send multi-pass Adaptive Links to users in numerous ways. See [Distributing Pass Links to your Audience](https://www.airship.com/docs/guides/wallet/user-guide/create-links/distribute/).
You also have the option to use multi-pass URLs in `GET` API calls. Use a `GET` call if you don't want to serve your users an Adaptive Link. Specify a device type in the `GET` URL to request a .pkpass or JSON and stream it to the user from your app or website. See [Generate multiple passes from a single Adaptive Link](https://www.airship.com/docs/developer/rest-api/wallet/operations/adaptive-links/#generatemultipassfromadaptivelink) in the Wallet API reference.
> **Note:** * Multi-pass Adaptive Links do not support query parameters for personalizing passes.
> * An error will be displayed to the end user if a link contains more than 10 Adaptive Link IDs.
> * If a URL contains an invalid, unknown, or mismatched platform, an error will be displayed to the end user. For example, if one ID from an Adaptive Link supports both iOS and Android but another only supports Android, then when a user attempts to download the multi-pass bundle on iOS, the download will not work.
> * If any of the Adaptive Links IDs are expired, the multi-pass link will not work.
> * If there are no available passes remaining for any of the included Adaptive Links, the multi-pass link will not work.
# Create Adaptive Links using the dashboard
> Use the Airship dashboard to create and configure settings for Adaptive Links.
> **Note:** You must use the API to create Adaptive Links for event tickets and boarding passes. See:
> * [Adaptive Links for Event Tickets](https://www.airship.com/docs/guides/wallet/user-guide/create-links/event-tickets/#adaptive-links-for-event-tickets)
> * [Adaptive Links for Boarding Passes](https://www.airship.com/docs/guides/wallet/user-guide/create-links/flights-boarding-passes/#adaptive-links-for-boarding-passes)
You must have at least one Apple Wallet and one Google Wallet template to create an Adaptive Link.
1. Go to *Templates*.
1. Click anywhere in a template's row to see its expanded view, then click
**Create an Adaptive Link**.
1. Enter a descriptive name for the link, then enter a template name or ID and select from the results.
* You only need to enter a name OR specify a template. Both can be edited after saving.
* The name appears in the list of all the template's Adaptive Links. It does not appear to recipients
of the link. If you do not enter a name, it will automatically generate after saving based on the template you select in the next step.
* To change your template selection, select the edit icon (
) and start over.
1. Choose what will happen if the pass is opened in a desktop browser or
undetectable device type rather than a mobile device.
* **Display error on the device** — The device will display:
`{"error":{"code":1004,"message":"Device not supported."}}`.
* **Redirect to a landing page** — Enter the URL that the pass link should redirect to.
> **Important:** If you intend to send the link to web browsers via the Adaptive Link action
> in a message, select *Redirect to a landing page* to ensure that your
> web users do not get an error. See:
>
> * [Actions for App and Web messages](https://www.airship.com/docs/guides/messaging/messages/actions/)
> * [Actions for In-App Experiences](https://www.airship.com/docs/guides/messaging/in-app-experiences/configuration/button-actions/)
> * [Actions in the Interactive editor](https://www.airship.com/docs/guides/messaging/editors/interactive/actions/)
1. Configure options:
* **Personalized** — Determines whether the link generates a new pass each time the Adaptive Link is clicked.
* When **enabled** (box checked), an individual pass URL is generated each time the Adaptive Link is clicked, e.g., 10 clicks = 10 unique passes created.
If you designed the pass templates to use personalized data such as first name, points, or a barcode value, enable this feature.
* When **disabled** (box unchecked), the same pass is returned each time the Adaptive Link is clicked, e.g., 10 clicks = 1 unique pass created.
> **Note:** * In almost all cases, you will want to leave Personalized disabled to ensure only one pass ID exists for each personalized pass.
>
> * When Personalized is disabled, you cannot update an Adaptive Link to update passes generated from the Adaptive Link. Rather, you must [publish template updates](https://www.airship.com/docs/guides/wallet/user-guide/updating-passes/publish/) through the dashboard or using the [Bulk Update API](https://www.airship.com/docs/developer/rest-api/wallet/operations/templates/#updatepassesbytemplate) to push updates to passes generated from the Adaptive Link.
* **Limit available passes** — Enter the number of passes that can be created from the Adaptive Link. When disabled, the number of passes is not limited. A value is required when editing an existing Adaptive Link.
* **Expiration date** — Controls when the link will no longer generate passes. Select a date up to 1,080 days in the future. If left blank, the link remains valid as long as it is [actively in use](https://www.airship.com/docs/guides/wallet/user-guide/create-links/adaptive-links/#expiration).
1. Click **Save**.
# Create pass links using CSV upload
> Format and upload a CSV file to create pass links.
## About CSV upload
To create pass links using CSV upload, your CSV file must be
formatted with columns that match the field layout for your pass template.
After uploading the CSV file in the dashboard, you will receive a link
to download the processed file appended with the pass URLs. You can then distribute the URLs/links to your users.
> **Important:** 1. The CSV upload method does not generate [Adaptive Links](https://www.airship.com/docs/reference/glossary/#adaptive_link).
>
> 1. The URLs returned by the CSV upload are multi-use passes — they
> can be downloaded by multiple devices.
>
> 1. **URLs are Dynamic** — Viewable passes are not generated until the user interacts with the pass
> URL and installs the pass on a device. Due to the dynamic nature of
> pass URLs, keep in mind the following:
> * When a pass is created with specific values, the pass cannot be updated until after it has been installed.
> * If a template is changed before a pass is installed, the pass will have the newest template state.
> * **Caution**: Creating multiple passes with a single external ID will cause any pass after the first one that is installed to fail and send an error message. **Make sure that each pass has a unique external ID**.
## CSV Formatting {#format-csv}
Find the headers you will use for your CSV:
1. Go to *Templates*.
1. Select the template that will serve as the base model for
your passes, then click **Edit Design**.
1. Use the field names as the initial data in your CSV file. The field names
shown in this image are *Tier* and *Tier Name*.
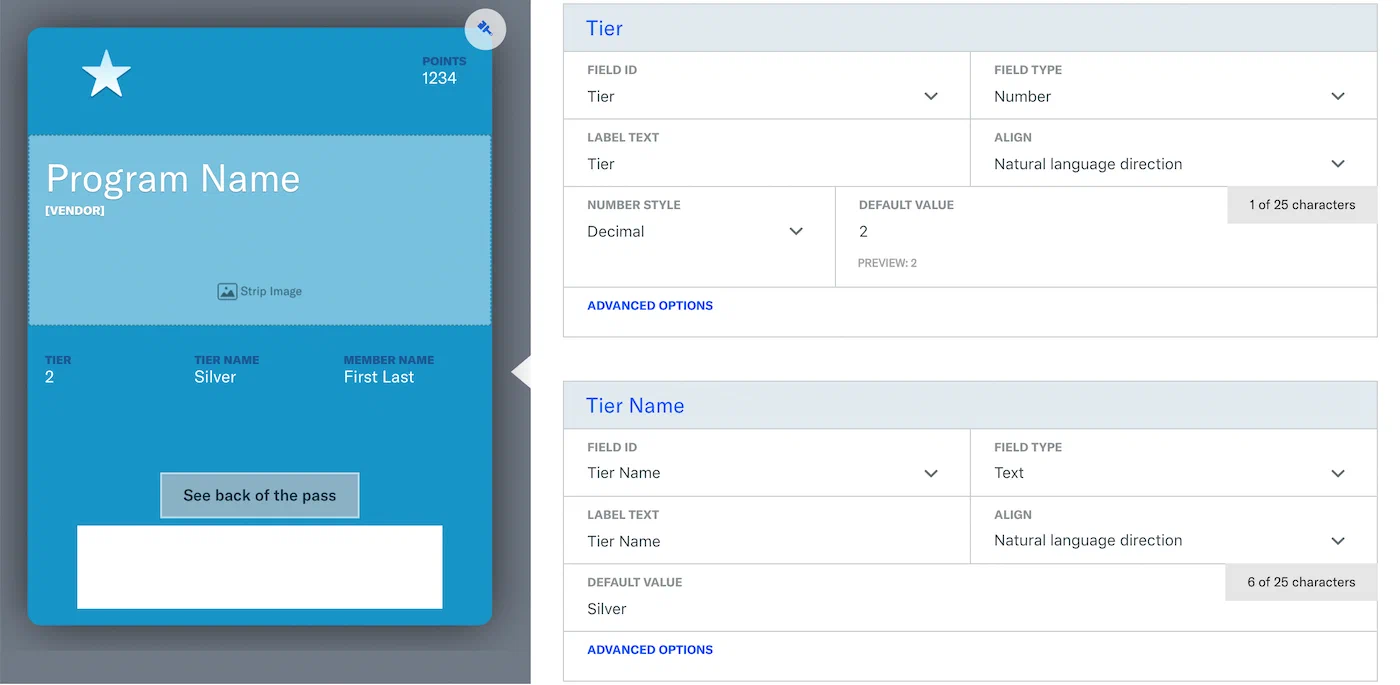
*Field names in the pass template*
Now you can create a CSV file with a header row that specifies field names, followed by rows specifying values for each field name. Each row represents a single pass.
> **Note:** You will be able to map your CSV headers to the correct Field Names after import.
We recommend your CSV file contain no more than 500,000 rows. The CSV file size limit is 250 MB, but there is no limit to the number of passes you can create this way.
In addition to columns specifying each field name, you can also include columns for:
* `barcode_value` : Provide custom barcode values for each pass.
* `externalId` : The external identifier value specifies a user ID in a backend system (e.g. a CRM database) that you can use to map a pass to your data. For example, if a customer receives a pass with an `externalId` value that links to an ID in your backend loyalty system. When your customer makes a purchase that earns loyalty points, you can update his or her pass can with this new data. This field *must* be unique. Airship will not process rows containing duplicate `externalId` values.
Here is the start of a valid CSV file:
*A sample CSV file for batch pass import*
> **Warning:** The only date format accepted for Google templates is YYYY-MM-DD.
## Upload Your CSV and Map Fields
1. Go to the same project and template used when [formatting your CSV](#format-csv).
1. Click **Batch Importer**.
1. Click **Select a .csv file** and choose your file.
1. Matched CSV headers and Field Names will auto-select. Use the dropdown menu
to select the correct Field Name per CSV header, or leave blank if there is
no corresponding Field Name or if you wish to not match to the CSV header,
e.g. a field name matches but you don't want it displayed on the pass.
1. Click **Confirm Mapping** after you have completed mapping each
field.
1. Enter your email address. This defaults to the email address in your
Airship account, but you can enter any valid email address.
1. Click **Process CSV**.
## Pass URLs
When your CSV file has finished uploading/validating, an email confirmation and a
download link will be sent to the provided address.
The validation process will search for errors, and if any are detected, the
email will direct you to the offending line(s). Once your CSV file has finished
uploading/validating, an updated CSV file containing `Pass ID` and
`Download URL` columns will be sent to the given address.

*The updated CSV file with pass download URLs*
Each URL can be used to download the associated pass. The updated file will
also be available via the **Download CSV file** button.
When you receive the processed CSV file, an additional column titled *Download
URL* is added to the file. The URLs in the Download URL column are formatted like so:
```text
https://wallet-api.urbanairship.com/v1/pass/dynamic/2931580989855247863.50827_457a6a69-cea8-4bbe-860a-aba56ee5a269
```
In the above example URL, `2931580989855247863.50827_457a6a69-cea8-4bbe-860a-aba56ee5a269`
is the internal reference ID that you will need when referencing this pass via
the Wallet API.
> **Note:** URLs that are not activated will expire after 6 months.
# Event tickets
> Event tickets in a mobile wallet project are different from most other pass types. This document covers information specific to setting up events and issuing adaptive links for event tickets.
While you can create and modify event ticket templates from the [mobile wallet](https://www.airship.com/docs/guides/wallet/getting-started/wallet/) dashboard,
you must perform all other operations — creating and modifying events, creating [adaptive links](https://www.airship.com/docs/reference/glossary/#adaptive_link) with event and attendee information, etc. — through the API. See the [Events
API](https://www.airship.com/docs/developer/rest-api/wallet/operations/events/)
and [Multiple Adaptive Links APIs](https://www.airship.com/docs/developer/rest-api/wallet/operations/adaptive-links/#createboardingpassoreventticketadaptivelinks) for a complete
reference of methods
and payloads.
## Event Ticket Composition
An event ticket is an [Adaptive Link](https://www.airship.com/docs/reference/glossary/#adaptive_link) that references an event ticket template populated with one or more events and an array of attendees per ticket.
Because of the specific event and attendee information required for each
event ticket, you cannot create event tickets using the standard dashboard or
`/links/adaptive` methods. You must use the `/links/adaptive/multiple/project`
endpoint instead.
An event ticket works like a standard adaptive link, with the following
differences.
1. Event ticket templates are referenced by ID. You must provide at least one iOS or Android template ID in the adaptive link payload.
1. The adaptive link payload references an `eventId`, `eventExternalId`, or contains a complete [event object](https://www.airship.com/docs/developer/rest-api/wallet/schemas/event-tickets/#eventrequest).
1. Each event in an event ticket adaptive link request includes an array of `attendees`. The endpoint generates an adaptive link for each attendee.
1. Assets referenced by ID (templates, events, etc.) must belong to the same
project; you cannot specify events or templates belonging to different
projects when creating an event ticket.
## Events
An *Event* is the part of an event ticket representing the venue and times of an event. You can make changes to an event to easily update passes for attendees. You can create events either:
* Using the `POST` method for the `/events` endpoint.
* By providing an event payload when creating adaptive links.
In both cases, the result of your request is an `eventId` or `eventExternalId`that
you can use to reference the event. After you create an event, you can modify it
from the `/events` endpoint. Any changes you make — moving the venue, pushing back
event times, etc. — automatically propagate to event tickets (adaptive links) that
reference the event.
The example below represents a single baseball game that you can use when generating tickets for attendees. You can edit the event to update the passes of all attendees.
**Event request example**
```http
POST /v1/events/project//id/ HTTP/1.1
Authorization: Basic
Content-Type: application/json
{
"fields": {
"eventName": {
"label": "Event",
"value": "LA Dodgers at SF Giants"
},
"venueTitle": {
"label": "Venue",
"value": "AT&T Park"
},
"venueAddress": {
"label": "Address",
"value": "24 Willie Mays Plaza\nSan Francisco, CA 94107"
},
"doorsOpen": {
"label": "Doors Open",
"value": "2019-09-25T08:35:00"
},
"startTime": {
"label": "Start Time",
"value": "2019-09-25T09:00:00"
},
"endTime": {
"label": "End Time",
"value": "2019-09-25T11:00:00"
}
},
"passGroups": ["giants_2019-09-25"]
}
```
### External IDs for Events
You can create an event with a custom identifier using the
`/v1/events/project/id/{projectExternalId}/id/{eventExternalId}` endpoint or by providing an `eventExternalId`
when you provide an event object as a part of an adaptive link request. A request
specifying an external event ID returns the custom identifier as `eventExternalId`,
which you can use to reference events in lieu of the
standard `eventId` in subsequent payloads, including the request to create event ticket
adaptive links.
### Pass Groups for Events {#pass-groups}
You can group events together, so that you can modify multiple events simultaneously — something you might need to do for multiple events at the same venue, e.g., a concert with a backstage pass, baseball game with a pre-game or field-level event, etc.
To do this, you can assign [events](https://www.airship.com/docs/reference/glossary/#wallet_event) to `passGroups` — plain text strings, similar to tags for passes. You can assign pass groups in any payload where you create an event or after you create an event using `/passgroups` endpoints.
**Add a pass group to an existing event with an external ID**
```http
POST /v1/events/project/id//id//passGroups HTTP/1.1
Authorization: Basic
Content-Type: application/json
{
"passGroups": [
"giants_2019-09-25"
]
}
```
You can get a list of, or modify, all the events belonging to a `passGroup`. When you modify a pass group, you only need to provide the individual fields that you want to update for all events in the pass group. Any passes generated from events in the group are automatically updated accordingly.
**Update all events in a pass group**
```http
PUT /v1/events/project/12345/passGroups/giants_2019-09-25 HTTP/1.1
Authorization: Basic
Content-Type: application/json
{
"fields": {
"venueTitle": {
"value": "Oracle Park"
}
}
}
```
## Attendees
The `attendees` array represents pass holders. Each object in the array represents an individual attendee and results in an individual adaptive link.
The `attendees` array appears within an event object when creating
event ticket adaptive links.
**Example event ticket with attendee array**
```json
{
"iosTemplateExternalId": "giantsBaseballTicket-ios",
"androidTemplateExternalId": "giantsBaseballTicket-android",
"payload":{
"events":[
{
"eventExternalId": "dodgersAtGiants-2019-09-25",
"attendees":[
{
"adaptiveLinkExternalId": "",
"fields":{
"ticketHolderName": { "label": "Name", "value":"SMITH/JOE" },
"seat": { "value":"33" },
"ticketType": { "value":"VIP" },
"barcode_value": { "value": "1234" },
"barcodeAltText": { "value": "1234" },
"faceValue": { "value": "50" }
}
}
]
}
]
}
}
```
## Google Wallet Event Ticket Templates
Event ticket templates are not as customizable as other template types. Many
of the fields on an event ticket adaptive link are required and cannot be moved
or customized in any way.
You can set colors, logos, and otherwise customize the general feel of your
event tickets. But event tickets templates take a defined set of information
(from both `events` and `attendees`) and do not offer as much variance as other
pass types that take a wider and more customizable range of information.
In the dashboard template editor, you can provide sample event data to test the look
and feel of your pass. The event data you fill out in the template editor is purely
an example to help you visualize your event ticket. It is not saved as an event or
used when creating event tickets.
> **Important:** The event information you enter when creating your template is only to help you design your template and send test passes; it is overwritten by a [event object](https://www.airship.com/docs/developer/rest-api/wallet/schemas/event-tickets/#eventrequest) when you create event tickets. See the [Event Ticket Request object](https://www.airship.com/docs/developer/rest-api/wallet/schemas/event-tickets/#eventticketrequest) for information about the event object or ID you must provide when creating passes.
> **Note:** In general, you should set
> set `ignoresTimeZone: true` for template fields that take date-time values. Event
> dates and times are typically UTC local to the venue;
> setting `ignoresTimeZone: true` prevents Apple Wallet from modifying times
> based on the time zones of attendees' devices.
## Apple Wallet Event Ticket Templates
While `event` and `attendee` fields are native to Google Wallet templates, they are not native to Apple Wallet templates. You must name fields on your Apple Wallet template according to the `event` and `attendee` schemas to support event ticket adaptive links. See [Event Ticket Objects](https://www.airship.com/docs/developer/rest-api/wallet/schemas/event-tickets/) for a complete list of the field names your template should use.
* If you create your Apple Wallet event ticket template through the **dashboard**, you must rename fields on your template to match `event` and `attendee` object fields through the API.
* If you create your Apple Wallet event ticket template through the **API**, you must name fields identically to `event` and `attendee` objects.
**Example default Apple Wallet field names and supported event ticket equivalents:**
| Default field name | Rename field to |
|--------------------|-------------------------------------|
| `Seat` | `seat` |
| `Row` | `row` |
| `Vendor Name` | `venueTitle` |
| `Section` | `section` |
| `Ticket Details` | `finePrint`
| `Location` | `venueAddress` |
> **Important:** The event information you enter when creating your template is only to help you design your template and send test passes; it is overwritten by a [event object](https://www.airship.com/docs/developer/rest-api/wallet/schemas/event-tickets/#eventrequest) when you create event tickets. See the [Event Ticket Request object](https://www.airship.com/docs/developer/rest-api/wallet/schemas/event-tickets/#eventticketrequest) for information about the event object or ID you must provide when creating passes.
## Adaptive Links for Event Tickets
Event ticket adaptive links are adaptive link that generate or
return platform-appropriate passes of the `eventTicket` type. They are created from
event ticket templates and associated with `events` and `attendees`.
> **Note:** You must use the `/links/adaptive/multiple/project/` endpoint to create event tickets.
> While event ticket adaptive links have a similar request structure to other
> adaptive links, you cannot create event tickets through the standard
> `/links/adaptive` endpoint.
When you create an event ticket adaptive link, you can specify events by `eventId` (returned when creating an event), or you can create the event as
a part of the adaptive link request. Creating an event as a part of an adaptive link
request is the same as creating an event ticket through the `/events` endpoint: the
adaptive link response will return an `eventId` or `eventExternalId` that you can
use to reference or modify the event later on.
> **Note:** Templates and events in an adaptive link payload must belong to the same
> project.
Within each event, you will specify `attendees` — an array of objects, each
object representing an individual event ticket holder. In general, you should
set an `adaptiveLinkExternalId` for each attendee. You will modify event
ticket adaptive links with a `POST` to the `/v1/links/adaptive/multiple/id/{adaptiveLinkExternalId}`
endpoint; you cannot modify an event with an `adaptiveLinkId`
in the same way.
**Example adaptive link request**
```http
POST /v1/links/adaptive/multiple/project/id/ HTTP/1.1
Authorization: Basic
Content-Type: application/json
{
"iosTemplateExternalId": "",
"androidTemplateExternalId": "",
"payload":{
"events":[
{
"eventExternalId": "",
"fields":{
"eventName": { "value":"LA Dodgers at SF Giants" },
"venueTitle": { "value":"AT&T Park" },
"venueAddress": { "label": "Address", "value":"24 Willie Mays Plaza\nSan Francisco, CA 94107" },
"doorsOpen": { "label": "Doors Open", "value":"2019-09-25T08:35:00" },
"startTime": { "label": "Start Time", "value":"2019-09-25T09:00:00" },
"endTime": { "label": "End Time", "value":"2019-09-25T11:00:00" }
},
"attendees":[
{
"adaptiveLinkExternalId": "",
"fields":{
"ticketHolderName": { "label": "Name", "value":"SMITH/JOE" },
"seat": { "value":"33" },
"ticketType": { "value":"VIP" },
"barcode_value": { "value": "1234" },
"barcodeAltText": { "value": "1234" },
"faceValue": { "value": "50" }
}
},
{
"adaptiveLinkExternalId": "",
"fields":{
"ticketHolderName": { "label": "Name", "value":"SMITH/SALLY" },
"seat": { "value":"34" },
"ticketType": { "value":"VIP" },
"barcode_value": { "value": "1235" },
"barcodeAltText": { "value": "1235" },
"faceValue": { "value": "50" }
}
}
]
}
]
}
}
```
**Adaptive link response**
```http
HTTP/1.1 200 OK
Content-Type: application/json; charset=utf-8
[
{
"adaptiveLinkId": "",
"adaptiveLinkExternalId": "",
"iosTemplateId": "iosTemplateId>",
"iosTemplateExternalId": "",
"androidTemplateId": "",
"androidTemplateExternalId": "",
"eventId": 476,
"eventExternalId": "",
"url": "https://wallet-api.urbanairship.com/v1/pass/",
"iosUrl": "https://wallet-api.urbanairship.com/v1/pass//ios",
"androidUrl": "https://wallet-api.urbanairship.com/v1/pass//android",
"createdAt": "2018-09-24T09:12:32Z",
"updatedAt": "2018-09-24T09:15:32Z",
"isPersonalized": "false",
"availablePasses": 1000000,
"iosPassLinkId": "a5711a29-7b38-41f2-8202-8f792df89b0b",
"androidPassLinkId": "c1f512e5-fda3-4ddf-82c6-066c5681161d",
"status": 200
},
{
"adaptiveLinkId": "",
"adaptiveLinkExternalId": "",
"iosTemplateId": "iosTemplateId>",
"iosTemplateExternalId": "",
"androidTemplateId": "",
"androidTemplateExternalId": "",
"eventId": 476,
"eventExternalId": "",
"url": "https://wallet-api.urbanairship.com/v1/pass/",
"iosUrl": "https://wallet-api.urbanairship.com/v1/pass//ios",
"androidUrl": "https://wallet-api.urbanairship.com/v1/pass//android",
"createdAt": "2018-09-24T09:12:32Z",
"updatedAt": "2018-09-24T09:15:32Z",
"isPersonalized": "false",
"availablePasses": 1000000,
"iosPassLinkId": "a5711a29-7b38-41f2-8202-8f792df89b0b",
"androidPassLinkId": "c1f512e5-fda3-4ddf-82c6-066c5681161d",
"status": 200
},
]
```
## Modifying Events
Any endpoint you can provide an event payload to returns an `eventId`. You can
look up, modify, or delete an event using its ID in the path of the `/v1/events`
endpoint, regardless of whether you created the event using the `/v1/events` endpoint or provided all event information directly in an adaptive link payload.
If you assigned your events to [Pass Groups](https://www.airship.com/docs/reference/glossary/#pass_groups), you can target the pass group to modify a common field across multiple events in a group. For example, if you need to update `venueTitle` for a group of events, you could target the group and with a single update rather than updating each flight individually. When you update events in a pass group, event tickets associated with events in the group are updated accordingly.
**Modify all events belonging to a pass group**
```http
PUT /v1/events/project/12345/passGroups/giants_2019-09-25 HTTP/1.1
Authorization: Basic
Content-Type: application/json
{
"fields": {
"venueTitle": {
"value": "Oracle Park"
}
}
}
```
You can also modify an event while modifying corresponding event tickets, using a `POST` to `/v1/links/adaptive/multiple/project/id/{externalProjectId}`, specifying an existing event and existing `adaptiveLinkExternalId` values for the tickets you want to modify in the payload.
## Modifying, Looking-up, and Deleting Event Tickets
Each attendee represents receives their own event ticket adaptive link. You can modify
event ticket adaptive links using a POST to `/v1/links/adaptive/multiple/project/id/{externalProjectId}`, specifying an existing event and `adaptiveLinkExternalId` value for each event ticket you want to modify in the payload; Airship treats this call as a `PUT` and updates event tickets for the specified adaptive links. You cannot do the
same with the standard `adaptiveLinkId`. Therefore, you should expect to set external
IDs for your adaptive links.
You can look up and delete event ticket adaptive links using the standard GET and
DELETE methods for the `/v1/links/adaptive/{adaptiveLinkId}` and `/v1/links/adaptive/id/{adaptiveLinkExternalId}` endpoints.
# Flights and boarding passes
> Set up flights and boarding passes using Adaptive Links.
Managing boarding passes in a wallet project
involves some unique differences from other pass types. This document covers
information about flights, passengers, and boarding passes.
> **Note:** While you can create and modify boarding pass templates from the dashboard,
> all other operations — flight creation, creating adaptive links with flight and passenger information, etc. — are performed through the API.
## Boarding Pass Composition
A boarding pass is an [Adaptive Link](https://www.airship.com/docs/reference/glossary/#adaptive_link) that references a
boarding pass template, populated with one or more flights and one or more
passengers per flight.
While boarding passes resemble adaptive links for other pass types, you cannot create
a boarding pass using the standard dashboard or `/links/adaptive`
methods. You must use the `/links/adaptive/multiple/project` endpoints instead.
A boarding pass works much like a standard adaptive link, with the following differences.
* Boarding pass templates are referenced by ID. You must include at least one of `iosTemplate` or `googleTemplate` (or external ID equivalents `iosTemplateExternalId`, `androidTemplateExternalId`) in an adaptive link payload.
* The adaptive link payload references a `flightId`, `flightExternalId`, or contains a complete [flight object](https://www.airship.com/docs/developer/rest-api/wallet/schemas/flights-and-boarding-passes/#flightrequest).
* Each flight in a boarding pass adaptive link request includes an array of `passengers`. The request generates an adaptive link for each passenger in the array.
* Assets referenced by ID (templates, flights, etc.) must belong to the same project; you cannot use combinations of flights or templates across projects to create a boarding pass.
## Flights
You can create flights either:
* Using the `POST` method for the `/flights` endpoint. The `/flights` endpoint is a convenient way to create and modify flight information, independent of adaptive links and pass holders.
* By providing a flight payload when creating adaptive links.
In both cases, the result of your request is a `flightId` or `flightExternalId`that
you can use to reference the event — either to create boarding passes or to modify flight information from the `/flights` endpoint.
Any changes you make to an flight — moving the gate, changing departure or arrival times, etc. — automatically propagate to boarding passes (adaptive links) that
reference the flight.
**Flight request example**
```http
POST /v1/flights/project/ HTTP/1.1
Authorization: Basic
Content-Type: application/json
{
"fields": {
"flightNumber": {
"value": "815"
},
"airlineCode": {
"value": "OA"
},
"airlineName": {
"value": "Sabine Airlines"
},
"departureAirport": {
"label": "San Francisco",
"value": "SFO"
},
"departureGate": {
"label": "Gate #",
"value": "25"
},
"boardingTime": {
"value": "2018-07-30T08:35:00"
},
"departureTime": {
"value": "2018-07-30T09:00:00"
},
"arrivalAirport": {
"label": "Portland",
"value": "PDX"
},
"arrivalTime": {
"value": "2018-07-30T11:00:00"
},
"flightStatus": {
"value": "scheduled"
}
},
"passGroups": [
"sfo-pdx-20180730"
]
}
```
### External IDs for Flights
You can create a flight with a custom identifier using the `/v1/flights/project/id/{projectExternalId}/id/{flightExternalId}`
endpoint. A request specifying an external
flight ID returns the custom identifier as `flightExternalId`, and you reference flights
using this external identifier in lieu of the standard `flightId` in subsequent payloads,
including the request to create boarding pass adaptive links.
### Pass Groups for Flights and Boarding Passes {#pass-groups}
You can group flights together, so that you can modify multiple flights simultaneously — something you might need to do for flights with multiple stops.
To do this, you can assign flights to `passGroups` — plain text strings, similar to tags for passes. You can assign pass groups in any payload where you create a flight or after you create a flight using `/passgroups` endpoints.
**Add a pass group to an existing flight with an external ID**
```http
POST /v1/flights/project/id//id//passGroups HTTP/1.1
Authorization: Basic
Content-Type: application/json
{
"passGroups" :["sfo-pdx-20180730", "pdx-yvr-20180730"]
}
```
You can then return a list of all flights bearing the `passGroup` string, or modify the group. When you modify a pass group, you only need to provide the individual fields that you want to update for all flights in the pass group. Any passes generated from flights in the group are automatically updated accordingly.
**Update all flights in a pass group**
```http
PUT /v1/flights/project/12345/passGroups/sfo-pdx-20180730 HTTP/1.1
Authorization: Basic
Content-Type: application/json
{
"fields": {
"departureTime": {
"value": "2018-08-30T10:00:00"
}
}
}
```
## Passengers
The `passengers` array represents pass holders. Each object in the array is an individual pass holder and results in adaptive link. The `passengers` array appears within a flight object when creating boarding passes.
**Example boarding pass request with an array of passengers**
```http
POST /v1/links/adaptive/multiple/project/ HTTP/1.1
Authorization: Basic
Content-Type: application/json
{
"iosTemplateExternalId": "boardingPass-ios",
"androidTemplateExternalId": "boardingPass-android",
"payload":{
"flights":[
{
"flightExternalId": "sfo-tac-2018-08-30",
"passengers": [
{
"fields": {
"passengerName": { "value": "SMITH/JOE" },
"seatNumber": { "value": "13A" },
"seatClass": { "value": "Economy" },
"boardingGroup": { "value": "5" },
"securityProgram": { "value": "tsaPrecheck" },
"confirmationCode": { "value": "E4583B" },
"eticketNumber": { "value": "20595923485" },
"frequentFlyerProgramName": { "value": "Rapid Rewards®" },
"frequentFlyerNumber": { "value": "34525" },
"drinkCoupon": { "label": "Drink Coupon", "value": "Premium Drink" },
"fareType": { "label": "Fare Type", "value": "Business Select" },
"specialAssistance": { "label": "Special Assistance", "value": "Wheelchair" }
}
}
]
}
]
}
}
```
## Google Wallet Boarding Pass Templates
Google boarding pass templates are not as customizable as other template types. Many
of the fields on a boarding pass are required, like seat number, gate number,
etc. These fields cannot have default values, nor can they be moved or
customized in any way.
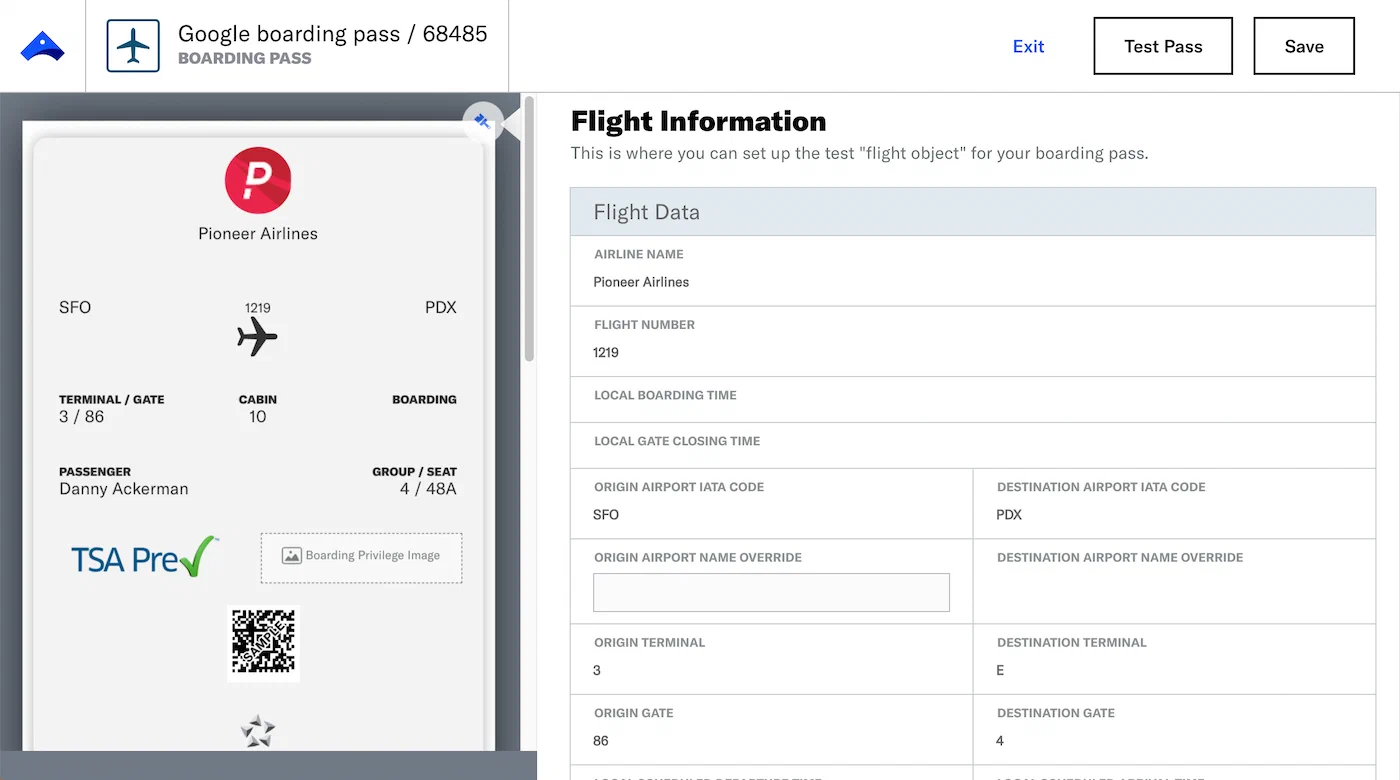
*The boarding pass template in the dashboard*
You can set colors, logos, and otherwise customize the general feel of your
boarding pass. But with boarding passes, more so than other pass types, you
will focus less on templates, and much more on modifying the information that
populates adaptive links built from those templates.
> **Important:** The flight information you enter when creating your template is only to help you design your template and send test passes; it is overwritten by a [flight object](https://www.airship.com/docs/developer/rest-api/wallet/schemas/flights-and-boarding-passes/#flightrequest) when you create boarding passes. See the [Boarding Pass Request object](https://www.airship.com/docs/developer/rest-api/wallet/schemas/flights-and-boarding-passes/#boardingpassrequest) for information about the flight object or ID you must provide when creating passes.
> **Note:** The Google Wallet boarding pass type supports airline boarding passes only. It does not support ferry, bus, or train tickets.
## Apple Wallet Boarding Pass Templates
While `flight` and `passenger` fields are native to Google Wallet templates, they are not native to Apple Wallet templates. You must name fields on your Apple Wallet template according to the `flight` and `passenger` schemas to support event ticket adaptive links. See [Flight and Boarding Pass Objects](https://www.airship.com/docs/developer/rest-api/wallet/schemas/flights-and-boarding-passes/) for a complete list of the field names your template should use.
* If you create your Apple Wallet Boarding Pass template through the dashboard: you must rename fields on your template to match `flight` and `passenger` object fields through the API.
* If you create your Apple Wallet Boarding Pass template through the API: you must name fields identically to `flight` and `passenger` objects.
> **Important:** The flight information you enter when creating your template is only to help you design your template and send test passes; it is overwritten by a [flight object](https://www.airship.com/docs/developer/rest-api/wallet/schemas/flights-and-boarding-passes/#flightrequest) when you create boarding passes. See the [Boarding Pass Request object](https://www.airship.com/docs/developer/rest-api/wallet/schemas/flights-and-boarding-passes/#boardingpassrequest) for information about the flight object or ID you must provide when creating passes.
> **Note:** For date-time fields on iOS boarding pass templates, you may want to set
> set `ignoresTimeZone: true`. Date-times for flights are set local to an airport terminal.
> Setting `ignoresTimeZone: true` prevents Apple Wallet from modifying times based on
> recipients' time zones.
**Example default Apple Wallet field names and supported boarding pass equivalents**
| Default field name | Rename field to |
|--------------------|-------------------------------------|
| `Seat` | `seatNumber` |
| `Depart Time` | `departureTime` |
| `Departure Airport` | `departureAirport` |
| `Class` | `seatClass` |
| `Arrival Airport` | `arrivalAirport` |
| `Passenger` | `passengerName` |
| `Ticket #` | `eticketNumber` |
| `Terminal Gate` | `departureTerminal` |
| `Flight #` | `flightNumber` |
## Adaptive Links for Boarding Passes
A boarding pass adaptive link is an adaptive link that generates or returns
platform-appropriate passes of the boarding pass type. It is created from
boarding pass templates and associated with `flights` and `passengers`.
> **Note:** You must use the `/links/adaptive/multiple/project/` endpoint to create boarding
> passes. While a boarding pass adaptive link has a similar request structure to other
> adaptive links, you cannot create boarding pass adaptive links through the standard
> `/links/adaptive` endpoint.
When you create an adaptive link, you can specify flights by `flightId` — the
identifier from a successful POST to the `/flights` endpoint. Templates and flights
referenced by ID must belong to the same project.
Within each flight, you will specify `passengers` — an array of objects, each
object representing an individual passenger with information like their
seat number, boarding group, etc.
**Example adaptive link request**
```http
POST /v1/links/adaptive/multiple/project/id/ HTTP/1.1
Authorization: Basic
Content-Type: application/json
{
"availablePasses": 1,
"iosTemplateExternalId": "",
"androidTemplateExternalId": "",
"payload": {
"isEventTicketUpdatePermitted": false,
"flights": [
{
"flightId": "",
"passengers": [
{
"adaptiveLinkExternalId": "",
"fields": {
"seatNumber": { "value": "13A" },
"confirmationCode": { "value": "E4583B" },
"passengerName": { "value": "SMITH/JOE" },
"specialAssistance": { "label": "Special Assistance", "value": "Wheelchair" }
}
},
{
"adaptiveLinkExternalId": "",
"fields": {
"seatNumber": { "value": "13B" },
"confirmationCode": { "value": "E4583B" },
"passengerName": { "value": "SMITH/SALLY" }
}
},
{
"adaptiveLinkExternalId": "",
"fields": {
"seatNumber": { "value": "13C" },
"confirmationCode": { "value": "E4583B" },
"passengerName": { "value": "SMITH/SAM" }
}
}
]
}
]
}
}
```
**Adaptive link response**
```http
HTTP/1.1 201 Created
Content-Type: application/json; charset=utf-8
[
{
"status": 201,
"adaptiveLinkId": "",
"adaptiveLinkExternalId": "",
"iosTemplateId": "",
"iosTemplateExternalId": "",
"androidTemplateId": "",
"androidTemplateExternalId": "",
"url": "https://wallet-api.urbanairship.com/v1/pass/",
"iosUrl": "https://wallet-api.urbanairship.com/v1/pass//ios",
"androidUrl": "https://wallet-api.urbanairship.com/v1/pass//android",
"createdAt": "2018-07-05T09:12:32Z",
"updatedAt": "2018-07-05T09:12:32Z",
"isPersonalized": "false",
"availablePasses": 1000000,
"flightId": 465,
"flightExternalId": "",
"iosPassLinkId": "eb94e8e0-4353-4e0b-bfe9-cfd21c52a540",
"androidPassLinkId": "41c1ea48-f469-4968-b610-a98629ea19bc"
}
]
```
## Modifying Flights and Passengers
Any endpoint supporting a `flight` payload will return a `flightId`. You can
look up, modify, or delete a flight using this ID in the path of the `/v1/flights`
endpoint, regardless of whether you created the flight using the `/v1/flights` endpoint or provided all flight information directly in an adaptive link payload.
If you assigned your flights to [Pass Groups](https://www.airship.com/docs/reference/glossary/#pass_groups), you can target the pass group to modify a common field across multiple flights in a group. For example, if you need to update `departureTime` for a group of flights, you could target the group and with a single update rather than updating each flight individually. When you update flights in a pass group, boarding passes associated with flights in the group are all updated accordingly.
**Modify all flights belonging to a pass group**
```http
PUT /v1/flights/project/12345/passGroups/sfo-pdx-20180730 HTTP/1.1
Authorization: Basic
Content-Type: application/json
{
"fields": {
"departureTime": {
"value": "2018-08-30T10:00:00"
}
}
}
```
Passenger objects exist on adaptive links (boarding passes). If you want to modify
passengers on a flight (if a passenger moves seats, or cancels their ticket), you
will do so by modifying adaptive links directly.
You can also modify a flight at the same time you modify corresponding boarding passes, using a `POST` to `/v1/links/adaptive/multiple/project/id/{externalProjectId}`
specifying both an existing flight and the existing `adaptiveLinkExternalId` for the boarding passes you want to modify in the payload
## Modifying, Looking-up, and Deleting Boarding Passes
You can modify boarding passes using a POST to `/v1/links/adaptive/multiple/project/id/{externalProjectId}`
specifying both an existing flight and the existing `adaptiveLinkExternalId` for the boarding passes you want to modify in the payload; Airship treats this call as a `PUT` and updates boarding passes for the specified adaptive links. You cannot do the
same with standard `adaptiveLinkId`. Therefore, you should expect to set external
IDs for your adaptive links.
You can look up and delete boarding pass adaptive links using the standard GET and
DELETE methods for the `/v1/links/adaptive/{adaptiveLinkId}` and `/v1/links/adaptive/id/{adaptiveLinkExternalId}`
endpoints.
**Update the seat number for a passenger to 25A**
```http
POST /v1/links/adaptive/multiple/project/7341 HTTP/1.1
Authorization: Basic
Content-Type: application/json
{
"iosTemplateId": 140633,
"androidTemplateId": 122802,
"projectId": 7341,
"payload": {
"flights": [
{
"flightId": 17385,
"passengers": [
{
"adaptiveLinkExternalId": "test_user-1011",
"fields": { "seatNumber": {"value": "25A"} }
}
]
}
]
}
}
```
## Related Links
> * [Wallet API: Flights](https://www.airship.com/docs/developer/rest-api/wallet/operations/flights/)
> * [Wallet API: Adaptive Links for Boarding Passes](https://www.airship.com/docs/developer/rest-api/wallet/operations/adaptive-links/#createboardingpassoreventticketadaptivelinks)
# Distributing Pass Links to your Audience
> You can send a pass link to a user via an app, email, SMS, or any other medium.
You can distribute pass URLs over any channel you use to communicate with your audience.
It's important to remember that you are sending a link to generate and install a pass on the device, not an
attachment to a message body. You should send adaptive links over a medium that you
expect to persist, in case your users decide to dismiss a notification alert and install the pass later.
If you are also an Airship messaging customer, you can include an adaptive link in your message. The way your audience uses an adaptive link depends on your message type:
* When the user taps or clicks the notification.
* When the user taps a button in the message.
* Include the link in the body of the message.
While you can include a pass link in the body of a message sent to **any channel**, you can configure messages you send to apps or web browsers to open the pass link based on a user interaction.
* **Push Notifications and In-App Messages:** When creating your message, choose the action that occurs when a user clicks or taps the message. Select either the *Web Page* action and paste the pass link, or the *Adaptive Link* action and select an adaptive link from the list.
* **In-App Automation:** Choose what action occurs when a user taps a button in your message and associate the pass link with the button.
Apple Wallet passes have an additional option: when the user taps your notification, your app will open and prompt the user to view or add the pass.
* Add the Airship In-App Wallet Action to your app.
* When creating a push notification or in-app message in the dashboard, add the pass link in a *Custom Key*.
Caveats for Google Wallet and Apple Wallet pass links are noted below. You can also distribute an [Adaptive Link](https://www.airship.com/docs/reference/glossary/#adaptive_link) instead.
* **Apple Wallet:** When the user clicks a pass link, the device’s default browser will open the link and render the pass, and the user may then save the pass to the device's Wallet app.
* **Google Wallet:** When the user clicks the pass link, the device’s Google Wallet app will open the link, and the user may then save the pass.
### Single- vs Multi-Use Public URL
When generating a pass via the
API, you can
create a publicly accessible URL for the pass, hosted at
https://wallet-api.urbanairship.com. The Public URL can be either a single
or multiple (multi-use) pass type, referring to the number of times the pass
can be be downloaded.
-
Use the Single option if you are creating a unique pass. A Single Public
URL can only be downloaded once, but the user can share the pass from the
Apple Wallet directly.
-
Use the Multiple option if the pass is non-unique and can be downloaded
by multiple devices and shared many times.
> **Important:** A public URL is required for Android and optional for iOS.
> **Note:** The URLs returned by the [CSV Batch Importer](https://www.airship.com/docs/guides/wallet/user-guide/create-links/csv-batch-import/)
> are multi-use passes — they can be downloaded by multiple devices.
### Apple vs Google URL Differences
From the user’s perspective, the pass installation experience is similar on either iOS
or Android — the pass is ultimately downloaded directly to either the Apple Wallet or
Google Wallet app. However, there are differences between the pass URLs:
-
Apple Wallet: Pass URLs generated from Apple Wallet templates point to
a stored .pkpass file. A .pkpass file can be considered similar to a PDF or
any other document that you might link to.
-
Google Wallet: Pass URLs generated from Google Wallet templates provide a
deep link from Google into the Google Wallet app so that the pass can be
downloaded directly without requiring a browser window to facilitate the
request.
For additional detail about the publicUrl object and pass deep linking, see:
API: Passes.
### Push Notification or In-App Message
Configuration steps vary between composers, but the *Content* steps for push notifications and in-app messages have the same relevant options. Refer to the [Airship composers](https://www.airship.com/docs/guides/getting-started/ui/composer-navigation/) guide for full documentation.
1. In the *Content* step of a composer, enter your message text and select either:
* [Web Page](https://www.airship.com/docs/guides/messaging/messages/actions/) action and paste your pass link.
* [Adaptive Link action](https://www.airship.com/docs/guides/messaging/messages/actions/) action and select from the dropdown menu.
> **Note:** Only adaptive links created in the dashboard will appear in the dropdown list.
1. Complete the remaining steps in the composer setup.
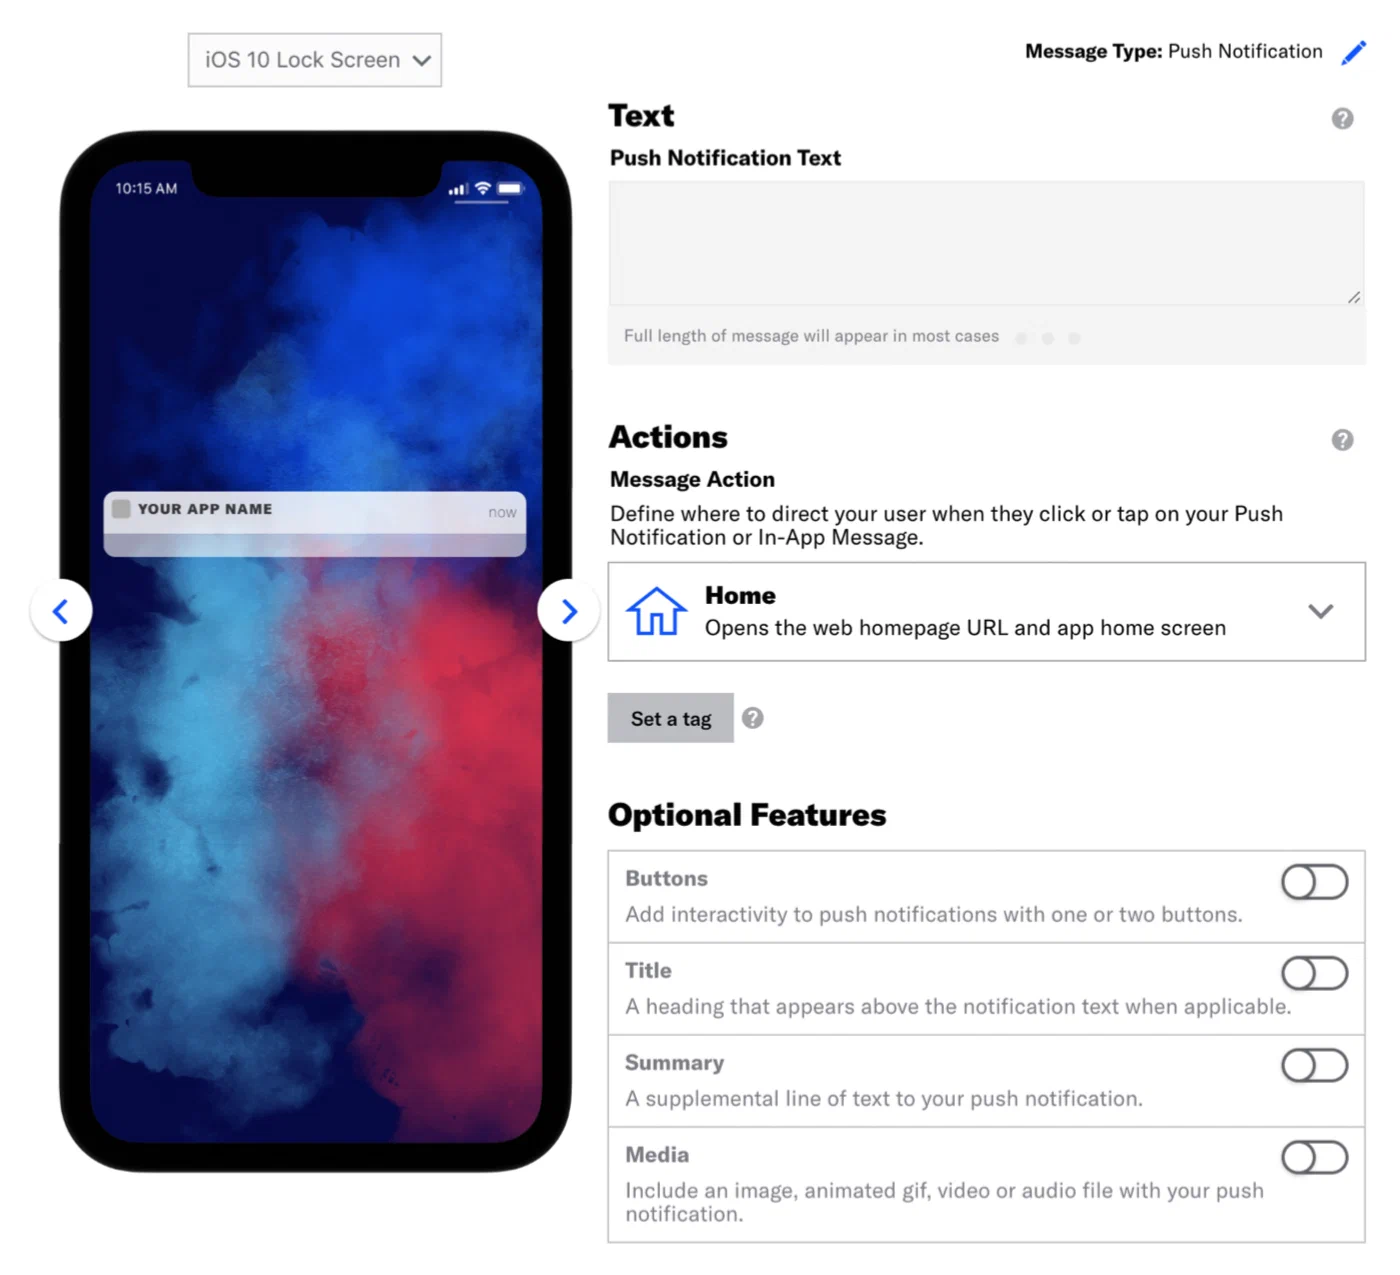
*Composing the push notification content*
### Push Notification using a Custom Key
First add the [Airship In App Wallet Action](https://github.com/urbanairship/ua-extensions/tree/master/AppleWallet) to your app so it can handle a Wallet custom key. This allows users to save passes directly in the app without being redirected to Safari. Then register the action in the app registry.
> **Note:** The Custom Key method is for Apple Wallet passes only.
Once your app is capable of handling a Wallet custom key, substitute the following Content and Delivery steps in each composer.
> **Note:** The configuration steps vary between composers, but the *Content* and *Delivery* steps have the same relevant options. The please refer to the individual tutorials for full documentation.
1. Follow the steps in these tutorials, selecting Push Notification as the message
type, and pause at the *Content* step.
* [Message Composer](https://www.airship.com/docs/guides/messaging/messages/create/)
* [Automation Composer](https://www.airship.com/docs/guides/messaging/messages/sequences/create-automation/)
* [A/B Test Composer](https://www.airship.com/docs/guides/experimentation/a-b-tests/messages/)
1. In the *Content* step, enter the text that will display in your message,
then select the [Home action](https://www.airship.com/docs/guides/messaging/messages/actions/).
1. Click *Delivery* in the header.
1. Select a delivery type, then enable
[Custom Keys](https://www.airship.com/docs/guides/messaging/messages/delivery/delivery-options/#custom-keys), and complete the configuration.
1. Select *iOS* from the platform dropdown menu
1. Enter the key and value:
* **key** = `wallet_action` or `^w`
* **value** = the public pass URL or the adaptive link URL
1. Complete the remaining steps in the composer.
### In-App Automation
1. In the *Actions* step of the [In-App Automation composer](https://www.airship.com/docs/guides/messaging/in-app-experiences/in-app-automation/create/), select either:
* [Web Page](https://www.airship.com/docs/guides/messaging/in-app-experiences/configuration/button-actions/#web-page) action and paste your pass link.
* [Adaptive Link](https://www.airship.com/docs/guides/messaging/in-app-experiences/configuration/button-actions/#adaptive-link) action and select an adaptive link from the dropdown menu.
> **Note:** Only adaptive links created in the dashboard will appear in the dropdown list.
1. Complete the remaining steps in the composer.
## API Examples
The examples below use this sample pass URL:
```text
https://wallet-api.urbanairship.com/v1/download/pass/9cde359c-c6b6-c6b6-c6b6-1159b754c89c
```
See [Actions](https://www.airship.com/docs/developer/rest-api/ua/schemas/push/#actionsobject) in the Airship API reference.
**Example `actions` object using the sample pass URL**
```json
{
"audience":{
"ios_channel": "b8f9b663-0a3b-cf45-587a-be880946e881"
},
"device_types":[ "ios" ],
"notification":{
"ios":{
"alert":"20% off Kung Fu classes!"
},
"actions":{
"open":{
"type":"url",
"content":"https://wallet-api.urbanairship.com/v1/download/pass/9cde359c-c6b6-c6b6-c6b6-1159b754c89c"
}
}
}
}
```
**Send automated message with adaptive link action through Airship**
```http
POST /api/pipelines HTTP/1.1
Authorization: Basic
Accept: application/vnd.urbanairship+json; version=3
Content-Type: application/json
{
"name":"Ticket Purchases",
"enabled": true,
"immediate_trigger": [
{
"custom_event": {
"key": "ticket_purchase"
}
}
],
"outcome":{
"push":{
"audience": {
"tag": "needs_ticket",
"group": "future_passengers"
},
"device_types":[
"ios",
"android",
],
"notification":{
"alert":"Tap to install your pass!",
"actions": {
"open": {
"type": "url",
"content": "https://wallet-api.urbanairship.com/v1/pass/adaptive/"
}
}
}
}
}
}
```
### API Push using a Custom Key
Use the `extra` key in the [iOS Override Object](https://www.airship.com/docs/developer/rest-api/ua/schemas/platform-overrides/#iosoverrideobject) to specify the pass URL.
**Example iOS override object with extra key using the sample pass URL**
```json
{
"audience":{
"ios_channel": "b8f9b663-0a3b-cf45-587a-be880946e881"
},
"device_types":[ "ios" ],
"notification":{
"ios":{
"alert":"20% off Kung Fu classes!",
"extra":{
"^w" : "https://wallet-api.urbanairship.com/v1/download/pass/9cde359c-c6b6-c6b6-c6b6-1159b754c89c"
}
}
}
}
```
## Personalizing Passes from Adaptive Links
> **Note:** You cannot personalize boarding passes or event tickets using query parameters. You must provide all values pass in the adaptive link `payload` object including passenger/attendee information.
When you send adaptive links, you can add query parameters to the link that will populate the pass when the user installs it.
For example: if you want to add an offer code, barcode value, member ID, and time/location to a pass, you could append query parameters to the adaptive link:
`https://wallet-api.urbanairship.com/v1/pass/adaptive/QXynXTbMhS?offercode=AUGUST&barcode=A1234567&tags=PST~OR&exid=A1234567`
> **Tip:** If you send a message using a template, you can use [Handlebars](https://www.airship.com/docs/reference/glossary/#handlebars) in the adaptive link action to automatically personalize adaptive links for your audience
> **Note:** You cannot personalize Google Wallet `class` fields with unique values. Any field preceded by `class` constitutes a class field. See [Google Wallet Pass Verticals documentation](https://developers.google.com/pay/passes/guides/overview/basics/about-google-pay-api-for-passes) for a full list of class fields for each pass type.
# Google Wallet deep links
> Use the Airship Android SDK to programmatically create and deep link Google Wallet passes in your app.
The following examples demonstrate how to create and deep link Google Wallet passes with the [Airship Android SDK](https://www.airship.com/docs/developer/sdk-integration/android/).
#### Android Kotlin
```kotlin
val field: Field = Field.Builder()
.setName("text")
.setValue("text value")
.setLabel("text label")
.build()
val passRequest = PassRequest.newBuilder()
.setAuth("User Name", "Airship API key")
.setTemplateId("template ID")
.addField(field)
.setTag("tag")
.build()
```
#### Android Java
```java
Field field = new Field.Builder()
.setName("text")
.setValue("text value")
.setLabel("text label")
.build();
PassRequest passRequest = PassRequest.newBuilder()
.setAuth("User Name", "Airship API key")
.setTemplateId("template ID")
.addField(field)
.setTag("tag")
.build();
```
#### Android Kotlin
```kotlin
passRequest.execute(object : Callback {
override fun onResult(pass: Pass) {
// Handle the pass
}
override fun onError(errorCode: Int) {
if (errorCode >= 500) {
// retry
}
}
})
```
#### Android Java
```java
passRequest.execute(new Callback() {
@Override
public void onResult(Pass pass) {
// Handle the pass
}
@Override
public void onError(int errorCode) {
if (errorCode >= 500) {
// retry
}
}
});
```
#### Android Kotlin
```kotlin
passRequest.cancel()
```
#### Android Java
```java
passRequest.cancel();
```
#### Android Kotlin
```kotlin
pass.requestToSavePass(applicationContext)
```
#### Android Java
```java
pass.requestToSavePass(getApplicationContext());
```
# Google Wallet Auto Linked Passes
> Send additional passes to users who already have a pass in their Google Wallet, automatically grouped with the existing pass.
## About Auto Linked Passes
Google Wallet's Auto Linked Passes feature automatically groups related passes together in a user's wallet. You use the Wallet API to link passes to a primary pass that the user already has, and Google Wallet handles the rest:
- The linked passes appear alongside the primary pass without the user needing to save or install them.
- The Wallet app displays a notification on the primary pass when a new linked pass arrives.
You can use auto-linking for all [Airship-supported Google Wallet pass types](https://www.airship.com/docs/guides/wallet/user-guide/reference/), and any pass type can serve as either the primary or linked pass. Because the user doesn't need to take any action, auto-linking increases the likelihood that they see and use the pass at the right moment.
Use this feature whenever a customer's journey involves multiple complementary passes:
- **Boarding pass + loyalty card** — When a frequent flyer already has your loyalty card in their Google Wallet, you can issue a boarding pass and link it to the loyalty card so the boarding pass appears alongside it automatically.
- **Event ticket + parking pass** — For a stadium or venue event, link a parking pass to the event ticket at the time of purchase. When the user opens their wallet on arrival, both passes are grouped and immediately accessible.
- **Boarding pass + lounge access** — When a business class traveler is issued a boarding pass, link their lounge access pass to it so they can locate it without a separate distribution step.
- **Member card + coupon** — During a promotional campaign, link a discount pass to a customer's existing member card so the offer appears in their wallet without requiring them to install it separately.
## Link passes
To link passes, submit a `POST` request to the [Wallet API](https://www.airship.com/docs/developer/rest-api/wallet/). The primary pass must be created using the Wallet API.
Three endpoints are available for linking passes, each based on how you identify the primary pass: by pass ID, by template ID and external pass ID, or by external template ID and external pass ID. In the request body, provide a `passURIs` array listing the passes to link. See [Pass URI formats](#pass-uri-formats) for supported formats.
Use the [Auto link passes to existing Google Pass](https://www.airship.com/docs/developer/rest-api/wallet/operations/google-passes-only/#autolinkedpassesforpassid) endpoint when you have the Airship-generated numeric ID for the primary pass.
**Link passes using a pass ID**
```http
POST /v1/pass/12345/linkedPasses HTTP/1.1
Authorization: Basic
Content-Type: application/json
{
"passURIs": ["v1/pass/adaptive/fqsl9UyW3O7", "v1/pass/adaptive/Xzq5O7lf262"]
}
```
Use the [Auto link passes to Google Pass with external ID](https://www.airship.com/docs/developer/rest-api/wallet/operations/google-passes-only/#autolinkedpassesforpassexternalid) endpoint when you have the Airship-generated template ID and your own external ID for the primary pass.
**Link passes using a template ID and external pass ID**
```http
POST /v1/pass/template/12345/id/boarding-pass-smith-815/linkedPasses HTTP/1.1
Authorization: Basic
Content-Type: application/json
{
"passURIs": ["v1/pass/adaptive/gqsl9UyW3O8", "v1/pass/template/id/lounge-template/id/lounge-smith-815"]
}
```
Use the [Auto link passes to Google Pass with external template ID](https://www.airship.com/docs/developer/rest-api/wallet/operations/google-passes-only/#autolinkedpassesforpassandtemplateexternalid) endpoint when you manage both the template and pass with your own external IDs.
**Link passes using an external template ID and external pass ID**
```http
POST /v1/pass/template/id/boarding-pass-template/id/boarding-pass-smith-815/linkedPasses HTTP/1.1
Authorization: Basic
Content-Type: application/json
{
"passURIs": ["v1/pass/template/id/parking-template/id/parking-lot-b-007", "v1/pass/template/id/lounge-template/id/lounge-smith-815"]
}
```
Each of these endpoints returns HTTP 200 with a `ticketId` on success. Use the `ticketId` to look up the status of the operation. See the [Tickets API](https://www.airship.com/docs/developer/rest-api/wallet/operations/tickets/) in the Wallet API reference.
**Example link passes response**
```json
{
"ticketId": 12345
}
```
## Pass URI formats
Each entry in the `passURIs` array is a URI that identifies a pass. The format depends on which identifier you have:
| Format | Identifier referenced |
| --- | --- |
| `v1/pass/{passId}` | Airship-generated pass ID |
| `v1/pass/adaptive/{adaptiveLinkId}` | Adaptive Link ID |
| `v1/pass/template/{templateId}/id/{passExternalId}` | Template ID and external pass ID |
| `v1/pass/template/id/{templateExternalId}/id/{passExternalId}` | External template ID and external pass ID |
| `v1/pass/dynamic/{dynamicPassId}` | Dynamic pass ID |
For more information about external IDs, see [External (or Custom) IDs](https://www.airship.com/docs/guides/wallet/user-guide/basics/#external-or-custom-ids) in *Wallet basics*.
### Updating passes
Pass updates are an integral piece of your mobile wallet campaign strategy.
# About Updating Wallet Passes
> Pass updates are an integral piece of your mobile wallet campaign strategy. Once a wallet pass is installed on a user's device, send content updates that make sense for the campaign's lifecycle.
## Updating Pass Information
After a user installs a pass, you can seamlessly update the pass as the user accrues loyalty points, uses some of their gift card balance, or event information changes, so that your users are always up to date.
By updating an already-installed pass, you help ensure that your customers never miss their gates, and that they take advantage of the loyalty programs that bring them back to your business.
When you update passes and adaptive links, you only need to provide the individual fields that you want to update.
**Update pass**
```http
PUT /v1/pass/12345/ HTTP/1.1
Authorization: Basic
Content-Type: application/json
{
"fields": {
"points": {
"value": "98765"
}
}
}
```
### Update Passes After Updating a Template
If you change your template, you can "publish" an update to your template to update passes for all of your pass holders. This makes it easy to update the look and feel of your passes with a single operation. You can also update fields on your template when you publish changes, but you should take care when updating fields that might be personalized. If you update a field that has already been personalized for individual pass holders, you'll erase pass holders' personalized information when you publish changes to your template.
> **Note:** If you add or remove fields from a template, Airship automatically publishes your changes to relevant passes generated from a template
[Learn how to publish changes to templates](https://www.airship.com/docs/guides/wallet/user-guide/updating-passes/publish/).
### Updating Flights and Events
You can manage flights and events independently of boarding passes and event tickets respectively, making it much easier to update pass holders when their flights or events change.
> **Note:** For Google Boarding Passes, Google automatically notifies holders when departureGate, departureTerminal, departureTime, or boardingTime are updated. These are independent of any notifications you send through Airship.
You can also use `passGroups` to update a group of flights or events — e.g. for a flight with multiple stops.
Airship recommends using the [FlightsAPI](https://www.airship.com/docs/developer/rest-api/wallet/operations/flights/) to perform updates to individual flights. The [Update endpoint](https://www.airship.com/docs/developer/rest-api/wallet/operations/flights/#updateflight) will update the flight and trigger the bulk pass update behavior if any details for the flight have changed. If flight details change frequently, Airship recommends batching these updates into periodic calls at regular, well-spaced intervals.
**Update a flight**
```http
PUT /v1/flights/project// HTTP/1.1
Authorization: Basic
Content-Type: application/json
{
"fields": {
"departureGate": {
"value": "21"
},
"boardingTime": {
"value": "2018-07-30T09:20:00"
},
"departureTime": {
"value": "2018-07-30T09:45:00"
},
"arrivalTime": {
"value": "2018-07-30T11:45:00"
},
"passGroups": [
"sfo-pdx-20180730"
]
}
}
```
### Tags and Pass Organization
You can assign tags to passes, to organize groups of passes and pass holders. You can target tags in the wallet API to change a group of passes.
**Update passes by tag**
```http
PUT /v1/tag/tag-name/passes HTTP/1.1
Authorization: Basic
Content-Type: application/json
Api-Revision: 1.2
{
"fields": {
"secondary1": {
"value": "12/31/2013"
},
"primary1": {
"value": "$2 Off"
}
}
}
```
### Recommended Use
After users install your pass, update the pass with values and notifications
relevant to where users are in the campaign's lifecycle.
#### Pass Type: Loyalty
**Scenario:** Tier Upgrade
| Step | Update the pass when... | New content for the pass |
| --- | --- | --- |
| 1 | A user hits a new point tier. | Point balanceStrip imageNotification: New point balance and tier status |
| 2 | A user hits the next point tier — go back to step 1! |
#### Pass Type: Coupon
**Scenario:** Sale offers
| Step | Update the pass when... | New content for the pass |
| --- | --- | --- |
| 1 | A sale starts | Validate the pass |
| 2 | Pass expiration is impending | Notification: Warning about expiration, which drives people to stores |
| 3 | A sale ends | Expire the passAdd image that tells the user to watch for new offers |
| 4 | You have a new offer — go back to step 1! |
#### Pass Type: Event Ticket
**Scenario:** Event details: session content, address, resources, contest results
Airship recommends using the [Events API](https://www.airship.com/docs/developer/rest-api/wallet/operations/events/) to perform updates to individual events. The [Update endpoint](https://www.airship.com/docs/developer/rest-api/wallet/operations/events/#updateevent) will update the event and trigger the bulk pass update behavior if any details for the event have changed. If event details change frequently, Airship recommends batching these updates into periodic calls at regular, well-spaced intervals.
| Step | Update the pass when... | New content for the pass |
| --- | --- | --- |
| 1 | A user's next session is starting soon | Notification: Upcoming session time and location, and contest enrollment |
| 2 | A user's session ended | Notification: Attendance thank you, and contest results |
| 3 | Next session — go back to step 1! |
| 4 | You have an announcement | Notification: Festival news, or about events related to previously attended sessions |
| 5 | You have a VIP event | Invitation to VIP event |
### Use Cases
**Simple**
> * Loyalty: Upgraded tier
> * Coupon: Sales offer
> * Gift Card: Balance change
> * Member Card: Renewal reminder
> * Event Ticket: Seat assignment
> * Boarding Pass: Gate change
**Common**
> * Send alerts and additional information based on tags or location changes.
> * Modify values, with or without an alert.
> * Add generic locations or beacons to a pass via the UI (up to ten locations or beacons).
**Complex**
> * Personalize with user-specific location or beacons tied to the pass (not supported by all passes).
> * Add/remove segmentation properties for a pass.
> * Change barcode type and/or value.
### Considerations
Consider these three things for each update, and you'll know your pass holders
are getting the right changes.
1. **AUDIENCE:** Make sure you are updating via the appropriate endpoint.
* [Update a single pass](https://www.airship.com/docs/developer/rest-api/wallet/operations/passes/#updatepass):
`/v1/pass/{id}`.
* [Update a single pass with external ID](https://www.airship.com/docs/developer/rest-api/wallet/operations/passes-with-external-ids/#updatepassexternalid):
`/v1/pass/id/{externalId}`.
* [Update a pass with external ID for a single template](https://www.airship.com/docs/developer/rest-api/wallet/operations/passes-with-external-ids/#updatepassfromtemplateexternalid):
`/v1/pass/template/{templateId}/id/{passExternalId}`.
* [Update passes with a specific tag](https://www.airship.com/docs/developer/rest-api/wallet/operations/tags/#updatepassesfortags):
`/v1/tag/{tag}/passes`, where `tag` is a specific tag.
* [Update passes by segment](https://www.airship.com/docs/developer/rest-api/wallet/operations/segments/#updatepassesbysegment):
`/v1/segments/{projectId}/{segmentId}/passes`.
* [Update all passes for a template (Bulk Update)](https://www.airship.com/docs/developer/rest-api/wallet/operations/templates/#updatepassesbytemplate):
`v1/template/{templateId}/passes`, where `templateId` is the template ID
for which the bulk update is being done. You may alternatively supply an
external ID for the passes, `passExternalId`.
Bulk update via the API is essentially the same as using
[Publish](https://www.airship.com/docs/guides/wallet/user-guide/updating-passes/publish/) in the dashboard, but the API has
more options.
* [Update a pass with external ID that was created from an adaptive link](https://www.airship.com/docs/developer/rest-api/wallet/operations/adaptive-links-with-external-ids/#updatepassesexternalid):
`v1/links/adaptive/{adaptiveLinkId}/passes/id/{passExternalId}`.
* [Update a pass with external ID that was created from an adaptive link in a specific project](https://www.airship.com/docs/developer/rest-api/wallet/operations/adaptive-links-with-external-ids/#updatepassesfromadaptivelinkexternalid):
`v1/links/adaptive/project/id/{projectExternalId}/id/{adaptiveLinkExternalId}/passes/id/{passExternalId}`.
1. **GENERIC vs. PERSONALIZED**
* Are you updating a *generic pass*, where all pass holders have the same content? Go for it.
* Are you updating *personalized passes*? If so, make sure you aren't replacing values for *all pass holders* that are pass holder-specific.
1. **TEST:** Use a test template and confirm the changes before updating your users'
passes. Already confident with test templates? You may want to use a test
tag instead.
See
[API: Passes: Update Pass](https://www.airship.com/docs/developer/rest-api/wallet/operations/passes/#updatepass) for
the full documentation.
# Setting Wallet Pass Expiration
> Revoke a pass or prevent the accumulation of stale passes in your end users' wallets by controlling when it expires.
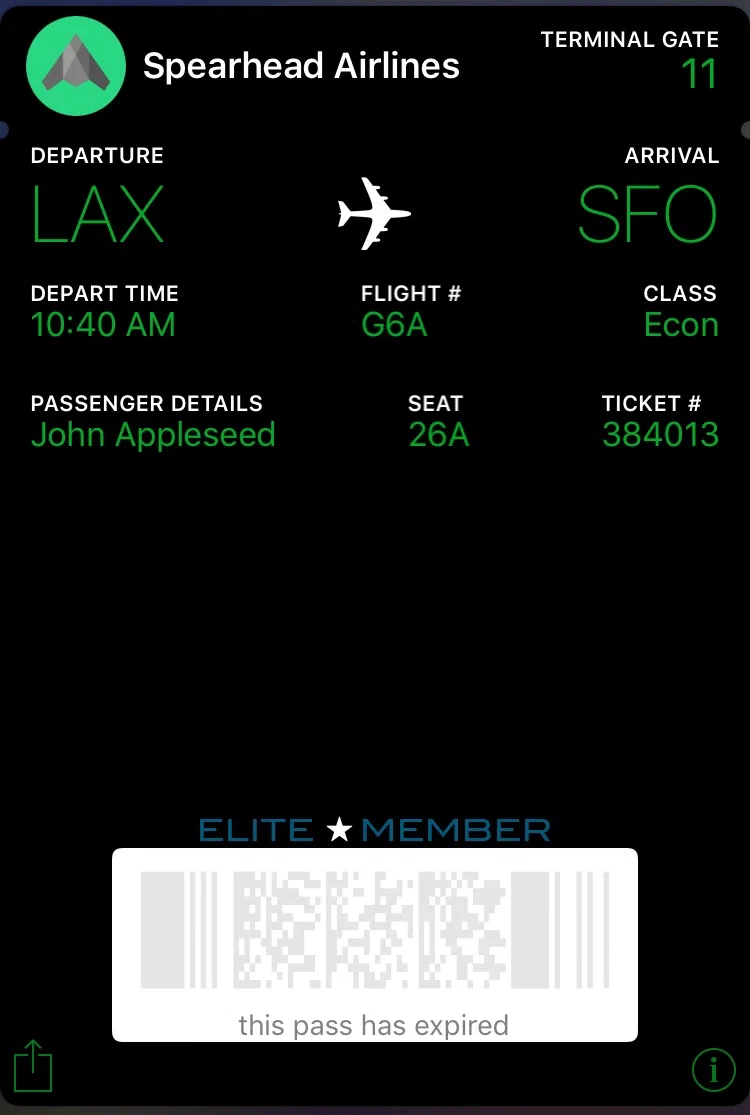
*An expired wallet pass*
Pass expiration is based on the pass creation date, which is when a pass link was created based on its template. Expired passes display a greyed-out barcode and text "this pass has expired".
Default expiration after pass creation:
* **Boarding pass, Event ticket:** 30 days
* **Coupon:** 365 days
* **Loyalty, Member, Gift card, or generic:** 730 days
You can set expiration periods for new and existing passes.
## Set expiration for new passes
Edit a template to set expiration for new passes created from the template. Changes to template expiration do not affect existing passes.
1. Go to **Templates** and select the template you want to edit.
1. Select **UPDATE** for **Template Expiration**.
1. Set an expiration option:
| Option | Description | Steps |
| --- | --- | --- |
| **Specify date** | New passes created using this template will expire at 11:59 PM on the specified date. | Enter a date using date picker or enter a date in MM/DD/YYYY format, and then select a time zone. |
| **Specify duration** | New passes using this template will expire the specified number of days after pass creation. | Enter a number between 1 and 1,825. |
| **Never** | New passes generated from this template will never expire. This option is not available for boarding passes and event tickets. | n/a |
1. Select **Save**.
## Updating expiration for existing passes
You can provide a new expiration date for an existing pass or expire it immediately by rendering it void. Voided, unexpired passes can be reactivated.
### Apply a new expiration date
You can change the expiration date of an existing pass by adding or editing the `value` for `expirationDate` using any of the Update Pass API functions:
* [Update pass](https://www.airship.com/docs/developer/rest-api/wallet/operations/passes/#updatepass)
* [Update pass with external ID](https://www.airship.com/docs/developer/rest-api/wallet/operations/passes-with-external-ids/#updatepassexternalid)
* [Update pass for a template with external ID](https://www.airship.com/docs/developer/rest-api/wallet/operations/passes-with-external-ids/#updatepassfromtemplateexternalid)
* [Update passes by tag](https://www.airship.com/docs/developer/rest-api/wallet/operations/tags/#updatepassesfortags)
* [Publish a bulk update to passes for a template](https://www.airship.com/docs/developer/rest-api/wallet/operations/templates/#updatepassesbytemplate)
The `expirationDate` string is formatted identically for Apple and Google in their respective `headers` objects:
* Apple Wallet pass request [expirationDate](https://www.airship.com/docs/developer/rest-api/wallet/schemas/passes/#createpassapplewalletrequest)
* Google Wallet pass request [expirationDate](https://www.airship.com/docs/developer/rest-api/wallet/schemas/passes/#createpassandroidpayrequest)
### Void or reactivate a pass
Voiding a pass makes it immediately inactive and unusable. Since voiding does not require setting a new expiration date for the pass, it can be a useful way to manage pass control when reactivation is likely. Voided passes can be reactivated as long as they are not expired. When you reactivate the pass, it keeps its original expiration date unless you set a new one.
To void a pass, set the `label` for `expirationDate` to `voided`.
To reactivate a voided pass, set the `label` for `expirationDate` to `valid`. Also make sure a reactivated pass's `expirationDate` is set to a future date, since the pass is unusable if the expiration date has passed.
# Wallet Segments Builder Tutorial
> Segments are predefined groupings of your audience that you can construct using Tags in the Segments Builder.
*Segments* are reusable audience selection criteria. They are used with the
Publish feature to apply template design changes to Apple Wallet passes that
have already been distributed. Create a segment instead of recreating your
audience selections every time you update a pass. Segments are created within
a project and can be used for any template within that project.
> **Note:** Segments can also be created via the API. See: [Wallet API: Segments](https://www.airship.com/docs/developer/rest-api/wallet/operations/segments/).
## Create a New Segment
Tags are selected from — not created by — the Segments Builder. Select tags
that you have already created and attached to passes. See the
[API: Tags](https://www.airship.com/docs/developer/rest-api/wallet/operations/tags/). documentation for more detail.
To create a new segment:
1. Go to *Segments*.
1. Click **New Segment**.
1. Select whether the conditions you set will apply to *All* or *Any* passes
in the project. The default statement is "Include passes where *All* of the
following are true." Use the All/Any dropdown menu to change your selection.
- ALL = all criteria must be met (boolean AND)
- ANY = any criteria must be met (boolean OR)
1. Choose *is* or *is not* from the next dropdown menu.
1. Enter your search term, and click to select from the listed search
results, if any.
If you would like to set multiple conditions, click **Add a
condition** and continue with your specifications.
1. Enter a descriptive name.
1. Click **Save**.
Click the Segments menu link to return to your list of segments.
## Edit or Delete a Segment {#edit-delete}
1. Go to *Segments*. Three properties are displayed per segment:
* **Segment Name**
* **Date Created**
* **Date Edited:** The date and time when the list was last edited.
1. Click the delete icon (trash) or the edit icon (
).
## Update a Segment's Passes {#segment-passes}
To update a segment's passes, use the Publish feature. When choosing which
passes to update, select the radio button for *A specific segment*, then
select your previously created segment. See:
[Publish Tutorial](https://www.airship.com/docs/guides/wallet/user-guide/updating-passes/publish/).
# Publish Template Design Changes
> Apply template design changes to Apple Wallet passes that have already been distributed.
Use *Publish* to apply template design changes to Apple Wallet passes that
have already been distributed. Changes apply to:
* Images
* Logo text
* Colors
* Back of pass fields
> **Note:** With the exception of logo text, any changes made to fields on the *front of
> the pass* **will not** be applied to currently distributed passes.
> **Note:** While Publish is not supported for Google Wallet, Google Wallet passes will
> automatically update with any changes made to *class* fields. How it works:
>
> * If a class value `class.*` is changed, all passes will be changed.
> * On [Update Pass](https://www.airship.com/docs/developer/rest-api/wallet/operations/passes/#updatepass), only that
> pass is updated. Class values are not sent with the update object when
> updating passes, so there is no effect on other passes.
>
> Any field preceded by `class` constitutes a class field. For a full list of
> class fields, please visit the
> [Google Wallet documentation](https://developers.google.com/pay/save/guides/loyalty/design).
## Update Passes
1. Go to *Templates*.
1. Click anywhere in a template's row to see its expanded view.
If you have only one template in the project, the initial view is expanded.
1. Click **Publish**.
1. Choose which passes to to update.
* **All passes:** The number of passes that will be updated is noted in parentheses.
* **A specific segment:** Choose a previously created segment, or click the
link to *create one now*, which will open the [Segment Builder](https://www.airship.com/docs/guides/wallet/user-guide/updating-passes/segments-builder/). You will need to start these Publish steps again after saving a new segment.
1. Choose when to update the passes, *Now* or *At a Specific Date and Time*. If sending *At a Specific Date and Time*, either choose a date from the
calendar that appears after clicking the date field, or manually enter
in YYYY-MM-DD format. Use the dropdown menus to make time selections.
* The time zone is when the pass will be updated, not the pass holder's time zone.
* Scheduled updates must be within 30 days of the current date.
1. Click **Confirm Publish** to apply template changes.
You will be returned to the list of project templates. Click the **Publish** button again to see the status in the *Schedule Updates* or *Published History* table. You will receive an email once the syncing process has completed, and the status will update in the Published History table.
**Scheduled Updates table**
* **Scheduled to publish** is the date and time when the template update process is scheduled to initialize.
* **Segment** is either *All Passes* or the segment chosen for the update.
**Published History table**
* **Start** is the date and time when the template update process was initialized.
* **End** is the date and time when the template update process ended.
* **Status** displays either *In Progress*, *Completed*, or *Error*.
## Cancel a Scheduled Pass Update
1. Go to *Templates*.
1. Click anywhere in a template's row to see its expanded view.
If you have only one template in the project, the initial view is expanded.
1. Click **Publish**.
1. In the *Scheduled Updates* table, select the cancel icon (trash) for the update you want to cancel.
### Sending notifications
Send notifications to Wallet pass holders.
# Wallet Push Notifications
> Send push notifications to wallet pass holders.
Use push notifications to deliver important information to your pass holders regarding their flight, event, or wallet pass program. For example, you might want to notify pass holders about weather conditions for an event, even when no changes were made to the time or location of the event. Or you might want to alert coupon pass holders that their coupon is set to expire.
> **Note:** [Google sends automatic notifications for some boarding pass updates](https://www.airship.com/docs/guides/wallet/user-guide/notifications/push-notifications/#automatic-notifications).
>
> For Apple Wallet pass update alerts, see [Pass Update Notifications](https://www.airship.com/docs/guides/wallet/user-guide/notifications/pass-updates/).
## Notification Appearance and Behavior
The push notification is generated by the native wallet app (Apple Wallet on iOS, Google Wallet on Android) and appears in banner format on the device's lock screen.
The full notification message content appears in the "Last Notification" field on the back of the pass. The field always displays the most recent notification message. You can customize the field label when sending notifications via the API.
iOS notifications contain the message content:

*Wallet push notification on iOS*
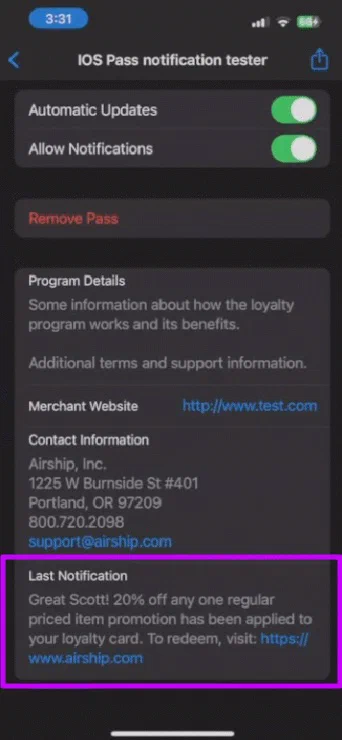
*Wallet push notification back of pass on iOS*
Android notifications alert the pass holder that a new message has been added to the pass:

*Wallet push notification on Android*
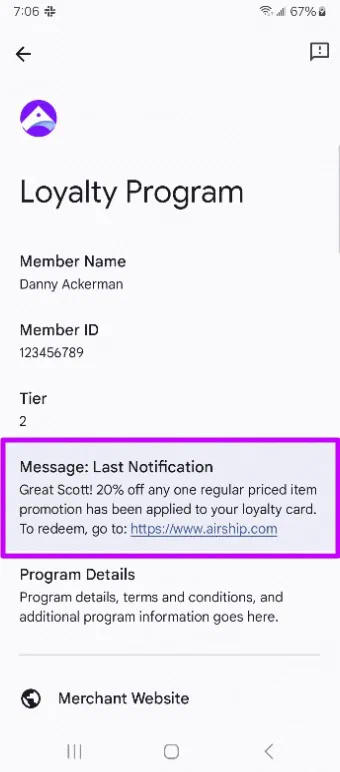
*Wallet push notification back of pass on Android*
## Including URLs
Your message text can include URLs that direct the pass holder to visit a webpage. To comply with Google Wallet and Apple Wallet Terms of Service, it is important that any URLs included in your message remain relevant to the pass or pass holder experience.
The URL appears as plain text in the notification. On the back of Apple Wallet passes, Apple automatically converts URLs to links. Google Wallet does not automatically convert URLs to links, but you can use an HTML anchor tag to make them links.
**Send an API wallet notification that includes a URL**
```http
POST /v1/pass/123/notify HTTP/1.1
Content-Type: application/json
Authorization: Basic
{
"value": "Redeem your discount: https://my.store.example.com"
}
```
## Send Notifications from the Dashboard
You can send, schedule, and manage Wallet Push Notifications from the Airship dashboard. You cannot edit a message after sending, but you can cancel a scheduled message and create a new one.
From a wallet project:
1. Go to **Templates** and select a template.
1. Select **Send message** and configure:
* **Message** — Enter your message text.
* **External ID** — (Optional) Enter an ID for testing purposes.
* **Send time** — Select **Now** or **Schedule for later**. If scheduling, specify the date, time, and time zone.
1. Select **Send message**.
To view a log of all notifications for the project, go to **Dashboard** or **Templates** and select **Notification history**. Only notifications sent from the dashboard are included in the history. Each message row includes the following information:
* Whether the message was sent or scheduled
* Scheduled send date and time in UTC
* Message text
* Username of the sender
* Message creation date and time in UTC
* Template ID and external ID, if any
* Status — Completed or Cancelled
* Actions — You can select **Cancel** for scheduled notifications.
Use the API method to [delete notifications](#delete-notifications).
## Send Notifications using the API
You can send notifications using any one of the [Push Notifications endpoints](https://www.airship.com/docs/developer/rest-api/wallet/operations/push-notifications/) across all pass identifiers.
**Identifiers for individual passes:**
* Pass ID
* Pass with external ID
**Identifiers for groups of passes:**
* Template ID
* Template with external ID
* Tag
* Segment
**Send a wallet notification**
```http
POST /v1/pass/123/notify HTTP/1.1
Content-Type: application/json
Authorization: Basic
{
"value": "20% off any one regular priced item"
}
```
**Send a wallet notification with a custom field label**
```http
POST /v1/pass/123/notify HTTP/1.1
Content-Type: application/json
Authorization: Basic
{
"label": "Current Promotion",
"value": "20% off any one regular priced item"
}
```
### Delete Notifications
Deleting a notification removes the "Last Notification" field from the back of the pass. It does not remove a push notification that has already been delivered.
**Delete a wallet notification**
```http
DELETE /v1/pass/123/notify HTTP/1.1
Content-Type: application/json
Authorization: Basic
```
### Schedule Notifications
Use the [Schedule an Update or Push Notification endpoint](https://www.airship.com/docs/developer/rest-api/wallet/operations/schedules/#scheduleupdate) to set a future delivery date and time for a push notification.
**Schedule a wallet notification**
```http
POST /v1/schedules/12345 HTTP/1.1
Authorization: Basic
Content-Type: application/json
Api-Revision: 1.2
{
"name": "New Offer Update",
"schedule": {
"scheduled_time": "2017-04-10T18:45:00"
},
"notify": {
"audience": {
"tag": "TZ_ET"
},
"pass": {
"notification": {
"value": "20% off any one regular priced item"
}
}
}
}
```
## Automatic Notifications
For Google Boarding Passes, Google automatically notifies holders when departureGate, departureTerminal, departureTime, or boardingTime are updated. These are independent of any notifications you send through Airship.
## Best Practices for Wallet Push Notifications
* **Daily Notification Limits:** Google Wallet currently limits to **maximum three notifications per day** per pass, and Apple Wallet limits to **maximum twenty notifications per day** per pass.
Limit the daily notifications across both platforms to three notifications per day. Sending too many notifications can create an unpleasant user experience and increase the likelihood that your pass holder will disable wallet notifications or remove the pass.
* **Identical Message Content:** Airship blocks attempts to send identical notification messages back to back, regardless of how much time has passed in between.
If your use case requires sending the same message content in back to back notifications, be sure to change the message slightly so that it is not exactly the same as the previous message. Otherwise, pass holders may assume subsequent messages were sent in error.
# Pass Update Notifications
> Send your pass holders a change message when you update their pass content.
Alert pass holders when their pass has been updated. For example, if their membership status has changed or if their loyalty points have increased, this would be an opportunity to notify the user and open the wallet pass for them to see that the pass has been updated.
> **Note:** Alerting pass holders when pass content has been changed is only available for Apple Wallet. [Google sends automatic notifications](https://www.airship.com/docs/guides/wallet/user-guide/notifications/push-notifications/#automatic-notifications) for some boarding pass updates.
When a change message is posted to a user's device, the screen displays a title and the pass's icon image along with the notification. The user's device will not play a sound or vibrate.
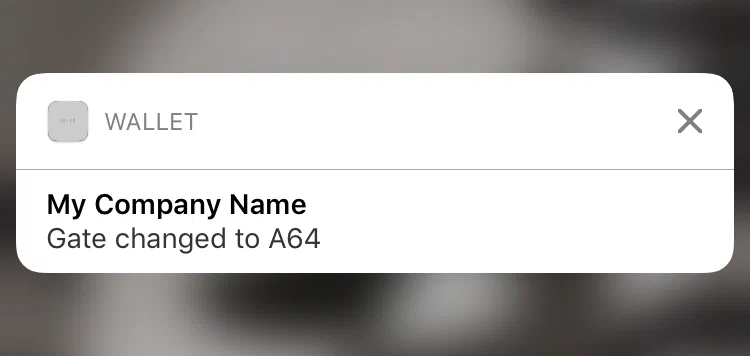
*A pass update notification on a device*
The title displayed with a notification is the company name associated with your Wallet account, unless you set a [custom change message title](#change-message-title) for the template.
Each field object on an Apple Wallet pass can include an optional *change message* value. A change message is the text that appears in an alert that is displayed when a pass field's value is changed.
The change message must include the escape value `%@`, which is replaced by the field value when that value is changed. For example, if you enter the change message `Gate changed to %@` and you later change the field value to `A64`, the alert text would be `Gate changed to A64`.
> **Note:** * If you don’t specify a change message, the pass holder isn’t notified when the field value changes.
> * Setting a change message will not trigger sending a notification. The notification is triggered when you change the field value.
> * When multiple fields with change messages are updated at the same time, we cannot control the processing order. That is handled by Apple.
## Add a Change Message Using the Dashboard
1. Go to *Templates*.
1. Click anywhere in a template's row to see its expanded view.
If you have only one template in the project, the initial view is expanded.
1. Click **Edit Design**.
1. Select a field, click **Advanced Options** at the bottom of its configuration pane, then check the box for *Notify the user when this value changes.*
1. Enter the text that you want to appear in the notification, including the placeholder `%@` for the field's new value.
> **Important:** A notification will not be triggered if `%@` is not in your change message.
1. Click **Save**.
## Add a Change Message Using the API
The following is an example of a pass field that includes an optional change message value using the key `changeMessage`. The value of `changeMessage` is the text that will appear in the notification. The placeholder `%@` for the field's future value is required.
When updating a pass, if the specified value is different than what is currently included on the pass, then the change message will be displayed on the user's device. The notification for the sample below would be `The value for this field has changed to New text value`.
**Example `fields` object with `changeMessage`**
```json
{
"fields": {
"TextField": {
"changeMessage": "The value for this field has changed to %@",
"value": "New text value",
"label": "Text Field Label"
}
}
}
```
## Set a Custom Title For Change Messages {#change-message-title}
By default, the title of change message notifications for iOS is the company name associated with your Wallet account. In some cases, pass holders may not recognize this name as the issuer of the pass, so you may want to change it. You can set a custom title for change messages by adding a `changeMessageTitle` field to your template. The default value set for the field becomes the new title of change message notifications.
To set a custom change message title for your template:
1. Click **Add a Field** or **Add Another Field**. You can place the field anywhere, but we recommended adding it
to the back of your pass template so that it is unobtrusive.
1. Enter `changeMessageTitle` for the field ID, and click **Add custom changeMessageTitle field**.
1. Set the Field Type to *Text*.
1. Change the Label Text to `Issuer`.
1. Enter a recognizable sender name for the Default Value. This value will be the title of all change message
notifications for passes created from this template.
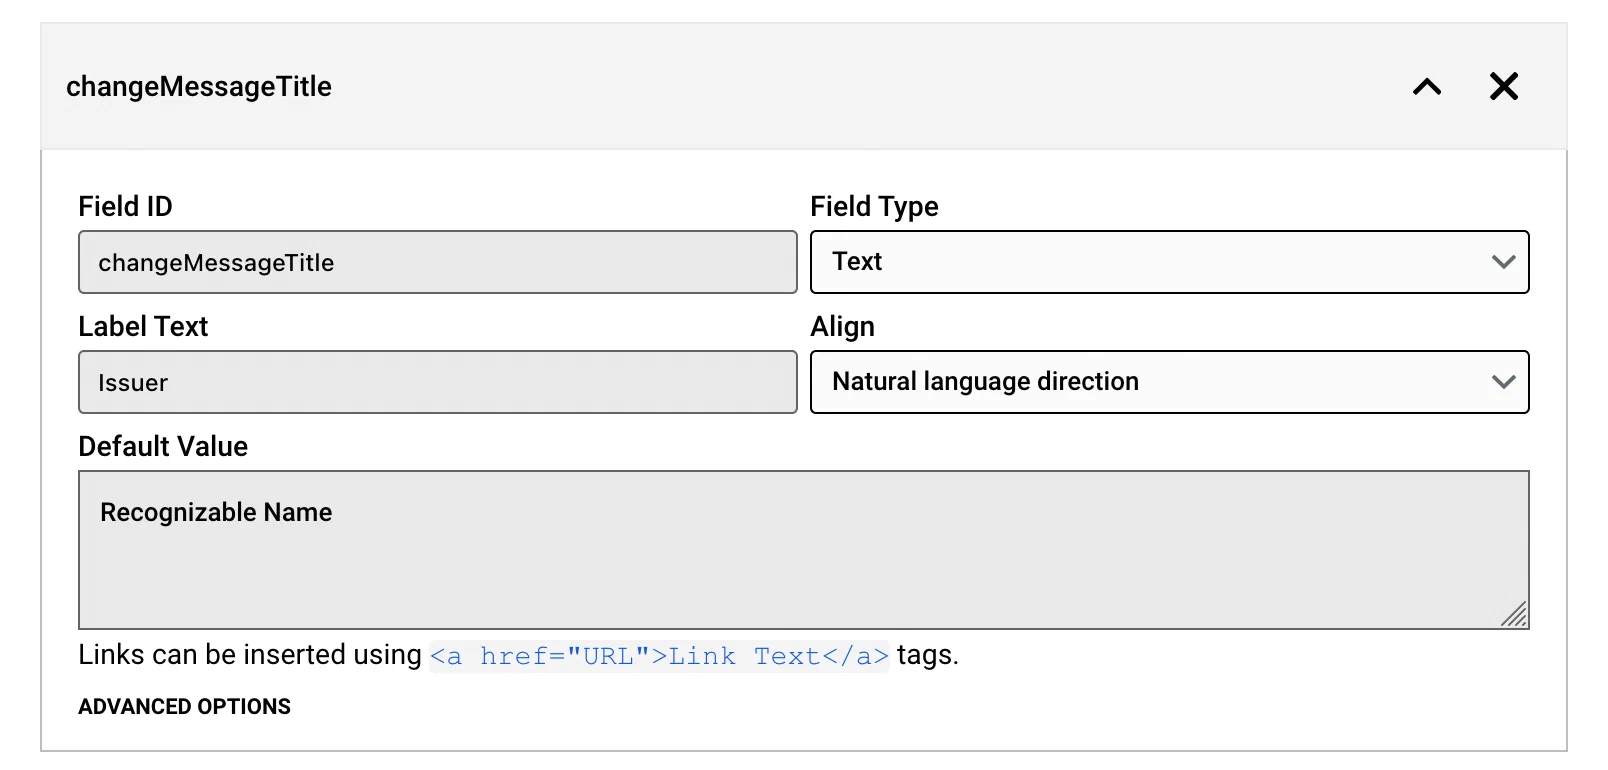
*Setting a custom title for change messages*
You can represent the field in the API as a `changeMessageTitle` object in the `fields` object of a template.
**Example `fields` object with `changeMessageTitle`**
```json
{
"fields": {
"changeMessageTitle": {
"value": "Title for change messages",
"label": "Issuer",
"fieldType": "back"
}
}
}
```
> **Note:** The `changeMessageTitle` value also appears in the pass preview card that is shown when a pass is shared by Messages or Mail.
## Send a Pass Update
Now that you have a change message set, the alerts are handled automatically. After you edit the value of a field in a template and save the changes, you then need to give your pass holders the latest version of the pass, via the [Update Pass API](https://www.airship.com/docs/developer/rest-api/wallet/operations/passes/#updatepass) or by [publishing changes in the dashboard](https://www.airship.com/docs/guides/wallet/user-guide/updating-passes/publish/).
> **Note:** Publishing changes only updates fields on the back of a pass. If you intend to send pass updates via Publish, add a `Messages` field to back of the pass template, include a change message, and use the field for your change notifications.
## Best Practices for Change Messages
* **Message Length:** Keep your change messages short. The notification will be truncated if it's too long, just like other notifications. If you need to deliver a longer message, consider using [Wallet Push Notifications](https://www.airship.com/docs/guides/wallet/user-guide/notifications/push-notifications/) instead.
* **Spam:** Do not change field values frequently. Multiple alerts will likely lead to users removing your pass.
* **Wallet Push Notifications:** If you plan on sending promotional, marketing messaging or other general alerts to your users, consider using [Wallet Push Notifications](https://www.airship.com/docs/guides/wallet/user-guide/notifications/push-notifications/) instead.
# Location-Based Pass Alerts
> Set triggers to make pass-relevant text appear on a user's lock screen based on location, date, or proximity to a beacon.
* The user must have already installed the pass for the trigger to function.
* See [Mobile Wallet Reference: Location and Date Triggers](https://www.airship.com/docs/guides/wallet/user-guide/reference/#location-and-date-triggers) for available triggers per pass type, requirements, and location radius and date window information.
* For Apple specifications, see [Relevance Information Displays Passes on the Lock Screen](https://developer.apple.com/library/archive/documentation/UserExperience/Conceptual/PassKit_PG/Creating.html#//apple_ref/doc/uid/TP40012195-CH4-SW53), including Table 4-2, in
the Apple Wallet Developer Guide.
* For Google specifications, see [Nearby Notifications](https://developers.google.com/wallet/retail/loyalty-cards/use-cases/trigger-push-notifications#nearby-notifications) in the Google Wallet Developer Guide.
## Add a Relevant Location Trigger
Display a shortcut to your pass on the user's screen when the device is in the vicinity of a certain location. The radius around the location where the shortcut appears is determined by the wallet platform and varies by pass type. For instance, Boarding Passes will appear on the lock screen at around 1,000 m, while Coupons will appear at around 100 m. You can add up to ten Relevant Locations per template and per pass.
1. Go to **Triggers**.
1. Click anywhere in a template's row to see its trigger settings in the expanded view. If you have only one template in the project, the initial view is already expanded.
1. Click **Add Triggers** then **Add a Relevant Location**.
1. Enter an *Address*, then click to choose the
address from the list of matches that appears. After selecting the address, its GPS coordinates will be listed next to the Location pane's title.
1. (Optional) Enter the *Relevant Text* that will appear on the lock screen when a pass holder is near the location. For example, "Store nearby on 3rd and Main." For Google passes, the *Relevant Text* field is determined by Google, so it is not editable.
1. (Optional) Click **Add Another Location** and continue with your specifications.
1. Click **Save Changes**.
Location triggers can be used in combination with [Date/Time Triggers](#add-a-relevant-date-time-trigger).
Alternatively, you can define up to 10,000 locations for passes installed from an [Adaptive Link](https://www.airship.com/docs/reference/glossary/#adaptive_link), which will detect the 10 locations nearest the user and associate them with the pass as the location triggers. See the locations array for an [Adaptive Link request](https://www.airship.com/docs/developer/rest-api/wallet/schemas/adaptive-links/#adaptivelinkrequest) in our Wallet API reference.
## Add a Relevant Date/Time Trigger
Display a shortcut to your pass on a user's lock screen when the device is in the vicinity of a certain location during a certain date and time. This is handy for certain types of passes that have date and time relevancy, like Events and Boarding Passes.
Relevant Date/Time triggers have the following requirements and behaviors:
* Relevant Date/Time triggers are supported for Apple Wallet passes only.
* The timing when the shortcut appears is determined by the wallet app and varies by pass type.
* Relevant Date is not supported for Coupons or Store Cards.
* You can use Date and Time without Location for Event passes only.
* Once `relevantDate` is added to a template, passes pick it up at create time. You can overwrite the value using the [Create pass](https://www.airship.com/docs/developer/rest-api/wallet/operations/passes/#createpass) or [Update pass](https://www.airship.com/docs/developer/rest-api/wallet/operations/passes/#updatepass) API, or by using query parameters when [generating a pass from an Adaptive Link](https://www.airship.com/docs/developer/rest-api/wallet/operations/adaptive-links/#generatepassfromadaptivelink).
1. Follow the steps above to set up a [Relevant Location trigger](#add-a-relevant-location-trigger).
1. Go back to **Triggers**.
1. Click anywhere in a template's row to see its trigger settings in the expanded view. If you have only one template in the project, the initial view is already expanded.
1. Click **Add Triggers** then **Add a Relevant Time**.
1. Make selections for the *day*, *time*, and *time zone* when you want the pass to display.
* **Select a day:** Use the date picker, or enter a date in MM/DD/YYYY format.
* **Select a time:** Select a time from dropdown menu, or enter a time in 24-hour notation, e.g., 16:47 for 4:47 p.m.
* **Select a time zone:** Select from the dropdown menu.
1. Click **Save Changes**.
## Add a Beacon Trigger
Display a lock screen notification with a shortcut to the pass when the device is within the proximity range of a certain [beacon](https://en.wikipedia.org/wiki/IBeacon). You can add up to ten beacons per template. Beacon triggers are supported for Apple Wallet passes only.
1. Go to **Triggers**.
1. Click anywhere in a template's row to see its trigger settings in the expanded view. If you have only one template in the project, the initial view is already expanded.
1. Click **Add Triggers** then **Add a Beacon**.
1. Enter the beacon's *UUID* and the *Relevant Text* that will appear on the lock screen when the
pass holder is near the beacon.
1. (Optional) Enter the beacon's *Major* and *Minor* values.
1. (Optional) Click **Add Another Beacon** and continue with your specifications.
1. Click **Save Changes**.
## Edit or Remove a Trigger
1. Go to *Triggers*.
1. Click anywhere in a template's row to see its trigger settings in the expanded view. If you have only one template in the project, the initial view is already expanded.
1. Click a trigger to highlight it, then make your desired changes, or click the X in the upper right corner of its pane to delete it.
1. Click **Save Changes**.
### Reporting
Register a Wallet callback server and view template activity.
# Wallet callbacks
> You can register your project to receive callbacks when your audience installs or uninstalls your passes. For Loyalty projects, you can also register to receive callbacks when your audience personalizes their passes.
You can register a callback server using the `/project/{project_id}/settings/callback` endpoint, providing both the URL you want to call back and any applicable headers required by your callback server.
## Wallet Callback Server Requirements
If your callback server requires additional headers, you must provide them when registering your callback. We recommend at least setting an `Authorization` header. Addresses must be HTTPS.
Your callback server should expect to receive callbacks at up to three endpoints:
* `{baseUrl}/v1/pass/install` — Receives a callback when your audience installs passes.
* `{baseUrl}/v1/pass/uninstall` — Receives a callback when your audience uninstalls passes.
* `{baseUrl}/v1/pass/{pass_id}/personalize` — Receives a callback with a personalization object when your audience personalizes a Loyalty pass. You must [add personalization requirements](https://www.airship.com/docs/developer/rest-api/wallet/operations/apple-wallet-pass-personalization/) to Apple templates before users can personalize passes created from them.
## Wallet Callback Payloads
Your callback server should expect to receive and handle JSON payloads formatted as follows:
**Example pass install JSON**
```json
{
"passId": 149440311,
"templateId": 158327,
"serialNumber": "3388000000005047792.158327_92a3e4d1-5110-3aca-a26e-fb21618aa5f2_149440311",
"createdAt": "2020-09-11T22:47:22.000Z",
"updatedAt": "2020-09-11T22:47:22.000Z",
"externalId": "coolexample",
"platform": "android"
}
```
**Example pass uninstall JSON**
```json
{
"passId": 149440311,
"templateId": 158327,
"serialNumber": "3388000000005047792.158327_92a3e4d1-5110-3aca-a26e-fb21618aa5f2_149440311",
"createdAt": "2020-09-11T22:47:22.000Z",
"updatedAt": "2020-09-11T22:47:22.000Z",
"externalId": "coolexample",
"platform": "android"
}
```
* `passId`: Integer, the ID of the pass installed or uninstalled.
* `templateId`: Integer, the ID of the template the pass was created from.
* `serialNumber`: String, the serial number of the pass. This string is generated by the vendor — Apple or Google.
* `createdAt`: String, the date-time when the pass was created.
* `updatedAt`: String, the date-time when the pass was last updated.
* `externalId`: String, the external ID for the pass, if set.
* `platform`: String, the platform on which the pass is installed, one of `android` or `ios`.
## Register a Wallet Callback Server
You can register your callback server with the `/v1/project/{project_id}/settings/callback` endpoint. See the [Wallet Callbacks API](https://www.airship.com/docs/developer/rest-api/wallet/operations/callbacks/) for more information about modifying or deleting a callback specification.
After you register your callback server, Airship will issue callbacks when users install or uninstall passes in your current project.
**Register a callback server**
```http
POST /v1/project/12345/settings/callback HTTP/1.1
Authorization: Basic
Content-Type: application/json
{
"baseUrl": "https://www.example.com/callbacks",
"headers": {
"Authorization": "Basic dGVzdEB0ZXN0LmNvbTp0ZXN0",
"Content-Type": "application/json"
}
}
```
# Template activity
> Template reports display counts and a graph of the number of passes created, installed, and removed over last 30 days.
Unlike the overview statistics on the project's dashboard, the numbers in template reports reflect *net* pass activity. In the example of a user installing, then removing, then adding a pass, the template report counts this as two passes installed and one pass removed.
> **Tip:** Template reports are also available via the API. See:
> [API: Template Statistics](https://www.airship.com/docs/developer/rest-api/wallet/operations/statistics/).
1. Go to *Reports*.
1. Select the expand icon (▼) at the end of a template row to display the template report.
1. (Optional) Select created, installed, or removed passes to see only that activity.
1. (Optional) Click a date range filter option, or enter a custom date range. A custom date range must be between 7 days and 3 months; click the date fields and select from the calendar, or enter dates in MM/DD/YYYY format.
### Project Settings
View and edit project details.
# Edit or Delete Project
> Change your project's name, description, or custom project ID.
1. Go to *Settings » Project Details*.
1. Click **Edit Details** or *Update*, and make your changes.
> **Note:** Entering a custom project ID overrides the project's auto-generated default project ID.
1. Click **Save**.
## Delete a Project {#delete-project}
> **Important:** Before you can delete a project, you must expire or delete all passes associated with the project.
1. Go to *Settings » Project Details*.
1. Click *Delete Project* and confirm.
# Manage Apple Pass Certificates
> Manage your Apple Wallet certificates.
## Requirements
To integrate Apple Wallet with your account, you need:
* An Apple Pass Type Certificate
* The certificate password
If you do not yet have them, complete the steps in the Airship Support article
[How to make an Apple Pass Type Certificate](https://support.airship.com/hc/en-us/articles/213493683-How-to-make-an-Apple-Pass-Type-Certificate-for-Mobile-Wallet). If you need to renew a certificate, select your *existing* Pass Type ID instead of creating a new one.
> **Warning:** Changing the Pass Type ID for the certificate used on your project will
> make it impossible to edit passes generated with the old certificate. For
> this reason, you should ensure you have uploaded a valid certificate before
> you begin making passes.
## Add a New Certificate to your Airship Wallet project {#add-a-new-certificate}
Upload a new certificate to the project.
1. Go to *Settings » Certificates*.
1. Select *Upload a new .p12*.
1. Enter the *Certificate password*.
1. Click **Choose File** and select your p12 file.
1. Click **Save**.
Repeat these steps to add another certificate.
## Select an Existing Certificate
Designate which previously uploaded certificate should be used with the project.
1. Go to *Settings » Certificates*.
1. Select *Select an existing .p12*.
1. Select from the Certificate menu.
1. Click **Save**.
You may change the project's certificate as often as needed.
> **Warning:** If you have created any passes for a project and then change the
> certificate, you will be unable to interact with or update those passes.
> The certificate authorization will fail on those passes and they will be in
> an orphaned state.
## Replace Certificate
Use *Replace certificate* when you need to upload a new certificate to your
project, typically to replace an expiring certificate. The new certificate is
validated upon upload to verify it has the same basename and Team ID as the
original. If it is not a valid replacement, you are given the option to add it
as a new certificate.
1. Go to *Settings » Certificates*.
1. Click **Replace certificate**.
1. Select *Upload a new .p12*.
1. Enter the *Certificate password*.
1. Click **Choose File** and select your p12 file.
1. Click **Save**.
# Set up Google Wallet API
> Manage your Google Wallet API certificates and publishing access.
To enable Google Wallet in your Airship account you will need to complete a few steps in the Google Cloud Platform (GCP), Google Pay & Wallet Console, and within the Airship dashboard.
Generally, you will complete each section in the order presented in this guide.
> **Important:** You should ensure your use-case adheres to Google's [Acceptable Use Policies](https://pay.google.com/about/business/policy/#restricted-products-services). If any restrictions apply, you may encounter delays, or potentially have your use-case rejected. You can reach out to your account manager or Airship Support if you are unsure about your wallet use-case.
## Getting your Google Wallet API certificate
First, get a Google Wallet API Issuer ID. This ID is necessary to create and distribute passes for Google Wallet.
1. [Sign up on the Google Pay & Wallet Console](https://pay.google.com/business/console).
1. Go to *Google Wallet API* in the console and click **Build your first pass**. Once you accept the terms of service, you will be redirected to the Google Pay & Wallet Console, where your **Issuer ID** will be displayed.
1. Copy and paste your Issuer ID to a place where you can access it later.
---
Next, enable the Google Wallet API in the Google Cloud Platform.
1. [Log in to the Google Cloud Platform](https://console.cloud.google.com/). If you don’t already have a GCP project, create one.
1. Enable the [Google Wallet API](https://console.cloud.google.com/apis/library/walletobjects.googleapis.com) for your project.
---
next, **create a new Google Cloud service account and certificate**.
1. [Create a service account in the Google Cloud console](https://console.cloud.google.com/iam-admin/serviceaccounts/create) and provide your:
* Service account name — Example: `Airship Wallet`
* Service account ID — Example: `airship-wallet-account`
1. After entering the Service account ID, copy and paste the service account email address to a place where you can access it later. It will be formatted similarly to: `airship-wallet-account@my-project-id.iam.gserviceaccount.com`.
1. Click **Create and Continue**.
1. Click **Done**.
1. Select your new service account from the list.
1. Go to the *Keys* tab, or click the more menu icon (⋮) and select *Manage keys*.
1. Click *Add Keys* and select *Create new key*.
1. Select *P12* and click **Create**. This will automatically download the certificate p12 file.
---
Finally, you must authorize the Google Cloud service account to call the Google Wallet API. To do so, grant the service account access to manage your Issuer Account.
In the [Google Pay & Wallet Console](https://pay.google.com/business/console):
1. Go to **Users** and click **Invite a user**.
1. Enter the email address for the service account you created in the Google Cloud console.
1. Select the *Developer* access level.
1. Click **Invite**.
## Adding your certificate to your Airship Wallet project
In your Airship Wallet project:
1. Go to *Settings » Certificates* and select *Android*.
1. (When replacing an existing certificate only) Click **Replace certificate**.
1. Enter the Issuer ID.
1. Enter the email address for the service account you created in the Google Cloud console.
1. Click **Choose file** and select your p12 file.
1. Click **Save**.
## Getting publishing access
Before you can publish live Google Wallet passes, must create a Google Wallet API class and complete your Google Wallet API business profile (and get approval from Google).
First, [create your first Google Wallet template](https://www.airship.com/docs/guides/wallet/getting-started/project-template/#create-a-template) in your Airship Wallet project. This will automatically generate your API class.
While you can manually create a class within the [Google Pay & Wallet Console](https://pay.google.com/business/console), creating your first Google Wallet template in the Airship dashboard will generate a class for you and streamline the process.
---
Next, complete a Google Wallet API business profile.
1. [Go to the Google Pay & Wallet Console](https://pay.google.com/business/console).
1. Go to *Google Wallet API* in the sidebar.
1. Click **Complete business profile**.
1. Complete the **Business identity** and **Business information** sections of your Business Profile.
---
Google must approve your business profile before you can request publishing access. Once Google notifies you of approval, you can request publishing access..
1. [Go to the Google Pay & Wallet Console](https://pay.google.com/business/console).
1. Go to *Google Wallet API* in the sidebar.
1. Click **Request Publish Access** and follow the prompts.
# Manage Barcode
> Change your project's barcode format and edit its values.
1. Go to *Settings » Barcode*.
1. Click **Edit Barcode** and make your changes.
* **Barcode Format:** Select a format or *No Barcode*. See: [Barcode Types](https://www.airship.com/docs/guides/wallet/user-guide/reference/#ws-barcode-types).
* **Encoded Barcode Value:** This is the default barcode value and applies to all passes if you do not set a barcode value through the API. Leave blank if you do not want to add a default value.
> **Note:** * If barcodes should be **the same for every pass**, set the default barcode value here.
> * If barcodes should be **dynamic, differing for each pass**, you must set barcode values in the header object in the [API](https://www.airship.com/docs/developer/rest-api/wallet/operations/passes/#createpass).
* **Barcode Text:** This message appears under the barcode. Enable *Display the barcode value as the barcode text* if you want to display the value of the barcode as human-readable text. This field sets the card number for gift cards.
* **Encoding:** The default standard is ISO 8859-1. You can enter a different value if your scanning infrastructure supports an alternative.
1. Click **Save**.
# Link to Your App From the Back of an Apple Wallet Pass
> If you have an iOS app that works with your pass, you can add a link to the app from the back of a pass by creating an association between the app and the project by entering the app's iTunes Store Identifier (ADAM ID).
* If the app isn't installed on the device, the link opens the app's page in the App Store.
* If the app is already installed, the link opens the app.
## Enable the Wallet Service
> **Warning:** Make sure you perform these steps using the same Apple Developer account
> that is associated with your app's Apple Pass Type Certificate.
1. Log in to your [Apple Developer account](https://developer.apple.com/account/),
then go to *Certificates, Identifiers & Profiles » App IDs*.
2. Click the row of app you want to edit. You should then
see a list of services associated with the app.
*Viewing services associated with an app*
3. Click **Edit**, check the box for *Wallet*, and click **OK** to confirm.

*Enabling Wallet for an app*
Although this change may take a few hours to propagate throughout Apple's
system, you *do not* need to resubmit your app for approval. You can now add
the ADAM ID to your project.
## Add an ADAM ID to Your Project
> **Tip:** A quick way to find the ADAM ID is to copy the numbers at the end of the app's App Store URL. If the URL is `https://apps.apple.com/app/id1195168544`,
> the ADAM ID is `1195168544`.
>
> Another way is to navigate to *iTunes Connect* in the *iOS Dev Center*, find your app, and copy the Apple ID.
> 
>
> *Finding your Apple ID in iTunes Connect*
1. Go to *Settings » Associated App ID*.
1. Click **Configure ADAM ID** and enter the ADAM ID.
1. (Optional) Click **+Add An ADAM ID** to add more IDs. They will be listed as *ADAM
ID 1*, *ADAM ID 2*, etc.
> **Note:** * Only add multiple ADAM IDs if you have another app to associate with the pass.
> * Enter multiple ADAM IDs in order of priority. Airship uses the first ADAM ID in the list that is compatible with the user’s device.
1. Click **Save**.
## Delete an ADAM ID
1. Go to *Settings » Associated App ID*.
1. Click **Configure ADAM ID**.
1. Click the X at the end of a row.
1. Click **Save**.