When creating messages, you configure its appearance in the Content step. In the Delivery step, you can configure content-related features that do not affect the appearance of the message.
In the *Content* step, click **Web Notification**:  Now you can configure the body of the message: 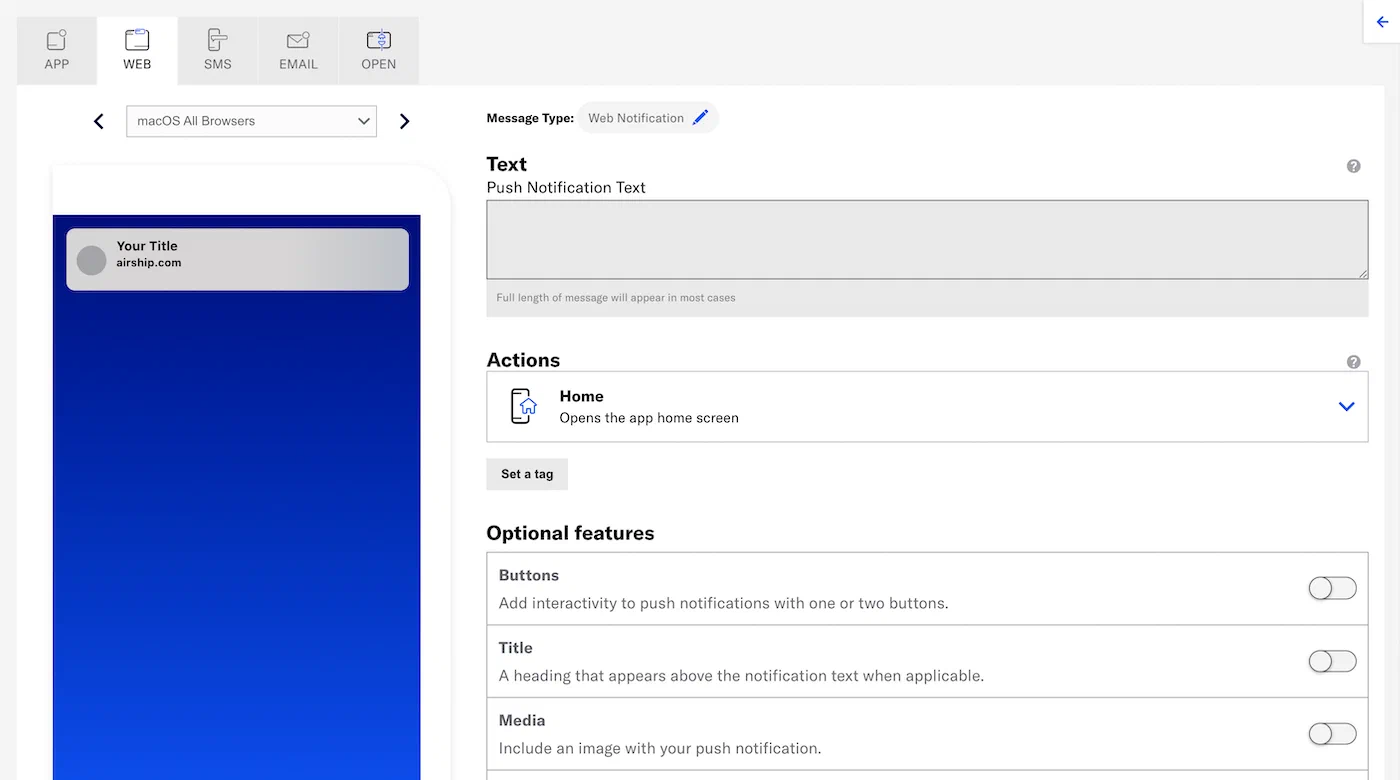 1.Enter the message text. If you are using [Handlebars](https://www.airship.com/docs/reference/glossary/#handlebars), you can test how the content will appear. See Previewing personalized content.
1. Select an [Action](https://www.airship.com/docs/reference/glossary/#action): * Home * Web Page * Adaptive Link 1. (Optional) Set and/or remove tags when the user interacts with your message.If your Airship plan includes CDN support, you can also upload media or select from previously uploaded media. See Insert media in message content in Media library.
### MediaEnter a URL to add media to your notifications. See also Media guidelines.
If using a personalized media URL for an App push notification, you must specify the media type after entering the URL:
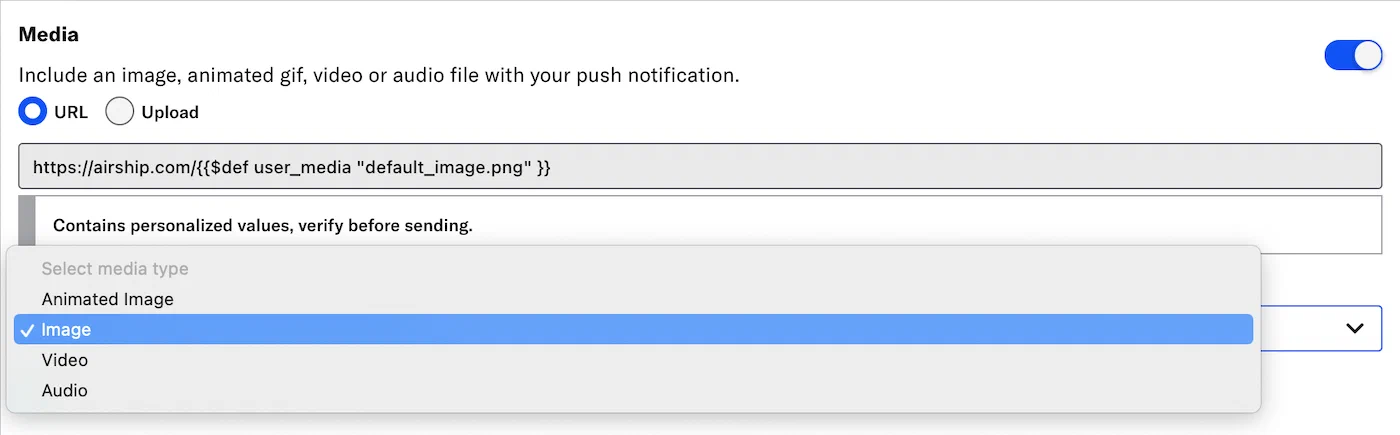 *Specifying the media type for a personalized media URL*If your Airship plan includes CDN support, you can also upload media or select from previously uploaded media. See Insert media in message content in Media library.
### Title Enter a title to create a heading that appears above the notification text. The title set here will override the [default title](https://www.airship.com/docs/developer/sdk-integration/web/getting-started/#airship-setup) configured for your web notifications.