# Preference Centers
{{< glossary_definition "preference_center" >}}
> **Important:** Airship Preference Centers are widgets that can be embedded in a page in an app or website. Please verify with your legal team that your full Preference Center page, including any web page for email Preference Centers, is compliant with local privacy regulations.
## Overview
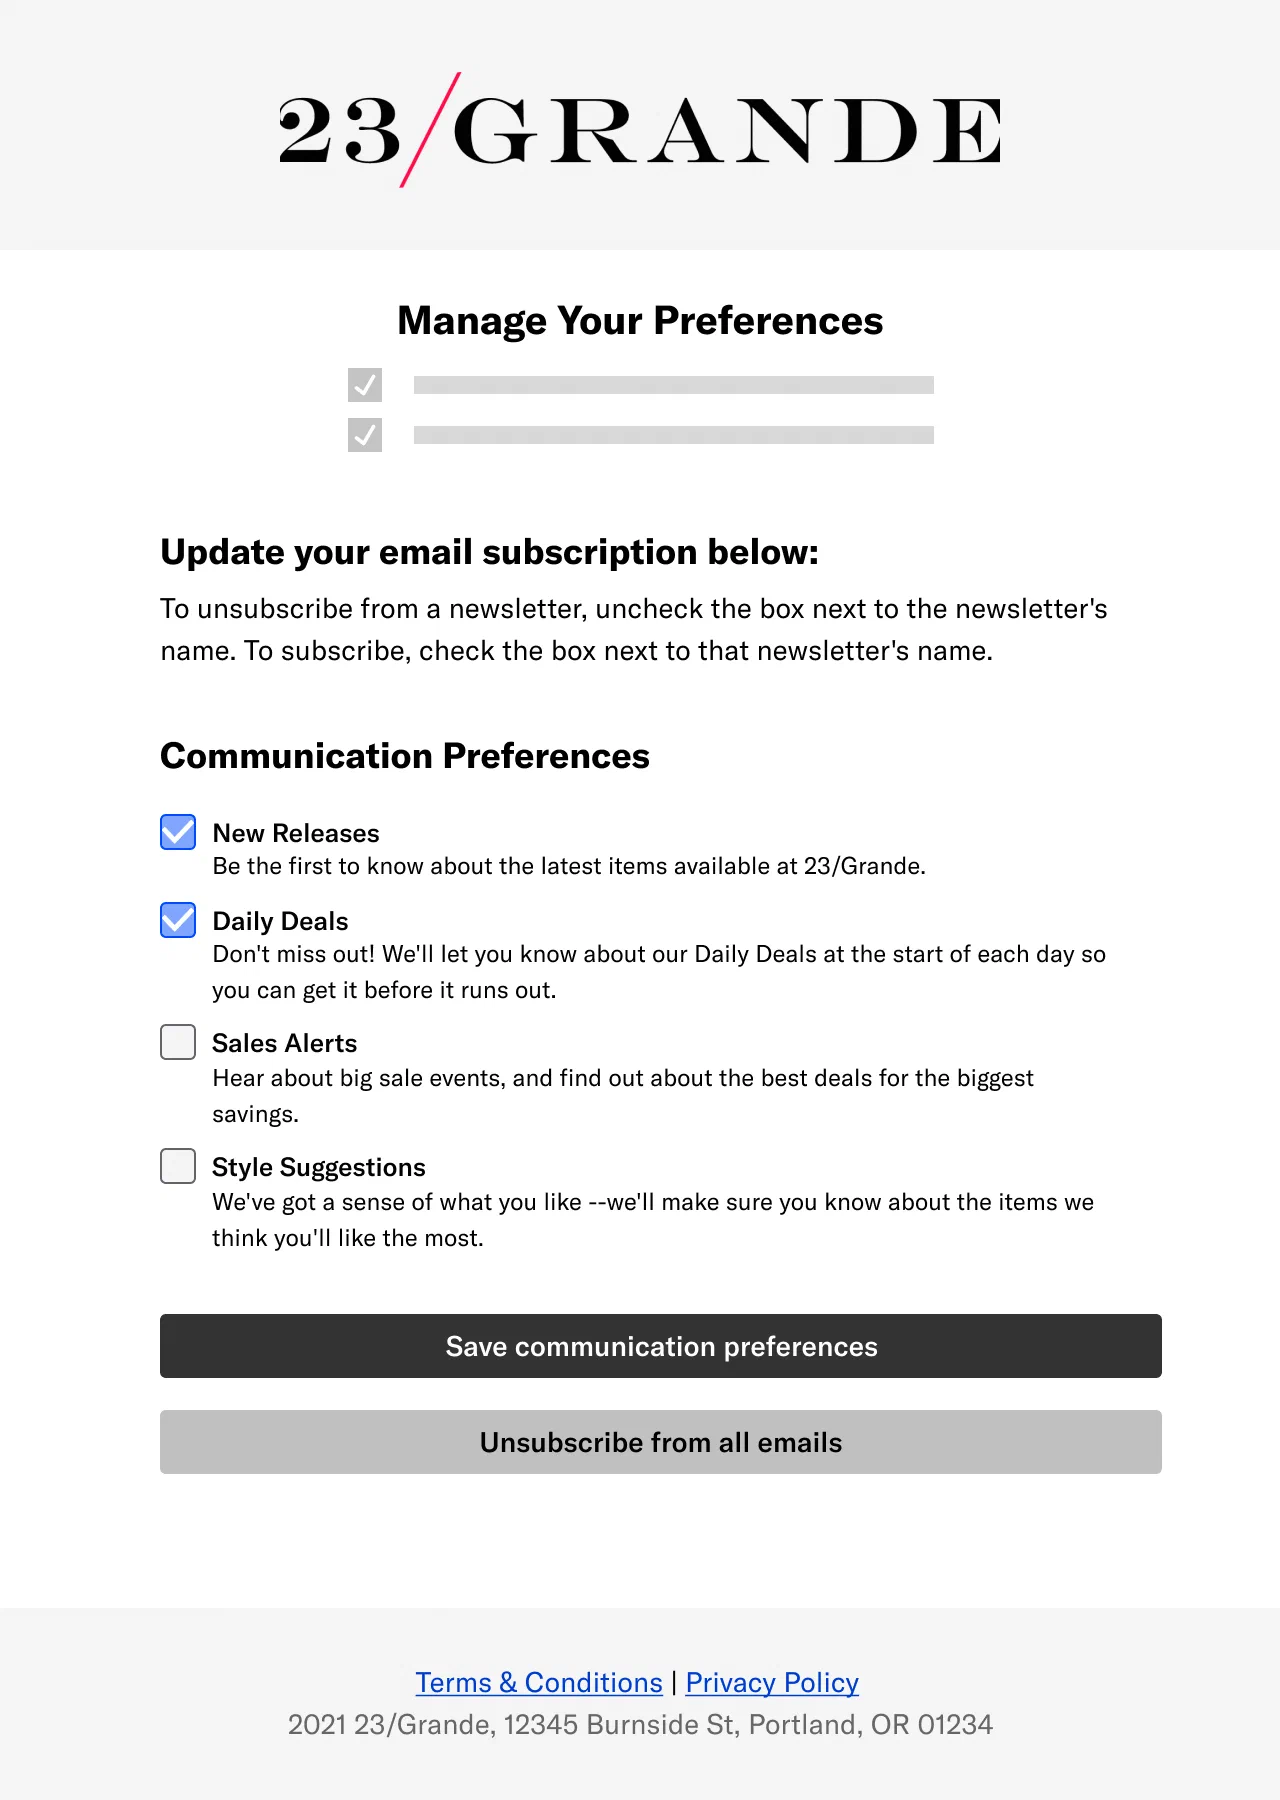
*Email Preference Center web page*
Preference Centers contain one or more page sections, each with an optional title and description. Add the text and sections you want in the page and select at least one [Subscription List](https://www.airship.com/docs/reference/glossary/#subscription_list) per section. You can also customize Subscription List names and descriptions to override those from your project settings.
You can change a Preference Center in the Airship dashboard at any time. Your saved edits are published in real time.
---
**Email** Preference Centers are Airship-hosted web pages. After creating the Preference Center in the dashboard, design a web page using our [WYSIWYG editor](https://www.airship.com/docs/guides/messaging/features/wysiwyg-editor/about/) and select a Preference Center to appear on the page. You can customize loading and saving status text and button labels and provide an Unsubscribe landing page URL. **No development work is required.**
Then, include the web page link in emails you send to a Subscription List. You can also test the page's appearance in your web browser before making it available to your users.
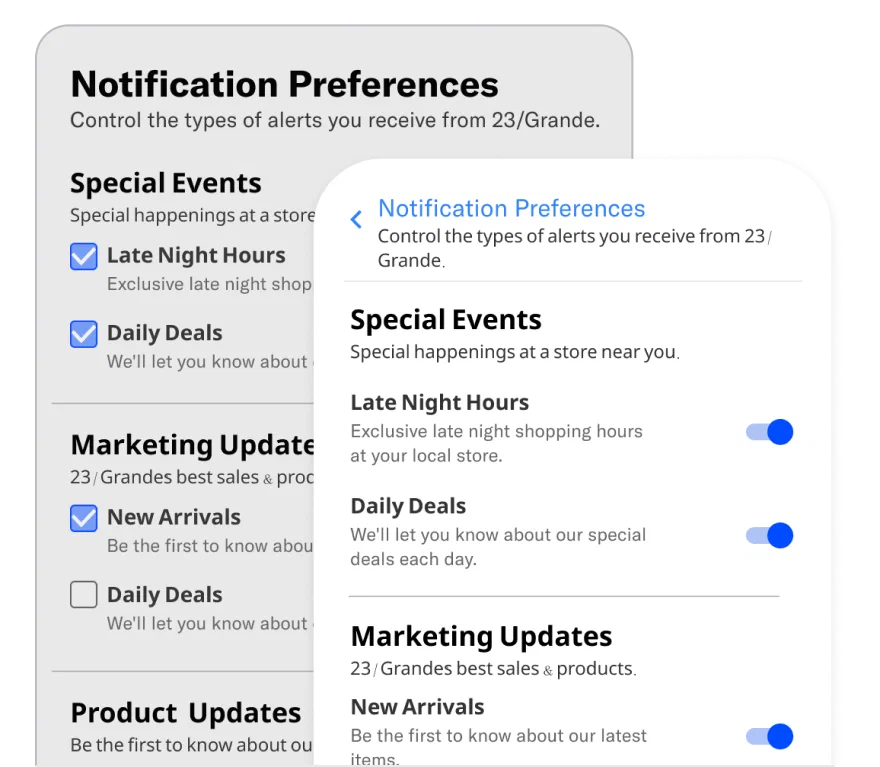
*Web and App single-channel Preference Centers*
---
**App** and **Web** Preference Centers can be displayed as individual pages in your app or website or embedded in a page. After creating the Preference Center in the dashboard, give your developer the Preference Center ID so they can add it to your website or app.
You can direct users to an App or Web Preference Center in multiple ways:
* App and website navigation
* Link or deep link
* The Preference Center [Action](https://www.airship.com/docs/reference/glossary/#action) in a push notifications or in-app message
* The Preference Center [WYSIWYG button action](https://www.airship.com/docs/guides/messaging/features/wysiwyg-editor/actions/) in a [Rich Page](https://www.airship.com/docs/reference/glossary/#rich_page) or [In-App Automation](https://www.airship.com/docs/reference/glossary/#iaa)
### Single- or multi-channel
Preference centers can support either a single channel or multiple channels. Multi-channel Preference Centers can be configured for a single channel.
Channel support, opt-in/out handling, and Airship plan requirements for each Preference Center type:
| Type | Channel support | Opt-in/out handling1 | Plan requirement |
| --- | --- | --- | --- |
| **Single-channel** | App, web, email | Preferences are updated per channel. | Non-AXP |
| **Multi-channel** | App, web, email, SMS | Preferences are updated at the [Named User](https://www.airship.com/docs/reference/glossary/#named_user) level per channel type. For example, if a user has two app channels and they update a preference for an app Subscription List, Airship updates both app channels for their named user, not just the one for the device they are on. | [AXP](https://www.airship.com/docs/reference/feature-packages/) |
1. See additional information in Subscription List opt-in/out handling per channel.
In both Preference Center types, you can manually group Subscription Lists under headings you create. For multi-channel only, you also have the option to organize Subscription Lists automatically by channel:
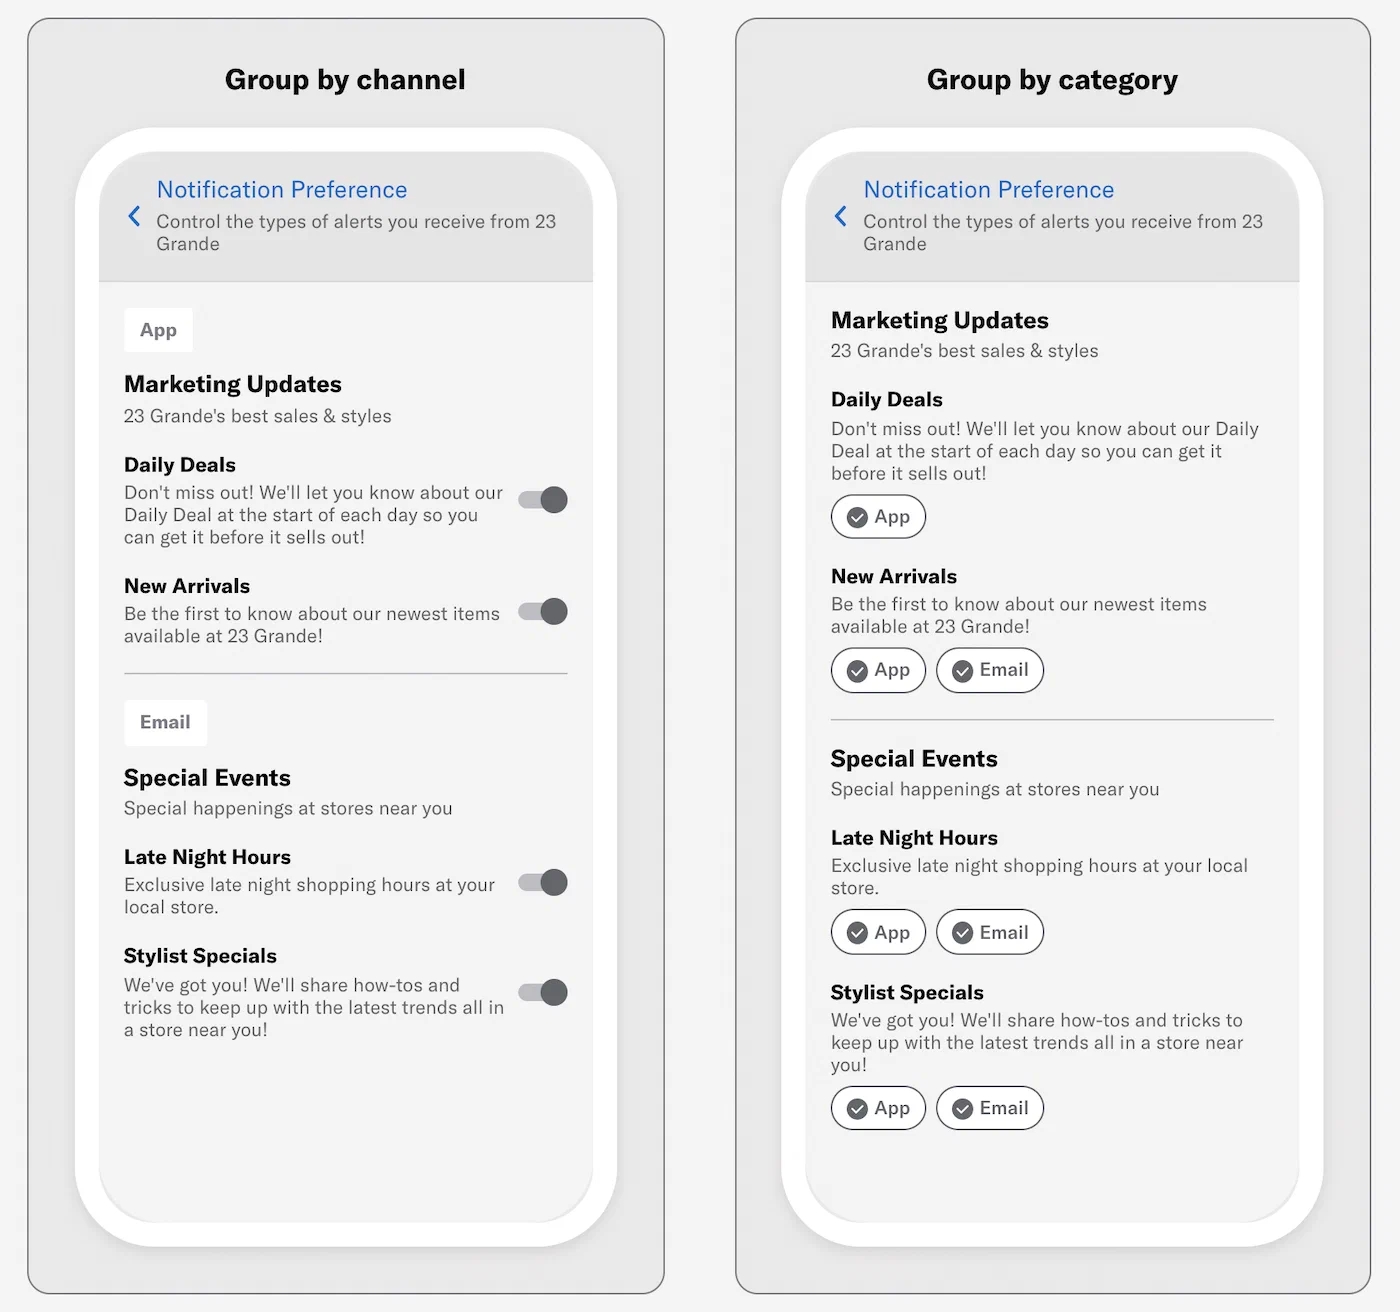
*Layout options for a multi-channel (App and Email) Preference Center*
### Subscription List opt-in/out handling per channel
Subscription List opt-in status change handling for Preference Centers:
| App and Web | Email |
| --- | --- |
| When a user changes their opt-in status for a Subscription List in a single-channel app or web Preference Center, their status is updated for the respective device or browser. For multi-channel, preferences are updated at the [Named User](https://www.airship.com/docs/reference/glossary/#named_user) level per channel type. | When a user follows the link from your email, the URL automatically inserts their [Channel ID](https://www.airship.com/docs/reference/glossary/#channel_id) and loads the web page, showing their email opt-in status for each email Subscription List in your project.For a single-channel Preference Center, when a user changes their opt-in status and submits the form, the status is updated in Airship for the email address the message was sent to. For multi-channel, preferences are updated at the [Named User](https://www.airship.com/docs/reference/glossary/#named_user) level per channel type. |
> **Important:** Changes users make in Preference Centers apply to the opt-in statuses for Subscription Lists only. **They do not control the opt-in status for receiving messages.** For example, if a user opts in to an SMS Subscription List in a Preference Center, they will not receive messages sent to that list unless they are already opted in to SMS notifications. See opt-in information per channel:
>
> * App
> * [Android](https://www.airship.com/docs/developer/sdk-integration/android/push-notifications/getting-started/#enable-user-notifications)
> * [iOS](https://www.airship.com/docs/developer/sdk-integration/apple/push-notifications/getting-started/#enable-user-notifications)
> * [Web](https://www.airship.com/docs/developer/sdk-integration/web/push-notifications/)
> * [Email](https://www.airship.com/docs/developer/api-integrations/email/getting-started/#register-users)
> * [SMS](https://www.airship.com/docs/developer/api-integrations/sms/opt-in-out-handling/)
### Notification opt-in prompts and contact information
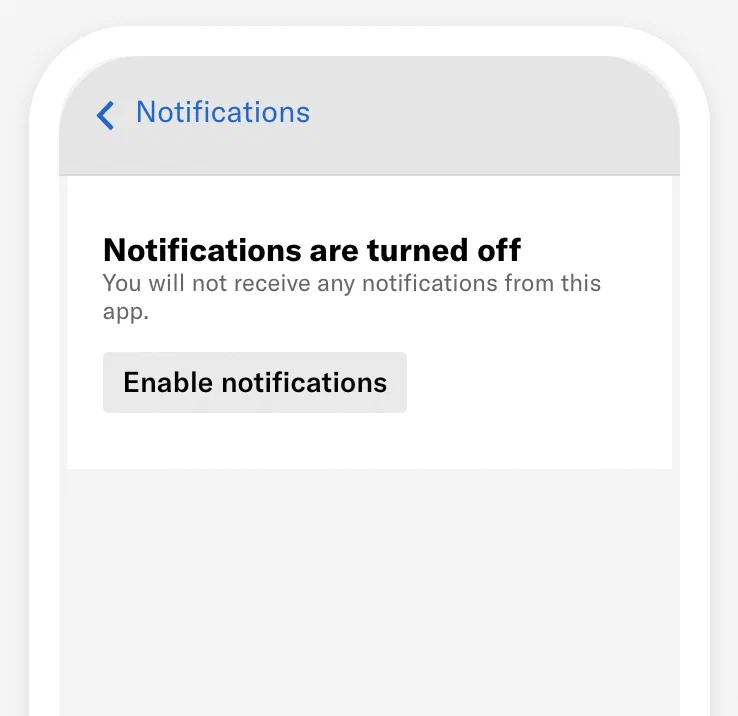
*An App opt-in prompt in an App Preference Center*
In an App Preference Center, you can add notification opt-in prompts for App, Web, Email, and SMS. They appear as embedded banners. For Email and SMS, users must add at least one email address or phone number, and users can manage addresses and numbers already opted in. All labels and fields within the prompts and modals are fully customizable.
---
For **App and Web**, the prompt banner appears in the Preference Center on devices that have notifications disabled. You configure a single prompt for both App and Web that contains a button for opting in. Selecting the button opens the native notification settings for your app or a browser message asking the user to allow web notifications. For a web Preference Center, your web developer must code an action for the button.
---
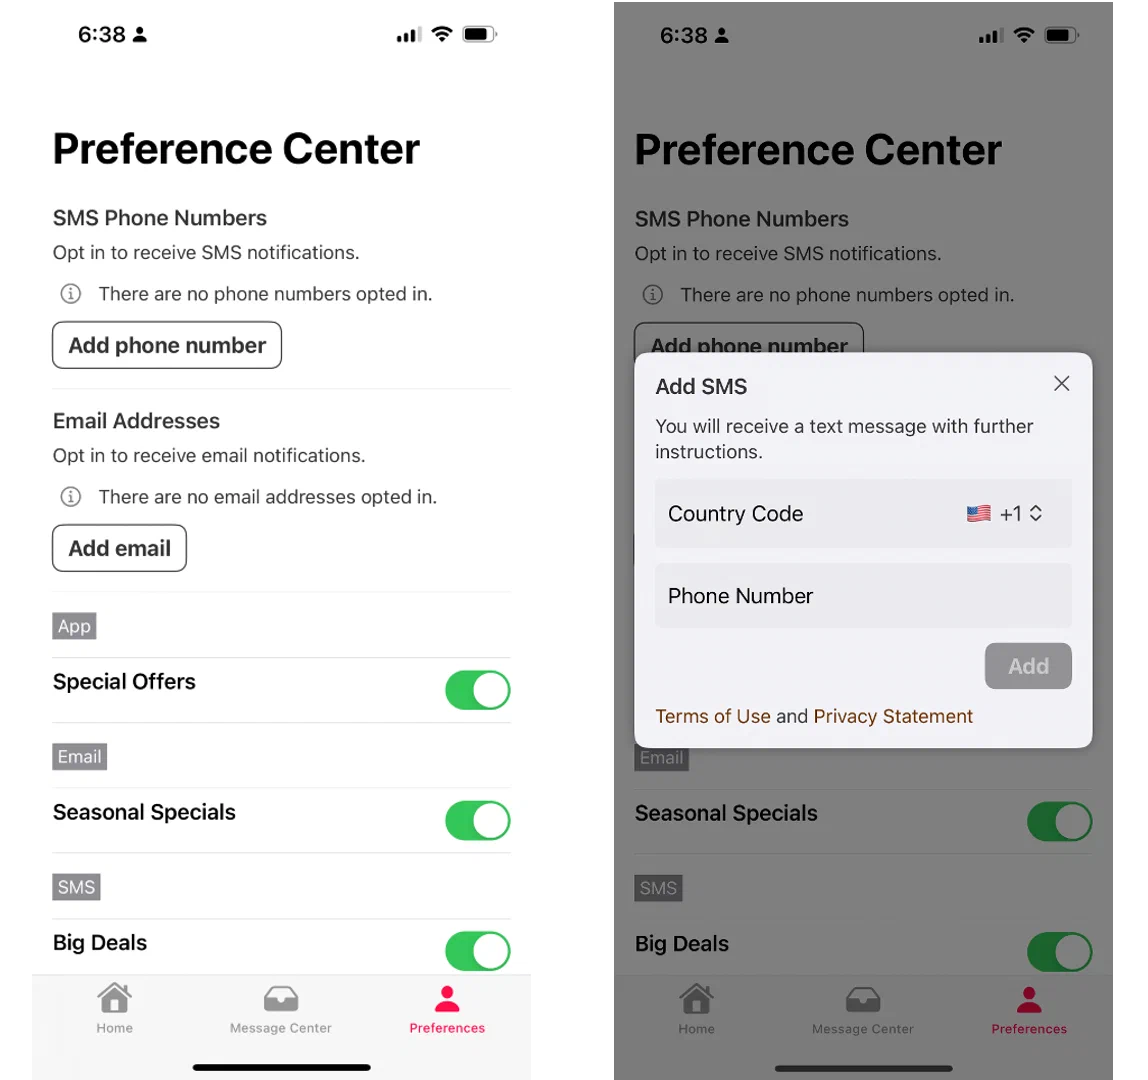
*Opting in to SMS in an App Preference Center*
For **Email and/or SMS**, the prompt banner appears whether or not a user has added an email address or phone number. Opted-in addresses and phone numbers associated with a [Named User](https://www.airship.com/docs/reference/glossary/#named_user) are listed within the prompt banner. Users can add email addresses or phone numbers in order to opt in, add other addresses or numbers, or remove their contact information in order to opt out. Addresses or numbers added by the user are automatically associated with their Named User ID, allowing for cross-channel messaging.
Users must complete the [Double Opt-In](https://www.airship.com/docs/reference/glossary/#double_opt_in) process in order to start receiving messages. Learn more about how double opt-in works for [Email](https://www.airship.com/docs/developer/api-integrations/email/getting-started/#double-opt-in) and [SMS](https://www.airship.com/docs/developer/api-integrations/sms/opt-in-out-handling/#double-opt-in). Your double opt-in workflow must be in place before saving an Email or SMS opt-in prompt in a Preference Center.
When removing an email address, users are opted out of [Commercial Email](https://www.airship.com/docs/reference/glossary/#commercial_email) only.
Required for Email and SMS opt-in prompts: [iOS SDK 18.6+](/docs/docs/developer/sdk-integration/apple/ios-changelog/#18.6.0) [Android SDK 18.1.2+](/docs/docs/developer/sdk-integration/android/changelog/#18.1.2)
### Reporting
Changes to subscription status are recorded as [Real-Time Data Streaming](https://www.airship.com/docs/reference/glossary/#rtds) events. For single-channel Preference Centers, the events are per channel. For multi-channel, they include the [Named User](https://www.airship.com/docs/reference/glossary/#named_user). See [Subscription Event](https://www.airship.com/docs/developer/rest-api/connect/schemas/events/#subscription) and [Subscription List Event](https://www.airship.com/docs/developer/rest-api/connect/schemas/events/#subscription-list) in the *Real-Time Data Streaming API* reference.
Even if you do not use Airship for all your channels, you can still use multi-channel Preference Centers for your other channels and keep your external providers in sync via Named User subscription status.
## Setup
First, create the Preference Center in the dashboard, and then see the Implementation sections for App and Web or Email.
> **Tip:** You can save an empty/undesigned Preference Center as a placeholder if your developer needs the ID immediately.
### Creating a Preference Center
The [Company account Owner](https://www.airship.com/docs/guides/getting-started/admin/company-plan/) or a team member with [Administrator permission](https://www.airship.com/docs/guides/getting-started/admin/teams-messaging/#access-levels) can create and manage Preference Centers. You can create a maximum of 50 Preference Centers per project.
1. Next to your project name, select the dropdown menu (
), then **Settings**.
1. Under **Project settings**, select **Preference Centers**.
1. Select **Create Preference Center**.
1. Define the Preference Center:
1. Select **Save and continue**.
1. (Multi-channel only) Select a layout. You can group Subscription Lists automatically by channel or manually under headings you create. If grouping by channel, select a channel to set up first. If a multi-channel Preference Center is organized by channel, Email automatically appears first.
---
Now you can design the appearance of the Preference Center.
1. Set the title and description. For multi-channel Preference Centers, they apply to all selected channels.
The Title is intended to appear as a page heading, with the Description appearing below. Their values apply to all channels, but appearance and control options vary:
* For **apps**, they appear in the navigation bar at the top of your Preference Center. If you do not enter a title, the default title "Notifications" appears.
* For **web**, your developer can control how they appear (or do not appear) in the Preference Center on your website.
* For **email**, the title is a level-one HTML heading (``), and the description is an HTML paragraph (`
`). They inherit whatever styles apply more generally from the surrounding page.
1. (Optional for App Preference Centers) Add [notification opt-in prompts and contact information](#notification-opt-in-prompts-and-contact-information). Follow the steps in the [next section](#configuring-opt-in-prompts-and-contact-information).
---
Next, configure page sections. Select ** Add another section** for more page sections.
Fields in each section:
For multi-channel Preference Centers grouped by channel:
* To add channels, select **
Add**, and select a channel. To remove a channel, select its tab, and then select **Remove channel**. Make sure to configure the page sections for each channel.
* To customize channel names, select **Settings
**, then **Channel names**, enter the names as you want them to appear in the Preference Center, then select **Save**. If you want to change the name and description of a Subscription List, you must edit the list itself. See [Managing Subscription Lists](https://www.airship.com/docs/guides/audience/segmentation/audience-lists/subscription/#managing-subscription-lists).
---
When you have completed configuration, select **Save and publish**.
### Configuring opt-in prompts and contact information
When [creating an App Preference Center](#creating-a-preference-center), you can add a section that [prompts the user to opt-in to messaging and where they can manage their email addresses and phone numbers](#notification-opt-in-prompts-and-contact-information).
> **Important:** Make sure your [Double Opt-In](https://www.airship.com/docs/reference/glossary/#double_opt_in) workflow is in place before saving an Email or SMS opt-in prompt in a Preference Center.
1. Under **Opt-in prompts**, select **Add
** next to **App/Web**, **Email**, or **SMS**.
1. (For App/Web) Configure fields for the title, body, button label, and button accessibility description. The accessibility description is optional text to be announced by assistive technology, such as screen readers. This overrides the announcement of the button label text. Selecting the button opens the native notification settings for your app or a browser message asking the user to allow web notifications.
1. (Optional for App/Web) Add an icon image. No icon is present by default. Enter an HTTPS URL for an icon image. The icon image may not render in preview. Open your app to review its appearance. See also [Personalizing media URLs](https://www.airship.com/docs/guides/personalization/content/personalize-actions/#media-urls).
If your Airship plan includes CDN support, you can also upload media or select from previously uploaded media. See Insert media in message content in Media library.
1. (For Email and SMS)[iOS SDK 18.6+](/docs/docs/developer/sdk-integration/apple/ios-changelog/#18.6.0) [Android SDK 18.1.2+](/docs/docs/developer/sdk-integration/android/changelog/#18.1.2) Configure fields for each step:
1. Select **Save**.
1. Complete the remaining steps for [creating the Preference Center](#creating-a-preference-center).
### Implementation: App and Web
Your app or web developer must place your Preference Center widget in the desired area of your app or website. If you included a [notification opt-in prompt](#configuring-opt-in-prompts-and-contact-information) for Web, your web developer must also code an action for the button.
1. Go to **Content**, then **Web Pages**.
1. Copy the ID for a Preference Center.
1. Give the ID and the following platform docs links to your developer. See:
* Preference Center documentation for [SDK integrations](https://www.airship.com/docs/developer/sdk-integration/)
* [Preference Center](https://www.airship.com/docs/developer/sdk-integration/web/advanced/preference-center/) for Web
### Implementation: Email
Next, create the Airship-hosted web page where you will embed your Preference Center:
1. Go to **Content**, then **Web Pages**.
1. Select **Create web page**.
1. Enter a name and description for your Preference Center web page, and select **Continue**. These fields are for use within the Airship dashboard only and do not appear in your form. Description is optional.
1. Select **Add
** for HTML and select a default or [saved layout](https://www.airship.com/docs/guides/messaging/features/wysiwyg-editor/saving-layouts/), or select **Blank Layout** to design your own. You can edit any layout after selecting. Then design the page. See [WYSIWYG editor](https://www.airship.com/docs/guides/messaging/features/wysiwyg-editor/about/) for details.
* Your layout must include at least one Preference Center element.
* Personalization is not supported.
* A placeholder is shown within the WYSIWYG editor, not your Preference Center design.
* Select **Preview** to see how the web page will appear on desktop and mobile devices.
1. Select **Done** when you are finished designing the page.
1. Select **Save web page** to return to the list of all web pages in your project.
#### Testing an Email Preference Center web page
After [Creating an Email Preference Center web page](#creating-an-email-preference-center-web-page), you can see how it will appear to your users by sending its link in an email to a [Test Group](https://www.airship.com/docs/reference/glossary/#preview_test_groups) or by manually editing the web page URL.
> **Note:** If you intend to send the message to your users immediately, use the [*Send Test* option in the *Review* step](https://www.airship.com/docs/guides/messaging/messages/create/#message-review) instead.
To send a test email:
1. If you do not already have a Test Group, create or edit one now, adding yourself as a member using your email address. See [Preview and test groups](https://www.airship.com/docs/guides/audience/preview-test-groups/).
1. Go to **Content**, then **Web Pages**.
1. Select the more menu icon () for a web page, then **Copy link to clipboard**.
1. In the sidebar, select the **Create** dropdown menu (
), then select **Message**, and complete the steps for the [Message composer](https://www.airship.com/docs/guides/messaging/messages/create/).
* In the Audience step, enable the Email channel, then select Test Users, enter your test group name, and select from the results.
* In the Content step, include the Preference Center link in the body of the email.
* In the Delivery step, select **Send Now**.
1. After sending, check your email for your test message, and follow the Preference Center link.
---
To test the web page without sending a message, add a [Channel ID](https://www.airship.com/docs/reference/glossary/#channel_id) to the Preference Center's URL:
> **Warning:** Interacting with the web page will apply changes to the channel ID you use for testing.
1. Go to **Content**, then **Web Pages**.
1. Select the more menu icon () for a web page, then **Copy link to clipboard**.
1. Paste the URL in your browser's address bar, replace `{{$channel.id}}` with an actual channel ID, and hit Enter on your keyboard.
You should now see your rendered Email Preference Center web page.
## Directing users to a Preference Center
In addition to adding a Preference Center to your app or website or providing a link or deep link, you use can Airship's built-in actions to open a Preference Center when a user interacts with a message or taps a button:
* For push notifications and in-app messages, select the Preference Center [Action](https://www.airship.com/docs/reference/glossary/#action) in the Content step in a Message, Automation, A/B Test, or Sequence.
* For [Rich Pages](https://www.airship.com/docs/reference/glossary/#rich_page) and [In-App Automation](https://www.airship.com/docs/reference/glossary/#iaa), select the Preference Center button action when configuring content using the WYSIWYG editor. See [Actions in the WYSIWYG editor](https://www.airship.com/docs/guides/messaging/features/wysiwyg-editor/actions/).
---
For Email Preference Centers, add the URL as a link in an [email message](https://www.airship.com/docs/guides/messaging/messages/content/email/email/) or [Template](https://www.airship.com/docs/reference/glossary/#template). To get the web page URL:
1. Go to **Content**, then **Web Pages**.
1. Select the more menu icon () for a web page, then **Copy link to clipboard**.
You must send your email using Airship. The Preference Center will not load for a user if sent from a system other than Airship.
Only link to an email Preference Center from an email.
## Managing Preference Centers
The [Company account Owner](https://www.airship.com/docs/guides/getting-started/admin/company-plan/) or a team member with [Administrator permission](https://www.airship.com/docs/guides/getting-started/admin/teams-messaging/#access-levels) can create and manage Preference Centers and web pages.
Select the dropdown icon () next to your project name, then **Settings**. Under **Project settings**, select **Preference Centers**. The most recently modified Preference Center appears first. Select a column header to sort by name, ID, date created, or date modified. Select the **Archived** filter to see all archived Preference Centers.
| Option | Description | Steps |
| --- | --- | --- |
| **Edit name and description (Single-channel)** | The name and description appear in the dashboard only. | Select the pencil icon (
), then the (
) next to the name. Update the name or description, then select **Continue**, then **Save and publish**. |
| **Edit name and description (Multi-channel)** | The name and description appear in the dashboard only. | Select the pencil icon (
), then **Settings
**, and then **Preference Center details**. Edit the name or description, then select **Save**, then **Save and publish**. |
| **Change layout (Multi-channel only)** | You can switch between grouping by category or channel. | Select the pencil icon (
), then **Settings
**, then **Preference center details**, then **Select a different layout**. Make a selection, and the Preference Center will reload with the new layout. |
| **Customize channel names (Multi-channel only)** | You set the channel names as they appear in the Preference Center. Channel names only appear when the Preference Center is grouped by channel and when more than one channel is added to the Preference Center. | Select the pencil icon (
), then **Settings
**, and then **Channel names**. Update the channel names, then select **Save**, then **Save and publish**. |
| **Edit content** | You can edit the Preference Center at any time. Changes are published immediately. | Select the pencil icon (
), update the design, then select **Save and publish**. |
| **Duplicate** | Makes a copy of the Preference Center with " copy" appended to the original name. | Select the duplicate icon (
), edit the name, ID, and description, and select a type (required for single-channel Preference Centers only). Then select **Save and continue** and follow the steps in [Creating a Preference Center](#creating-a-preference-center). |
| **Archive** | Available when **Published** filter is enabled. Removes the Preference Center from your list of published Preference Centers. This action does not affect its use in an app, website, or Airship-hosted web page. Archived Preference Centers count toward the maximum of 50. **Deleting a web page invalidates its URL.** | Select the archive icon (
). For multi-channel Preference Centers, you can also archive by going selecting the pencil icon (
), then **Settings
**, then **Preference Center details**, then **Archive Preference Center**. |
| **Unarchive** | Available when **Archived** filter is enabled. Restores the Preference Center to your list of published Preference Centers. | Select the archive icon (
). |
> **Note:** As of May 24, 2022, [AXP customers](https://www.airship.com/docs/reference/feature-packages/) can create multi-channel Preference Centers only. Previously created single-channel Preference Centers:
> * Cannot be duplicated
> * Can be edited — *Name and description only*
> * Can be archived
>
> See [Migrating to a user-level Preference Center](#migrating-to-a-user-level-preference-center).
## Managing web pages
Go to **Content** and select **Web Pages** to view the list of email Preference Center web pages in your project. Your last modified web page is listed first. You can sort the list by name or date modified, and search by name or keyword.
Select a web page name to open a drawer where you can do the following:
* For the web page link, select the copy icon () to copy it to your clipboard.
* Edit the name, description, and keywords. Select **Save** after making your changes.
* Select **Edit** or **Duplicate**, which are the same as the actions available from the more menu icon (), as described in the table below.
* View the date and time when the web page was created and last modified.
The following actions are available from the more menu icon () in the web pages list:
## Migrating to a user-level Preference Center
Single-channel Preference Centers created before October 10, 2022, update at the channel level. After migrating to a user-level Preference Center, preferences are updated at the [Named User](https://www.airship.com/docs/reference/glossary/#named_user) level per channel type. For instance, if a user has two app channels and they update a preference for an app Subscription List, then Airship updates both app channels for their named user, not just the one for the device they are on.
**Do not migrate until your SDK has been updated.**
* [Android migration guides](https://github.com/urbanairship/android-library/tree/main/documentation/migration)
* [iOS migration guides](https://github.com/urbanairship/ios-library/tree/main/Documentation/Migration)
> **Warning:** Migration is permanent. You cannot migrate a user-level Preference Center to channel-level.
1. Next to your project name, select the dropdown menu (
), then **Settings**.
1. Under **Project settings**, select **Preference Centers**.
1. Select the pencil icon (
) for a Preference Center.
1. Select **Start migration process**. This option only appears if the Preference Center is currently channel-level.
1. Check the terms box and select **Migrate Preference Center**. Migration takes seconds to complete.
1. Select **Save and publish** to apply the changes.