| Template field | Adaptive Link keypayload.flights[] |
Default label | Required | |
|---|---|---|---|---|
| 1 | image |
:white_check_mark: | ||
| 2 | airlineName |
fields.airlineName.value |
:white_check_mark: | |
| 3 | flightNumber1 |
fields.flightNumber.value |
:white_check_mark: | |
| 4 | departureAirport |
fields.departureAirport.label2 |
:white_check_mark: | |
| 5 | fields.departureAirport.value |
:white_check_mark: | ||
| 6 | arrivalAirport |
fields.arrivalAirport.label2 |
:white_check_mark: | |
| 7 | fields.arrivalAirport.value |
:white_check_mark: |
detailsTemplate. You can override this field to change its placement elsewhere on the pass, but you cannot remove or change its placement on the card title.value property. You can override the Airport name using the label field, but you don't have to set this value manually when creating flights.
### The Card Template
The Card Template consists of 2 rows. The first row supports three columns. The second row supports 2 columns. All `row`/`col` combinations support `subcol`, allowing for 2 template fields per rectangle in the image below.
*Required* items in the table below represent the required properties in the adaptive link payload, and are therefore required to be on a pass. While other fields may not be required, and you can hide them if empty, you may want to leave them blank and populate them as the `departureTime` approaches so your passengers know where to look on the pass to find new information.
Moving a template on a field moves both the `label` and `value` keys, if both keys exist, for a flight or passenger.
> **Note:** While the API allows for `label` values at the template field and flight object level, Google does not typically allow you to override field labels for boarding passes. In most cases, `label` overrides at the flight level apply to Apple Wallet passes only.
The table below relates template field names to the keys that populate the template in the adaptive link `payload.flights[]` array of objects.
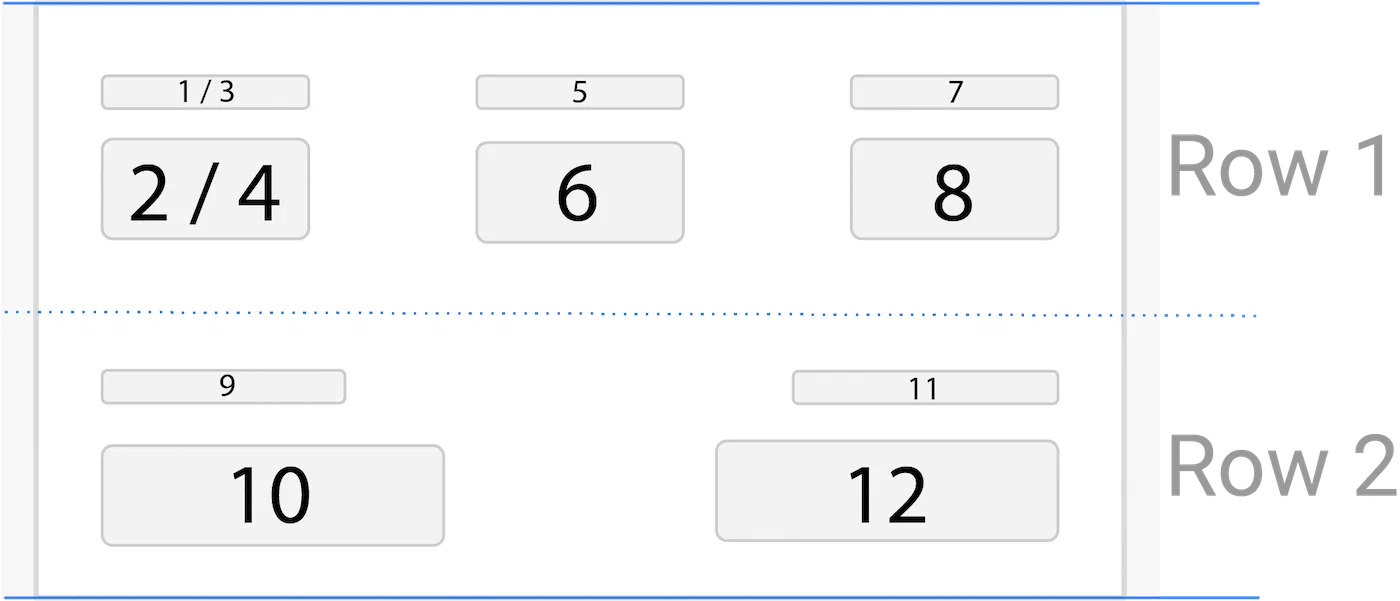
*The Card Template section of a boarding pass*
| Template field | Adaptive Link keypayload.flights[] |
Default label | Required | |
|---|---|---|---|---|
| 1 | departureTerminal |
fields.departureTerminal.label |
TERMINAL | |
| 2 | fields.departureTerminal.value |
|||
| 3 | departureGate |
fields.departureGate.label |
GATE | |
| 4 | fields.departureGate.value |
|||
| 5 | seatClassPolicy1 |
fields.seatClass.label |
CABIN | |
| 6 | seatClass |
passengers[].fields.seatClass |
||
| 7 | boardingTime2 |
fields.boardingTime.label |
||
| 8 | fields.boardingTime.value |
|||
| 9 | passengerName |
passengers[].fields.passengerName.label |
PASSENGER | |
| 10 | passengers[].fields.passengerName.value |
:white_check_mark: | ||
| 11 | boardingGroup |
passengers[].fields.boardingGroup.label |
GROUP | |
| 12 | passengers[].fields.boardingGroup.value |
|||
| 13 | seatNumber |
passengers[].fields.seatNumber.label |
SEAT | |
| 14 | passengers[].fields.seatNumber |
seatClassPolicy set on the flight.detailsTemplate.
### The Barcode Template
The barcode template consists of four rows. You can set default values for a few items on the template, but the barcode value itself is populated from the `headers` in your template or adaptive link with a `confirmationCode` value set for each passenger.
*Required* items in the table below represent the required properties in the adaptive link payload, and are therefore required to be on a pass. While other fields may not be required, and you can hide them if empty, you may want to leave them blank and populate them as the `departureTime` approaches so your passengers know where to look on the pass to find new information.
Moving a template on a field moves both the `label` and `value` keys, if both keys exist, for a flight or passenger.
> **Note:** While the API allows for `label` values at the template field and flight object level, Google does not typically allow you to override field labels for boarding passes. In most cases, `label` overrides at the flight level apply to Apple Wallet passes only.
The table below relates template field names to the keys that populate the template in the adaptive link `payload.flights[]` array of objects.
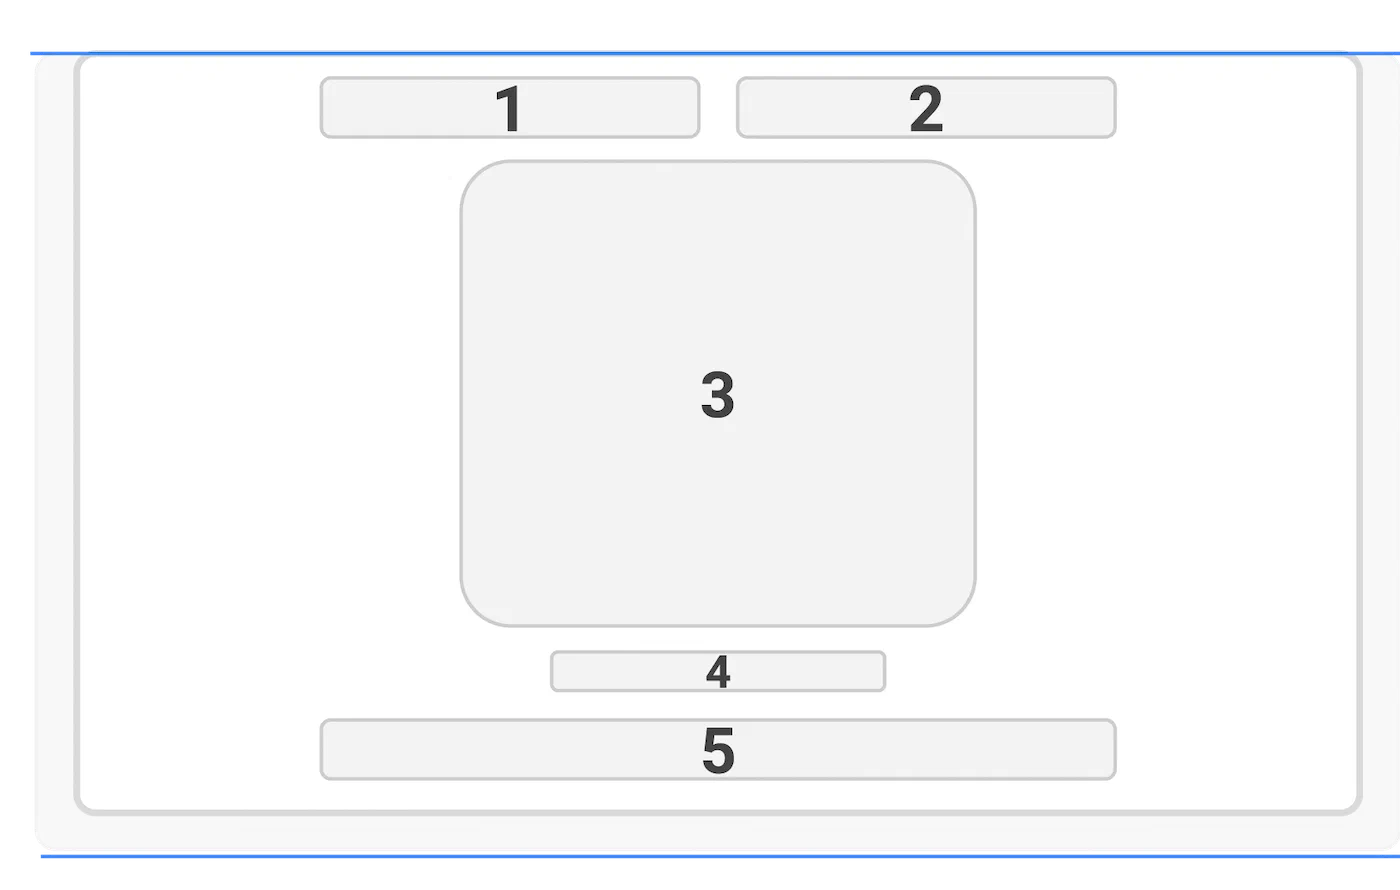
*The Barcode section of a boarding pass*
| Template field | Adaptive Link keypayload.flights[] |
Default label | Required | |
|---|---|---|---|---|
| 1 | headers.securityProgramLogo |
|
||
| 2 | headers.boardingPrivilegeImage |
|
||
| 3 | headers.barcode_value |
passengers[].fields.confirmationCode |
||
| 4 | |
headers.barcodeAltText |
||
| 5 | headers.airlineAllianceLogo |
fields.airlineAllianceLogo |
| Template field | Adaptive Link keypayload.flights[] |
Default label | Required | |
|---|---|---|---|---|
| 1 | boardingPosition |
Position | ||
| 2 | passengers[].fields.boardingPosition.value |
|||
| 3 | sequenceNumber |
Sequence | ||
| 4 | passengers[].fields.sequenceNumber.value |
|||
| 5 | boardingDoor |
Boarding Door | ||
| 6 | passengers[].fields.boardingDoor.value |
|||
| 7 | flightNumber |
Flight Number | ||
| 8 | fields.flightNumber.value |
:white_check_mark: | ||
| 9 | confirmationCode |
Confirmation Code | ||
| 10 | passengers[].fields.confirmationCode.value |
:white_check_mark: | ||
| 11 | eticketNumber |
Ticket Number | ||
| 12 | passengers[].fields.eticketNumber.value |
:white_check_mark: | ||
| 13 | frequentFlyerNumberfrequentFlyerProgramName |
Frequent Flyer Number1 | ||
| 14 | passengers[].fields.frequentFlyerProgramName.valuepassengers[].fields.frequentFlyerNumber.value |
|||
| 15 | boardingTime |
fields.boardingTime.label |
Boarding Time | |
| 16 | fields.boardingTime.value |
|||
| 17 | gateClosingTime |
fields.gateClosingTime.label |
Gate Closes | |
| 18 | fields.gateClosingTime.value |
|||
| 19 | departureTime |
fields.departureTime.label |
Scheduled | |
| 20 | fields.departureTime.value |
|||
| 21 | actualDepartureTime |
fields.actualDepartureTime.label |
Estimated Departure | |
| 22 | fields.actualDepartureTime.value |
|||
| 23 | arrivalTime |
fields.arrivalTime.label |
Scheduled | |
| 24 | fields.arrivalTime.value |
|||
| 25 | actualArrivalTime |
fields.actualArrivalTime.label |
Estimated Arrival | |
| 26 | fields.actualArrivalTime.value |
|||
| 27 | arrivalTerminal |
fields.arrivalTerminal.label |
Arrival Terminal | |
| 28 | fields.arrivalTerminal.value |
|||
| 29 | arrivalGate |
fields.arrivalGate.label |
Gate | |
| 30 | fields.arrivalGate.value |
|||
| 31 | boardingPrivilegeImage |
|
||
| 32 | Random Information1 |
|||
| 33 | Website1 |
| 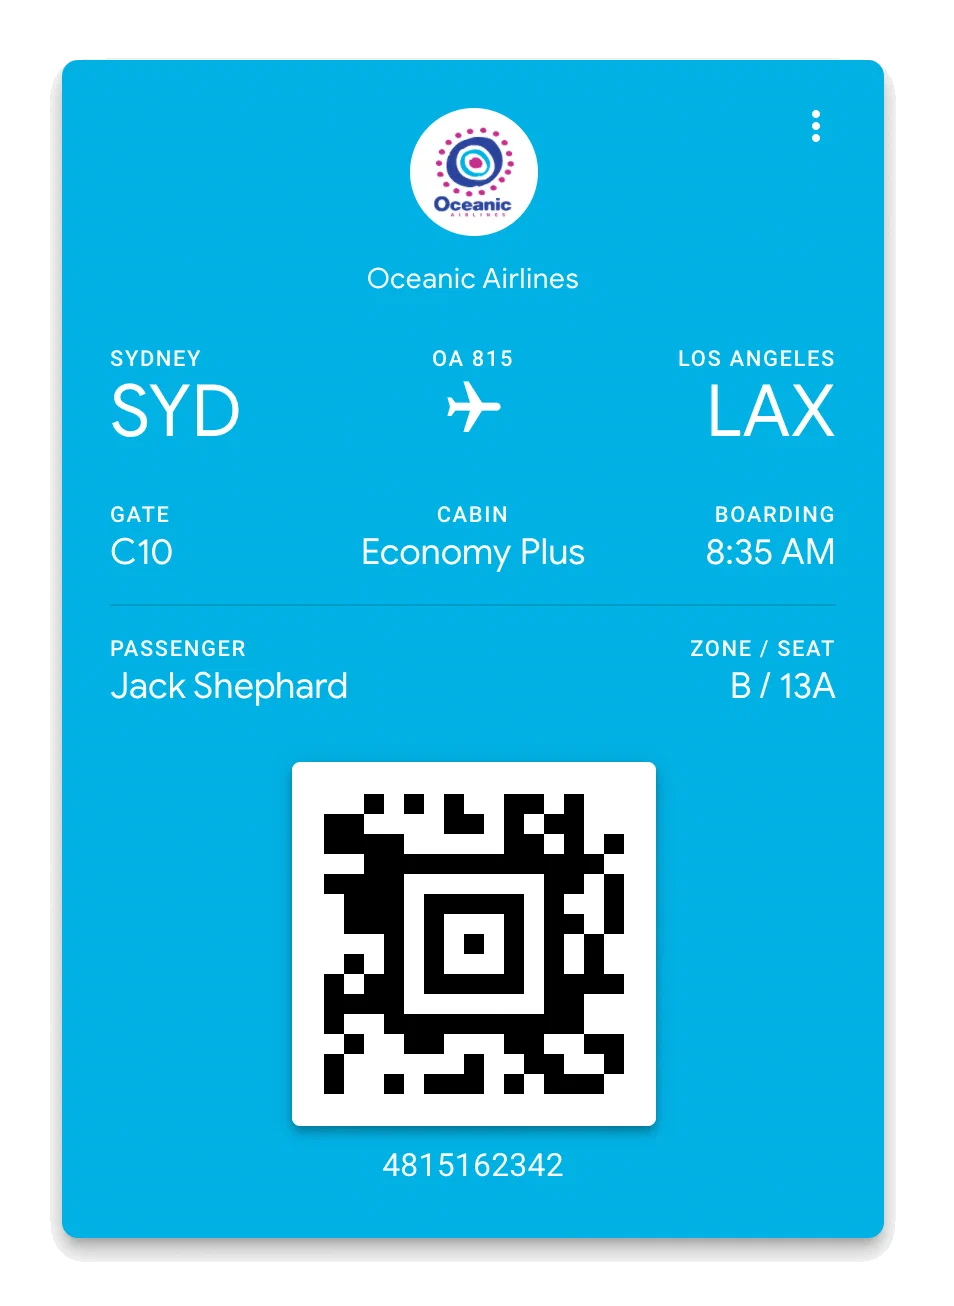 *Boarding pass with default fields* | 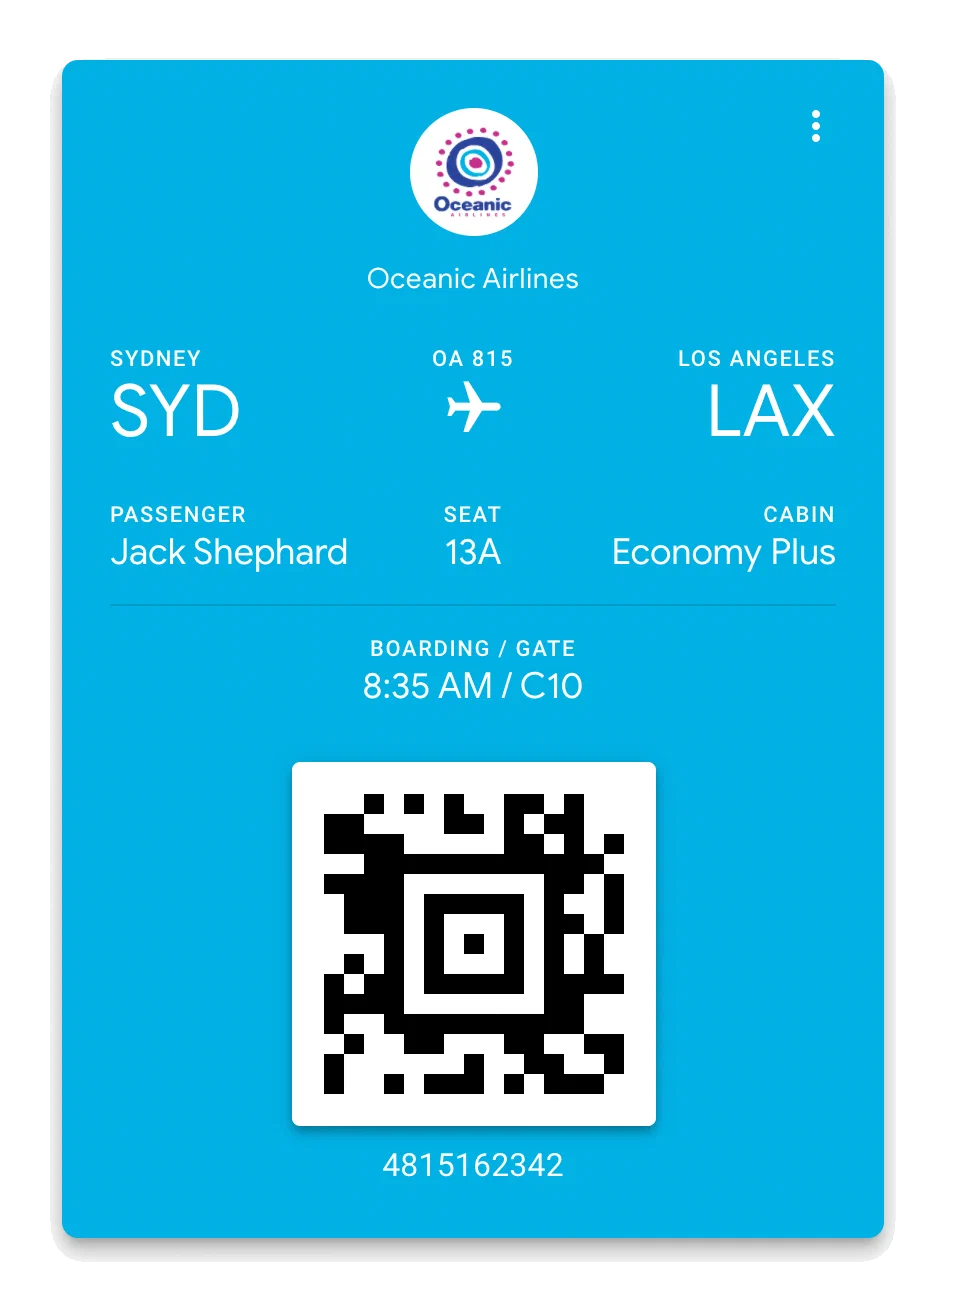 *Boarding pass with overrides applied* |