| Option | >Description | >Steps | >
|---|---|---|
| All Users | >Your entire app and/or web audience | >n/a | >
| Target Specific Users | >Audience members in a group you define | >See Targeting Specific Users. | >
| Test Users | >Members of a [Test Group](https://www.airship.com/docs/reference/glossary/#preview_test_groups) | >Select a Test Group. | >
| Feature Flag Audience | >Members of a [Feature Flag](https://www.airship.com/docs/reference/glossary/#feature_flag) Configuration audience1 | >Search for a flag by name, display name, or description, and then select a Configuration. | >
1. Configurations using the Feature Flag access condition are excluded.
### Channel conditions > **Note:** For projects in accounts using the [channel-level segmentation system](https://www.airship.com/docs/guides/audience/segmentation/segmentation/#channel-level-segmentation), channel conditions are instead set when using the **Target Specific Users** option for your message audience.Use channel conditions to filter which channels are included in the audience. A channel must meet the conditions to remain in the audience.
To set channel conditions, use the same process as when building a [Segment](https://www.airship.com/docs/reference/glossary/#segment). You can use the following data in your conditions:
Follow the configuration steps in Targeting Specific Users.
### Rollout [ADD-ON](https://www.airship.com/docs/reference/feature-packages/) *Rollouts for Scenes require the Feature Flags add-on for your Airship plan.* A rollout is a method of limiting a Scene's total or targeted audience by setting an adjustable percentage. For more information, see [Scene rollouts](https://www.airship.com/docs/guides/features/messaging/scenes/rollouts/). To set up a rollout: 1. Select **All users**, **Target by conditions**, or **Target Specific Users**. 1. Enable **Audience Allocation**. 1. Set a percentage. You can change the percentage at any time. For **Target by conditions** and **Target Specific Users**, the percentage applies to users who meet the set conditions. 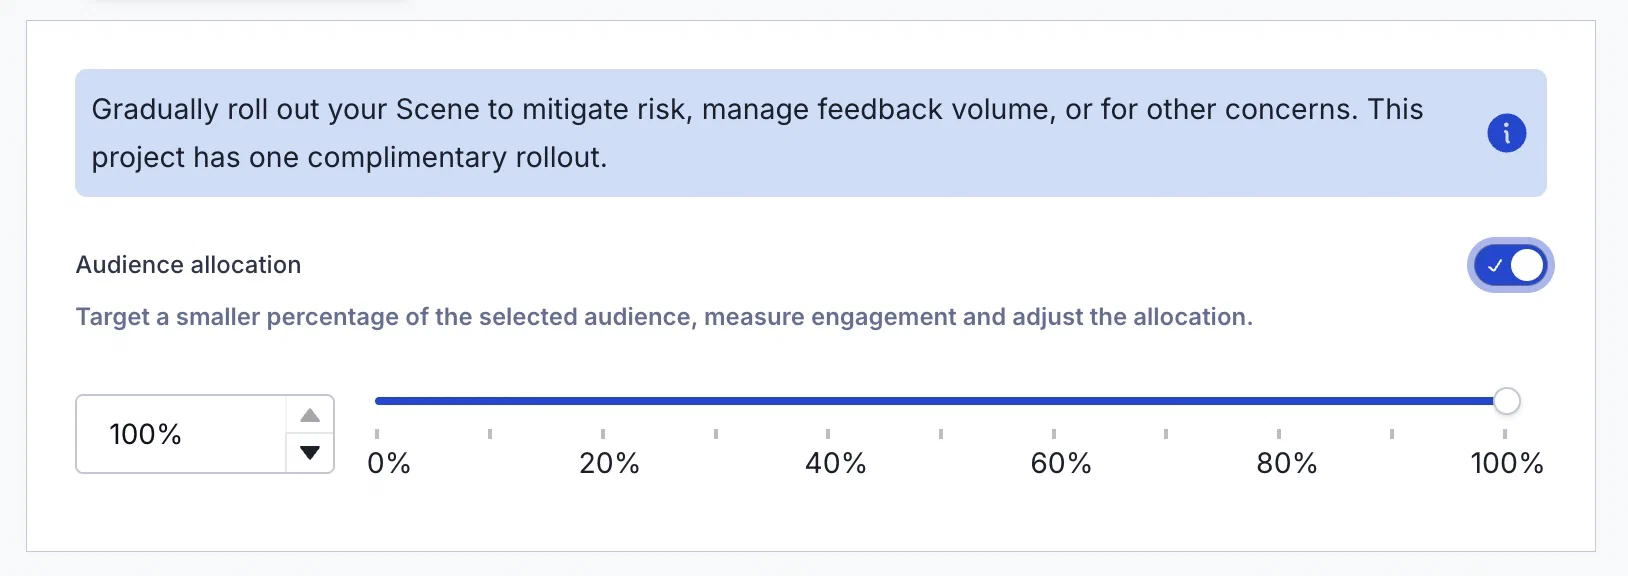 *Configuring a controlled rollout for a Scene* ## Content 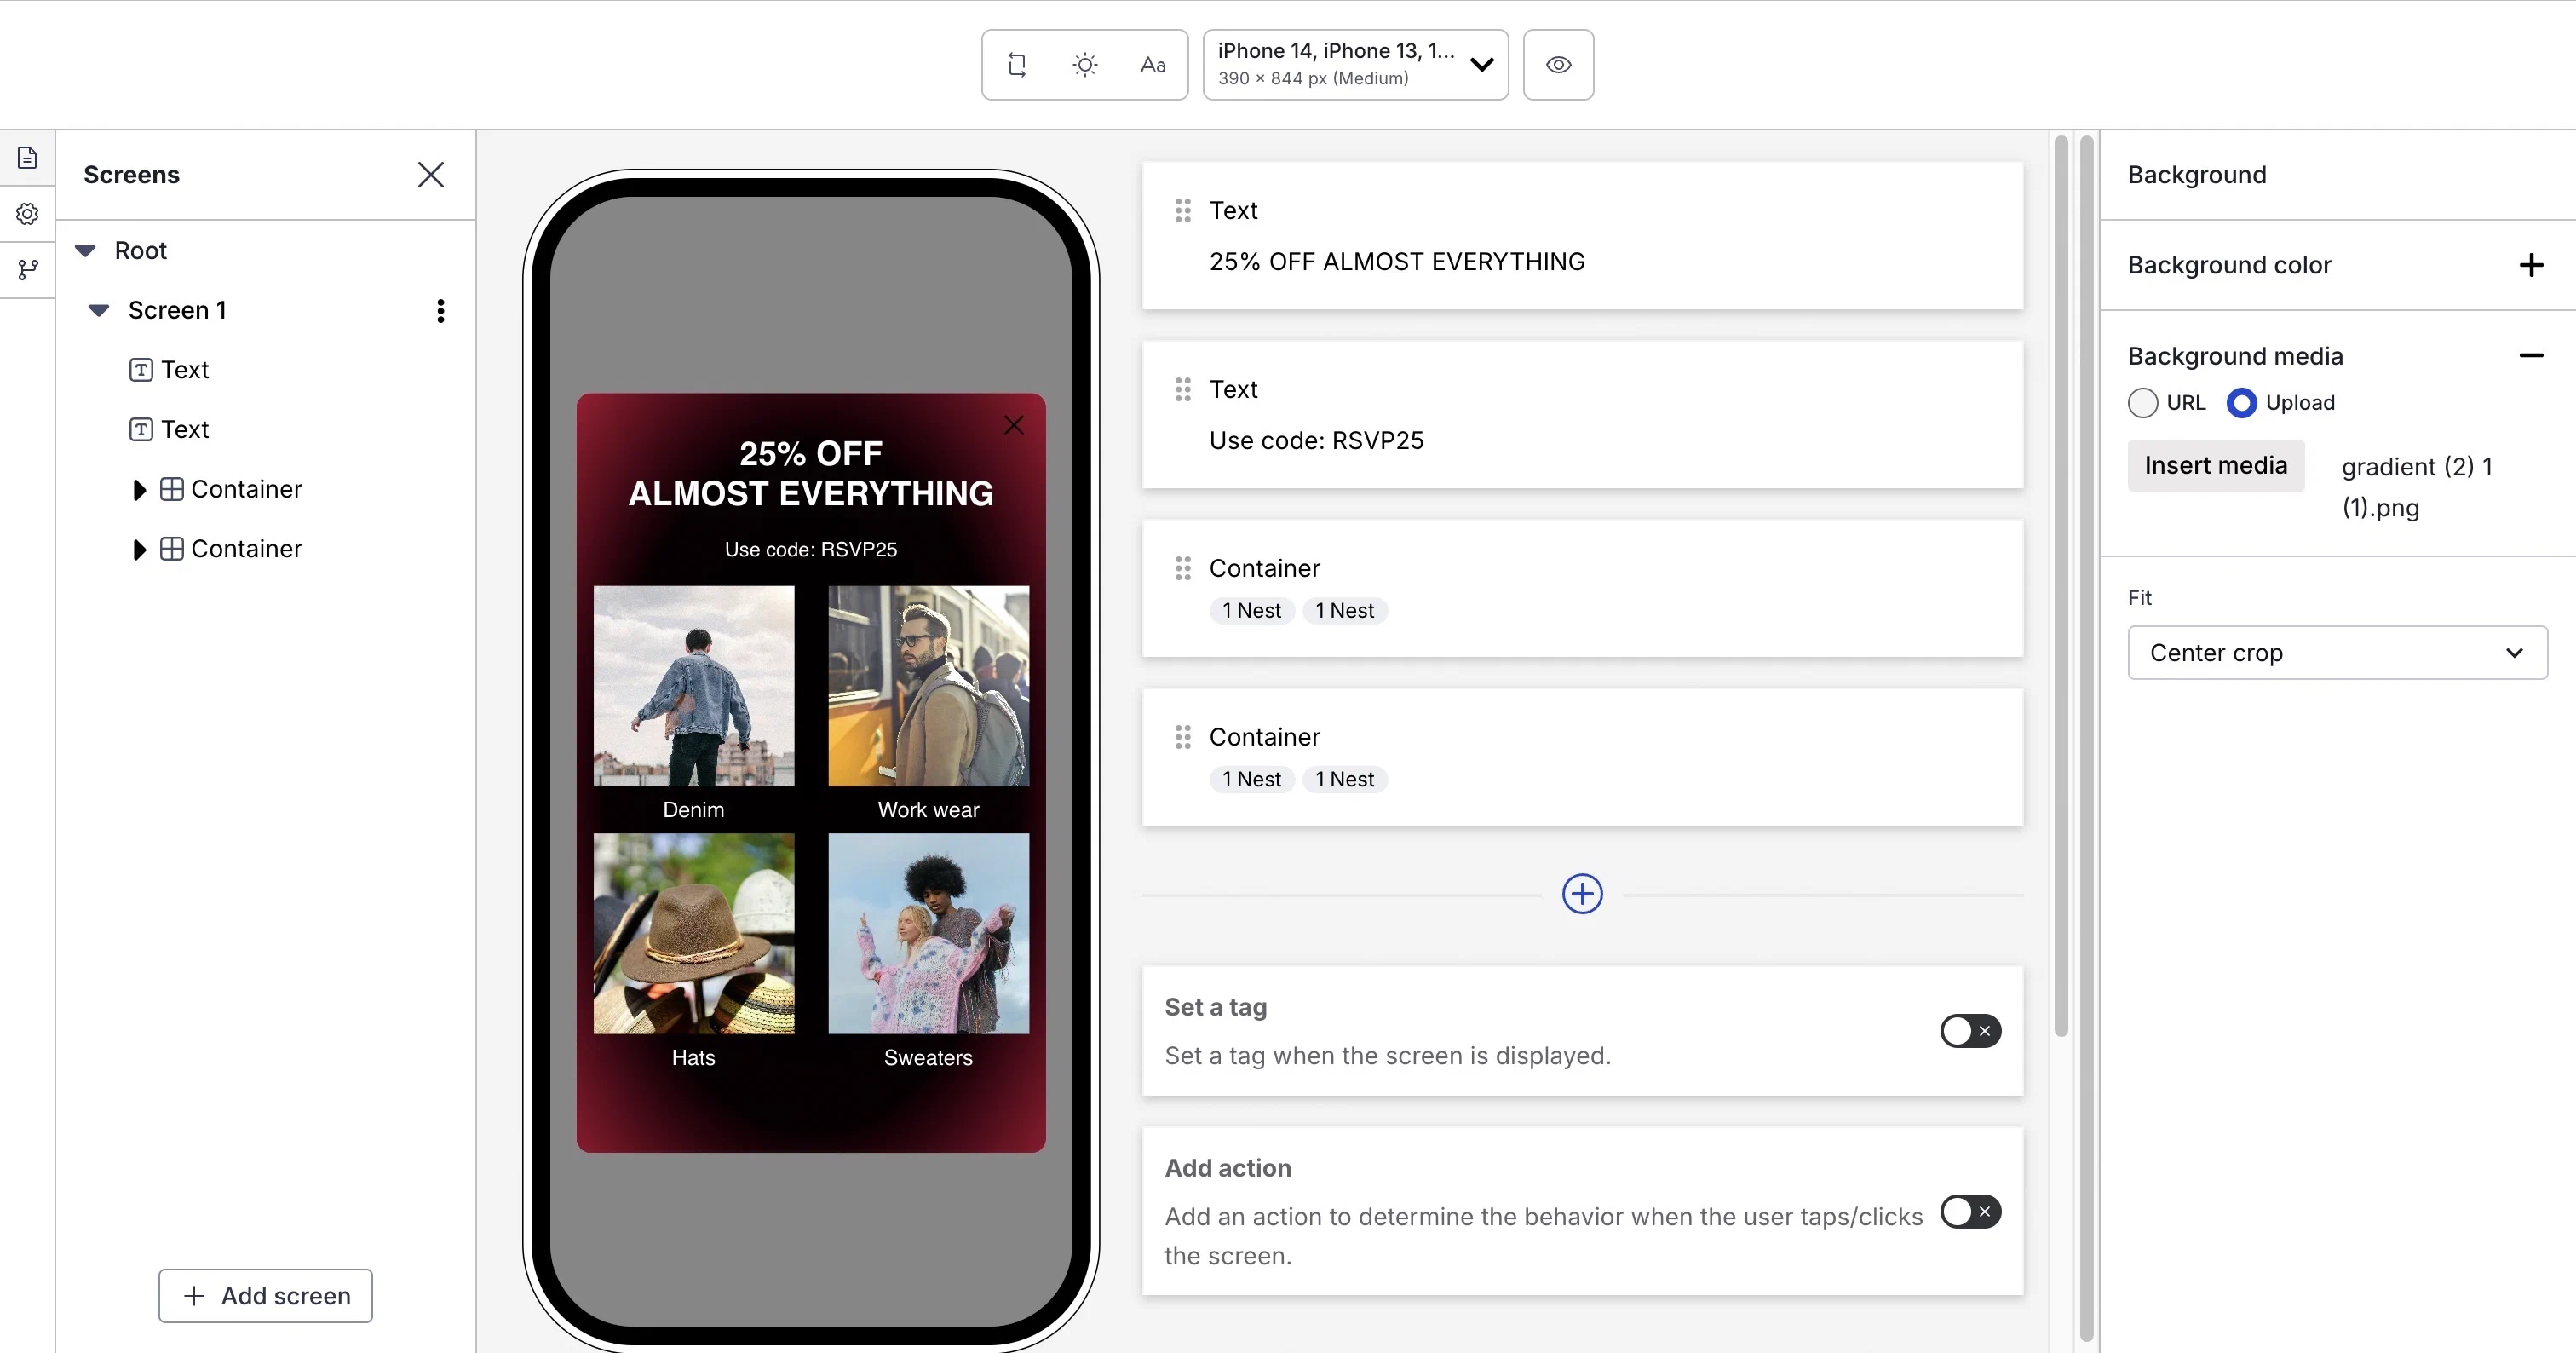 *The Content step in the Scene composer* Follow this general workflow for creating content: 1. Select a starting point: * **✨ Start with AI** — Create using a [conversational chat interface](https://www.airship.com/docs/guides/messaging/editors/native/ai-content/). * **Start from Scratch** — Manually configure each screen. * **Custom HTML** — [Provide your own HTML](#provide-custom-html). * **A default or [custom content layout](https://www.airship.com/docs/guides/messaging/editors/native/custom-layouts/)** — Select a template and then manually refine each screen. 1. Select **Continue with selection**. You can change your selection up until selecting **Done**. 1. Configure settings for the entire Scene and the content of each screen. See the [Native Experience Editor](https://www.airship.com/docs/reference/glossary/#ne_editor) for configuration options and details. 1. Select **Done**. ### Provide custom HTML [iOS SDK 20.1+](/docs/docs/developer/sdk-integration/apple/ios-changelog/#20.1.0) [Android SDK 20.1+](/docs/docs/developer/sdk-integration/android/changelog/#20.1.0) You can provide custom HTML for your Scenes instead of designing individual screens. After [selecting **Custom HTML** for your content](#content), enter a publicly accessible URL. If your Airship plan includes CDN support, you also have the option to upload an HTML file. Your HTML must be a single file containing all code. Any CSS, JavaScript, or images should be included inline or referenced via publicly accessible URLs. Custom HTML Scenes have the following limitations: * Native Scene features are not available, including [Branching](https://www.airship.com/docs/reference/glossary/#branching), [Story](https://www.airship.com/docs/reference/glossary/#story) mode, analytics tracking, or screen editing tools. All Scene logic, including multi-screen navigation, must be handled by your HTML and JavaScript. * Outside of your code, the only onscreen element you can configure is the [Dismiss button](https://www.airship.com/docs/guides/messaging/editors/native/root/). * Personalization is not supported. ## Behavior 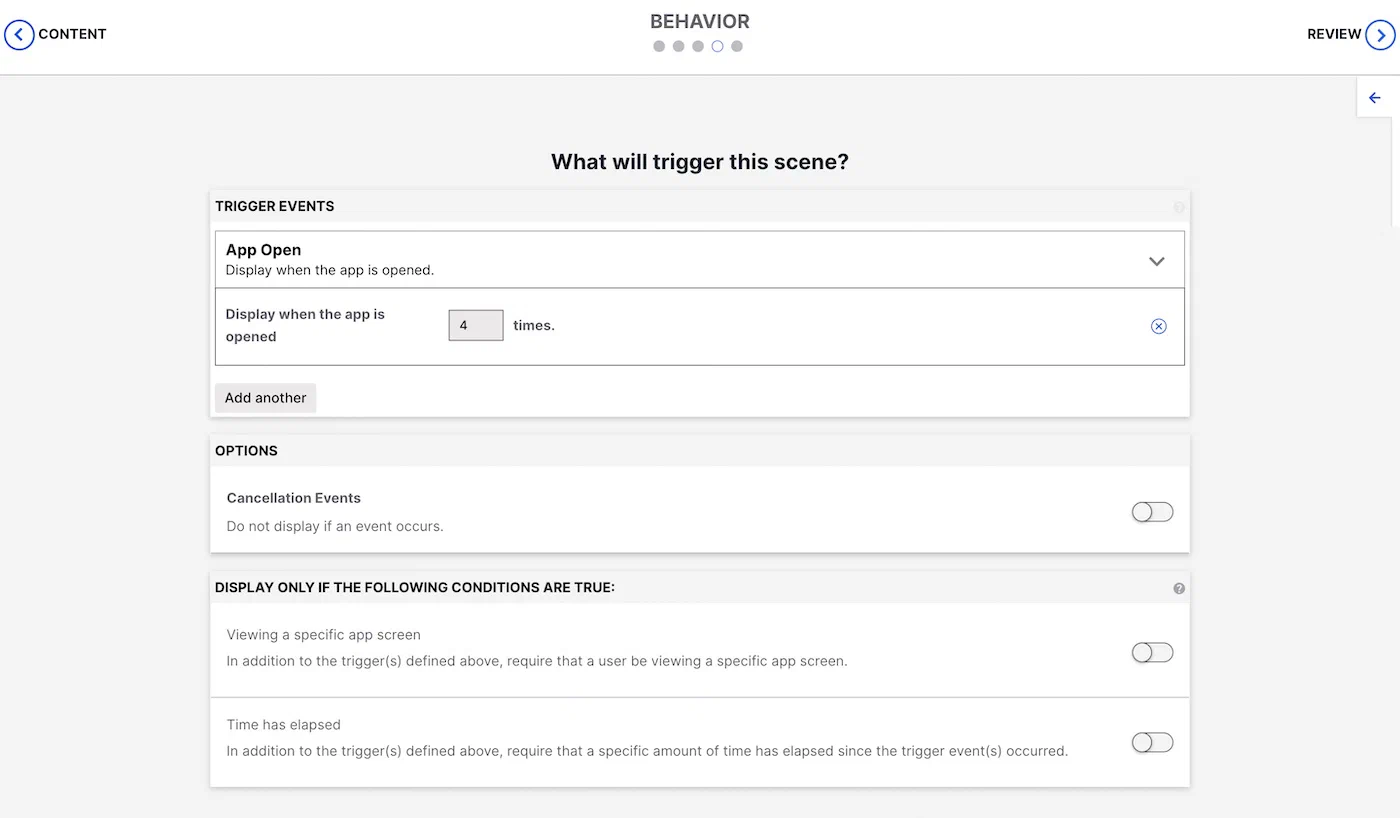 *The Behavior step in the Scene composer* Configure the event that will cause the Scene to appear to users. You can also configure cancellation events and conditions for displaying the Scene. Follow the steps in [In-app experience triggers](https://www.airship.com/docs/guides/messaging/in-app-experiences/configuration/triggers/). ## Review {#review-scene} Review your Scene appearance and summary. * For Scenes with more than one screen, select the arrows at the side of the screen to page through each screen's preview and content summary. Toggle the Light/Dark selector above the preview to see the appearance of elements with an assigned [Color Set](https://www.airship.com/docs/reference/glossary/#color_set). Light Mode values appear in Dark Mode preview if no Dark Mode value was entered for a color set. * If you selected **Feature Flag Audience** in the [Audience step](#audience), compare the flag and Scene start and end dates in the Schedule section to make sure your intended timing is set up correctly. * If you want to make changes, select **Edit**, make your changes, then either select the right arrow icon (caret-circle-right) or select the central navigation dot to return to the Review step. Select **Finish** to make the Scene active. If you exit before selecting **Finish**, the Scene is saved as a draft. # Scene reports > View aggregate survey reports and individual Scene performance metrics, including engagement statistics, user paths, screen interactions, and custom events. ## Aggregate reports For aggregate information about responses to questions and NPS surveys in your Scenes, see [Surveys](https://www.airship.com/docs/guides/reports/engagement/#surveys) in *Engagement Reports*. ## Individual Scene reports To view Scene-level reports, go to **Messages**, then **[Messages Overview](https://www.airship.com/docs/reference/glossary/#messages_overview)**, and select the report icon ( ) for a Scene. The report is in the same format as [Message Reports](https://www.airship.com/docs/guides/reports/message/). The header displays the Scene name and creation date, time and time zone, as well as its status. These options are available in the header: * Stop ( ) — Changes the status of an Active Scene to Canceled. This is effectively the same as [specifying an end date](https://www.airship.com/docs/guides/messaging/in-app-experiences/configuration/optional-features/#specify-start-and-end-dates), immediately applying an end date of "now." Active messages can be canceled at any time. * Play (play) — Changes the status of a Canceled or Expired Scene to Active. See [Restart an In-App Automation or Scene](https://www.airship.com/docs/guides/messaging/manage/change-status/#restart). This is effectively a shortcut to editing the Scene and either eliminating or [specifying an end date](https://www.airship.com/docs/guides/messaging/in-app-experiences/configuration/optional-features/#specify-start-and-end-dates). Expired Scenes can be restarted within a grace period of 14 days. After 14 days they can only be duplicated. * Edit ( ) — Opens the Scene for editing. Availability depends on its status. Active Scenes can be edited at any time. An Expired or Canceled Scene can be edited and its end date extended, making it active again, within a grace period of 14 days. After 14 days they can only be duplicated. * Duplicate ( ) — Creates a copy of the Scene and opens it for editing. You must complete the composer steps in order to save the new Scene. ### Performance The Performance section of a Scene report displays the following: * **Latest Message Activity** — This lists the username, date, time, and activity associated with the most recent change to the Scene. Last Message Activity data is available for 90 days after Scene creation. For Scenes with more than one activity, select **Show all** to open a modal window that displays all activity. * **Engagement Over Time** — This chart displays daily Completed, Dismissed, and Push Opt-in counts over the last 7 days. Hover over a date to see counts per day. You can select another time frame, and the chart will reload with the data for that period. * **User Paths** — For Scenes with branching, this flow chart displays each screen and its name, Impressions count, and Dismissed counts. A flow indicator shows the path taken between screens and the percentage of users that followed the path. Click and drag to move the chart, select the add (+) and remove icons (minus-circle) to zoom in and out, or select the refresh icon to restore the initial view. * **Statistics:** | Statistic | Description | | --- | --- | | **Survey Displayed** | For Scenes with questions or NPS, the total number of times the first screen with questions/NPS was displayed. | | **Survey Submitted** | For Scenes with questions or NPS, the total number of times users clicked the button or image with action [Submit Responses](https://www.airship.com/docs/guides/messaging/in-app-experiences/configuration/button-actions/#submit-responses) and the rate of submission. | | **Survey Not Submitted** | For Scenes with questions or NPS, the total number of times users dismissed the Scene without tapping the button or image with action [Submit Responses](https://www.airship.com/docs/guides/messaging/in-app-experiences/configuration/button-actions/#submit-responses). | | **Total Completed** | The total number of times all screens in a Scene were displayed and the rate of completion. This only appears for Scenes with more than one screen. | | **Total Dismissed** | The total number of times the Scene was dismissed before the last screen was displayed. This count is not included in reporting for Scenes with a single screen. | | **Total Impressions** | The total number of times the Scene was triggered and subsequently displayed on a device. This metric increments for repeat displays of the same Scene. See also [View impressions usage](https://www.airship.com/docs/guides/getting-started/admin/usage-payment/#view-impressions-usage) in our _View usage and manage payment_ guide. | | **Total Push Opt-ins** | The total number of users that opted in from the system prompt or app settings after tapping a button or image with action [Push Opt-in](https://www.airship.com/docs/guides/messaging/in-app-experiences/configuration/button-actions/#push-opt-in). | | **Unique Device Impressions** | The total number of unique devices where the Scene was triggered and subsequently displayed. This metric does not increment for repeat displays of the same Scene. | > **Note:** Ideally, Total Impressions = Total Completed + Total Dismissed, however discrepancies can occur due to: > > * **Users currently viewing a Scene** — Users triggered the Scene but have not yet dismissed or completed it. > * **Users closed the app, or users used the Back button on Android** — These behaviors are not reported by the SDK, so the related events are not tracked or counted. ### Scene detail The Scene Detail section of a Scene report displays the same information shown in the Review step of the Scene composer, plus: * Screen impressions — This is the total number of times the screen was displayed * Interactions — The Interactions table lists click/tap counts for each screen. * Screen dismissals — For Scenes with multiple screens, view a count of the times a screen was dismissed. Select the arrows to page through the previews of each screen. The counts update for the currently previewed screen. If you are currently running an [A/B test](https://www.airship.com/docs/guides/experimentation/a-b-tests/scenes/), you will see performance metrics for each variant. For more information, see [Selecting the winning variant](https://www.airship.com/docs/guides/experimentation/a-b-tests/scenes/#selecting-the-winning-variant) in *Scene A/B tests*. If you included questions or an NPS survey in your A/B test, responses are included in the [Surveys](https://www.airship.com/docs/guides/reports/engagement/#surveys) aggregate report. Select the link in Scene Detail to go to that report. ### Events The Events section of a Scene report displays a list of events directly and indirectly attributed to the Scene. The section is only displayed if you have [Custom Events](https://www.airship.com/docs/reference/glossary/#custom_event) enabled. Select **Download CSV** to export the data. The following data appears in the Events table: * **Event Name** — Human-readable name assigned to a particular Custom Event * **Notification Attribution** — Displays whether your event was directly or indirectly attributed to the Scene * **Count** — The number of instances of this event * **Value** — The value (monetary or otherwise) generated by the event * **Average Value** — *Value* divided by *Count* * **% of Total Count** — *Count* divided by the *Total* Count, which is listed on the bottom row If the Scene has a button, image, or screen configured with the action [Emit a Custom Event](https://www.airship.com/docs/guides/messaging/in-app-experiences/configuration/button-actions/#emit-a-custom-event), Notification Attribution for the event works as follows: * **Direct** — A user opened the app by tapping a push and emitted the Custom Event by tapping a button/image/screen in the Scene. * **Indirect** — A user opened the app sometime after a push was sent and emitted the Custom Event by tapping on a button/image/screen in the Scene. * **Unattributed** — No push was sent, and a user emitted the Custom Event by tapping a button/image/screen in the Scene. > **Note:** As of October 7, 2025, button tap events are listed per screen in the Interactions table in [Scene detail](#scene-detail). Before that date, events were listed in the Events table in the format `button-tap-action--