Campaigns
Keep your project organized by grouping related messages into Campaigns.
About Campaigns
Campaigns present your selected messages in list and calendar views, giving you:
- Focused hubs — Keep all messaging for a product launch, seasonal promotion, or event in one place.
- Cross-channel visibility — Get a complete picture of your coordinated marketing effort.
- Scheduling and monitoring tools — Use the calendar to spot scheduling gaps, avoid overlap, and optimize timing. You can sort and filter in both the list and calendar views to track status.
Open messages for editing, access reports, and create new messages directly from the Campaign.
You can also use AI to create and refine Campaigns, generating a structured overview and drafting messages through a conversational chat interface.
Though named similarly, campaign categoriesAn optional delivery feature used to group messages of similar types or messaging strategies for aggregate reporting. They help you track the efficacy of both your individual messages and a messaging campaign as a whole. are a separate feature and have no connection to Campaigns.
Create a Campaign
To create a Campaign using an AI chat interface, see Create and refine Campaigns using AI.
To create a Campaign manually:
- Select the Create dropdown menu (), then Campaign. Or go to Campaigns, and then select Add Campaign.
- Select the default Campaign name and change it to something descriptive, and then select the submit icon () to save it.
Now you can add existing messages or new messages. You can also add messages from a composer.
Add existing messages
After opening a Campaign, select Add , then select Add existing. You can search for messages by name and use the following filters:
- Status — Select from Active, Draft, Paused, or Scheduled status.
- Message Type — Select a composer:
Select at least one message by checking the box in its row, and then select Add to Campaign. You will return to the Campaign messages list.
Add new messages
After opening a Campaign, select Add , and then select a composer:
- Message
- Automation
- In-App Automation
- Scene
- A/B Test — Legacy
You can also select Journey to configure a Sequence, In-App Automation, or Scene in the Journey map.
For Journey, you can complete configuration in the map. For all other options, after completing configuration, you will return to the Campaign messages list.
Add messages from a composer
To add a message to a Campaign while composing:
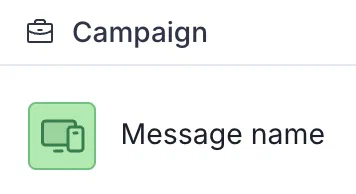
- Select Campaign above the message name. If the message is already assigned to a Campaign, the Campaign name will appear there instead.
- Search for and select a Campaign, or select Create to create a new one.
Create and refine Campaigns using AI
Use the Campaigns AI Agent to create or refine a Campaign through a conversational chat interface. Generate the Campaign overview and draft or update messages from a prompt or by uploading a file. You can chat with the agent at any time to make additional updates to your Campaigns.
You can also start from Audience PulseAnalysis of user activity using the Recency, Frequency, Monetary (RFM) method. You can create Segments from selected tiers and transitions within the reports and use them to target specific users.. See AI recommendations in Audience Pulse.
The agent supports the following capabilities:
- Conversational editing and refinement — Use natural language to iterate on your Campaign. Request changes like “Update the audience to loyalty members” or “Add a push notification for the launch date.”
- Campaign planning — Provide an objective, target audience, goals, and dates, and the agent will create a structured overview that serves as the foundation for message creation.
- Message creation — The agent uses the information in the overview as the foundation for drafting messages, ensuring content aligns with your goals and audience. It can create individual messages, ScenesA mobile app or web experience of one or more screens displayed with fully native UI components in real time, providing immediate, contextual responses to user behaviors. Scenes can be presented in full-screen, modal, or embedded format using the default swipe/click mode or as a story. Scene content can also be displayed in a Message Center message and contain survey questions., and SequencesA series of messages that is initiated by a trigger. Airship sends messages in the series based on your timing settings, and you can also set conditions that determine its audience and continuation. Sequences can be connected to each other and to other messaging components to create continuous user experiences in a Journey.. However, it cannot create open channel messages or link components to create a JourneyA continuous user experience of connected Sequences, Scenes, and/or In-App Automations..
Using the agent provides significant advantages:
- Faster planning — Turn a brief or idea into a complete campaign strategy and drafted messages with less manual setup.
- Documented strategy — Your strategy is captured in the overview before message creation begins, giving your team a shared reference as the campaign grows.
- Complete campaigns from incomplete briefs — The agent identifies gaps in your prompt or file and asks targeted follow-up questions, so you can build a complete campaign even when you don’t have all the details upfront.
- Consistent messaging — Because all drafted messages are grounded in the same overview, the agent produces content that’s consistent in tone, audience, and goals across the campaign.
You can use the agent from the Campaigns list or after opening a Campaign:
- Select Campaigns AI Agent.
- Enter a prompt describing your Campaign and/or upload a file.
- Supported file formats: TXT and PDF.
- The styles and personalities in your brand guidelines will be applied to the message design and content.
- Explicit content is excluded.
- Select the submit icon () after each prompt or upload.
After each generation completes, you can repeat these steps to continue editing. The agent will request additional information if needed to complete the overview. Once the minimum requirements have been met, it will prompt you to specify the messages you’d like to add and ask any questions needed to draft them. You can skip any item by saying “skip for now” or “I don’t have that information yet” when asked.
When you are finished using the agent, select the close icon (). Your chat history persists in the current editing session, so you can close and reopen the agent without losing your chat. Select the remove icon () to clear your chat history at any time.
All messages are added as drafts. You must still review message content, configure any per-message audience targeting, and schedule or send manually. For Scenes, you can also use the Scenes AI Agent for more fine-grained editing.
Opting In to AI Functions
If you opted out of AI usage, you must sign an updated contract to enable this feature. Contact your account manager for assistance.
Compliance Considerations in Using AI Functions
The Service incorporates AI functions, including Generative AI and Agentic AI.
Generative AI generates content such as Notification copy, images, and Journeys based on your prompts.
Agentic AI autonomously optimizes, personalizes, or executes cross-channel customer engagement actions, or analyzes audience and performance data, subject to the parameters and controls you set in the Service. These systems operate under human-defined parameters and do not initiate customer-facing actions without human interaction or pre-configured parameters. You are responsible for reviewing Generated Outputs for accuracy, appropriateness, and to ensure they do not violate third-party intellectual property or other rights. Airship does not publish Generated Outputs to end users without approval from the Customer.
In addition to the applicable terms of your agreement with Airship (e.g., Use of Service, Customer Responsibilities sections), you must comply with the Airship Acceptable Use Policy, which provides additional details about appropriate conduct when using the Service.
The Service includes safety features to block harmful content, such as content that violates our Acceptable Use Policy. You may not attempt to bypass these protective measures or use content that violates your agreement with Airship.
About the AI models:
Airship utilizes Google Gemini and Imagen to generate copy and images for AI Scene screens. The content is created solely with Google’s out-of-the-box models, and no customization or fine-tuning with Customer Data is applied. See Responsible AI in Google’s Google Cloud documentation.
Managing Campaigns
Go to Campaigns to view all Campaigns in your project. Each Campaign is listed by name and date last modified, with the most recently modified Campaign listed first. You can search for Campaigns by name.
To view or edit a Campaign, select its name from the list. To delete a Campaign, select the more menu icon (), then Delete.
Once you open a Campaign, you can work in three views:
Overview — The Campaign objective, goals, audience, dates, and channel strategies are automatically populated when you create and refine Campaigns using AI. Channel Strategies outlines each channel’s name, specifies its role as either Primary for the main message or Secondary for supporting communication, and details the particular strategy employed for that channel within the campaign.
Messages — Each message is listed by name with its status, channels, and last modified date. Select the name or date column headers to sort. You can manage messages using these options:
Option Description Steps Add message Add an existing message to the Campaign or create a new one. See the steps for adding messages in Create a Campaign. Edit message or open report Open the message in its origin composer or open its message report, Scene report, or Sequence performance report. Action availability depends on the status, and neither action is available for scheduled messages. Select the message name. Move message Move a message to a different Campaign. This action can be performed in bulk. Select the check box for one or more messages, then select Actions, and then Move to Campaign. Then, search for and select a Campaign, or select Create to create a new one. Remove message Remove a message from the Campaign. This action can be performed in bulk. Select the check box for one or more messages, then select Actions, and then Remove from Campaign and confirm. Calendar — This functions the same as the project-level calendar but includes only the messages in the Campaign.
The Status and Message Type filters in the list and calendar views are the same as in the project-level calendar. However, the messages list includes an additional legacy A/B test filter option, as these messages are only displayed in the list view, not in the calendar. See the filter descriptions in Visual indicators in Messages Overview and Calendar.
Goals
Use GoalsA business objective you want to measure, built from one or more selected events. Tracks conversions and generates performance reports. Also used for measurement in Holdout Experiments and A/B tests. to track the outcomes that matter most alongside the messages driving them. Reporting is scoped to only the messages in your Campaign, giving you the same Goal insights available at the project level narrowed to your Campaign’s performance.
From Goals in your Campaign, select Add, and then search for and select existing Goals, or create new ones by following the same steps as Create a Goal. You can add up to 10 Goals.
Now you can see how your Campaign’s messages are performing against each Goal, with a separate report for each one you add, giving you a clear picture of its effectiveness beyond sends and opens. Select Manage Campaign Goals to add or remove.
Goal reports do not include attribution for Scenes.
Content assets
Stay organized by associating your project’s content assets with a Campaign. You can reuse the same asset across multiple Campaigns without duplication.
Add existing media, templates, snippetsA reusable piece of content that you can define in Airship for later use in your messages and templates. Snippets support text or HTML content and can be used for commonly used elements such as a copyright, header image, or custom CSS., Preference CenterA page where users can manage their opt-in statuses for the subscription lists in your project. Preference Centers are presented within your app or website or as an Airship-hosted web page. web pages, and Scene layouts, or create new ones directly in the Campaign. Media requires CDN support. See Media library.
Add content from within a Campaign
Follow these steps to create new content or add existing items to a Campaign:
- Go to Campaigns and select a Campaign.
- Select Content for snippets, web pages, Scene layouts, and templates, or Media for your uploaded image, audio, and video files.
- Select Add, then choose a content type to create a new item or upload media, or Add existing.
- (For new content) Complete the steps for the content type:
- Media — Upload at least one file.
- Scene layouts — In the Scenes editor, select Save layout to add the layout to the Campaign. Editing before saving is optional.
- Templates, snippets, and web pages — Enter the name and other basic metadata to add the item to the Campaign. Edit it afterward to fill in the content.
- (For existing content) Select at least one item, then Add to Campaign or Insert selected media.
Add content at the project level
Use these steps when managing content at the project level:
- Go to Content for your project, then select a content type.
- For an item in the list, select the more menu icon (), then Add to Campaign.
- Select at least one Campaign, then Add.
Filter any content list by Campaign to view only its associated assets.
Managing content assets
In Content and Media, you can search assets by name or keyword.
In Media, the same management options are available as at the project level. See Managing media.
In Content, select the item’s name to open a drawer with the same management options as at the project level. See the relevant documentation:
To remove an asset from the Campaign, select the more menu icon (), then Remove from Campaign. The asset remains available at the project level.