# Visual editor
Use the Visual editor to upload HTML or configure templates for landing page and Message Center content.
The Visual editor is a legacy option for creating [landing page](https://www.airship.com/docs/guides/messaging/messages/content/app/landing-pages/) and [Message Center](https://www.airship.com/docs/guides/messaging/messages/content/app/message-center/) content.
## Capabilities
The Visual editor supports providing your own HTML or configuring a template:
* **HTML**— Uploaded HTML is single-use. It is not saved in your project for reuse on other messages, and you cannot edit it after uploading. See also [Custom HTML Templates for Rich Pages](https://www.airship.com/docs/reference/messages/custom-templates/).
* **Templates** — You can select a custom template added by Airship or [default template](#standard-templates-and-fields). The default templates have simple layouts and limited configuration options.
## Using the editor
You can select the Visual editor when configuring the content for [landing pages](https://www.airship.com/docs/guides/messaging/messages/content/app/landing-pages/) and [Message Center](https://www.airship.com/docs/guides/messaging/messages/content/app/message-center/).
After selecting the editor, follow these steps to configure content:
1. (For uploading HTML) Under **Standard Templates**, select the Upload option, and then:
* For landing pages, select **Upload** and choose your HTML file.
* For Message Center, go to the **Content** tab, and then select **Upload** and choose your HTML file.
1. (For templates) Select a custom template or a [default template](#standard-templates-and-fields). Templates added for you by Airship are listed under **Custom Templates**. Before making your choice, you can select **Preview** and a device type to see how it will appear.
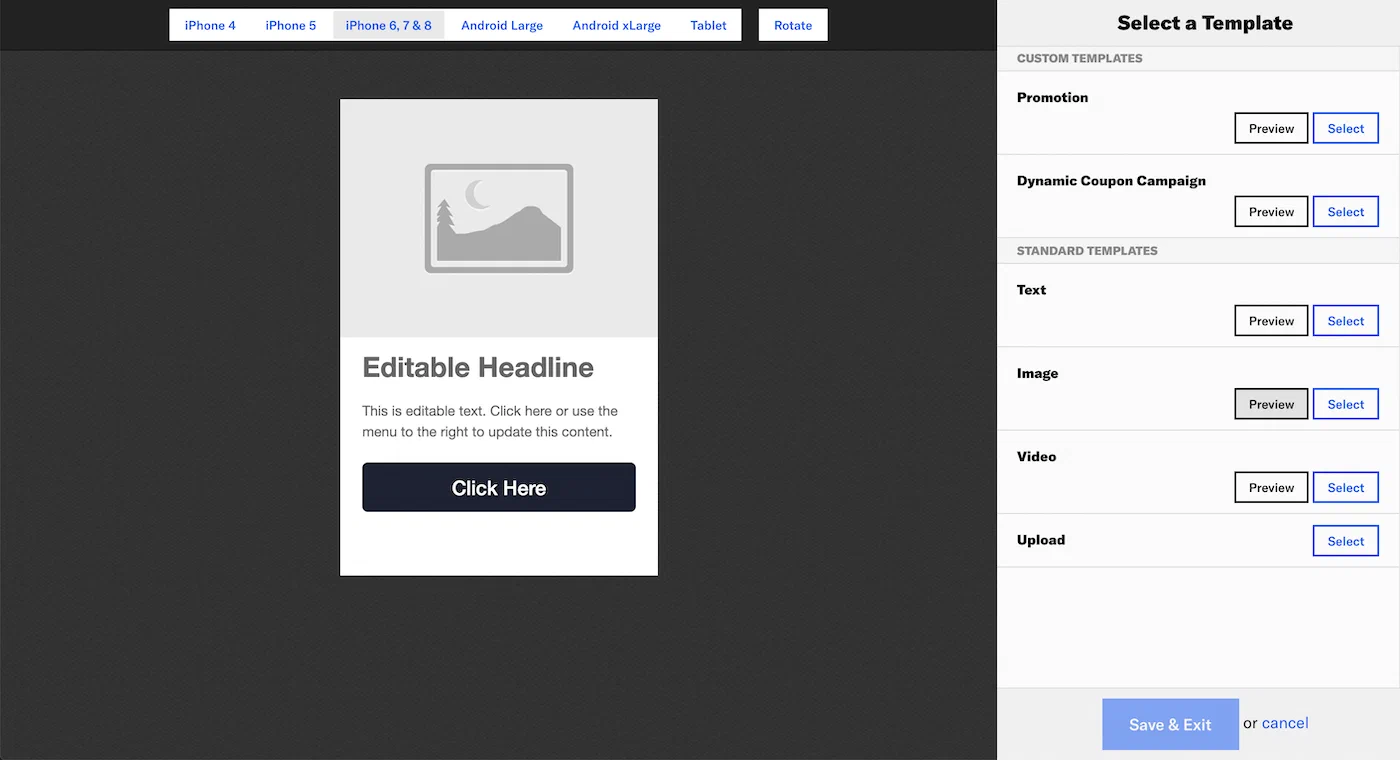
*Selecting a template in the Visual editor*
Next, [configure the template fields](#field-configuration) for each page element. For Message Center, the fields appear in **Content**. You can select fields in the preview or the sidebar. Use the **ON/OFF** toggle to enable or disable a field.
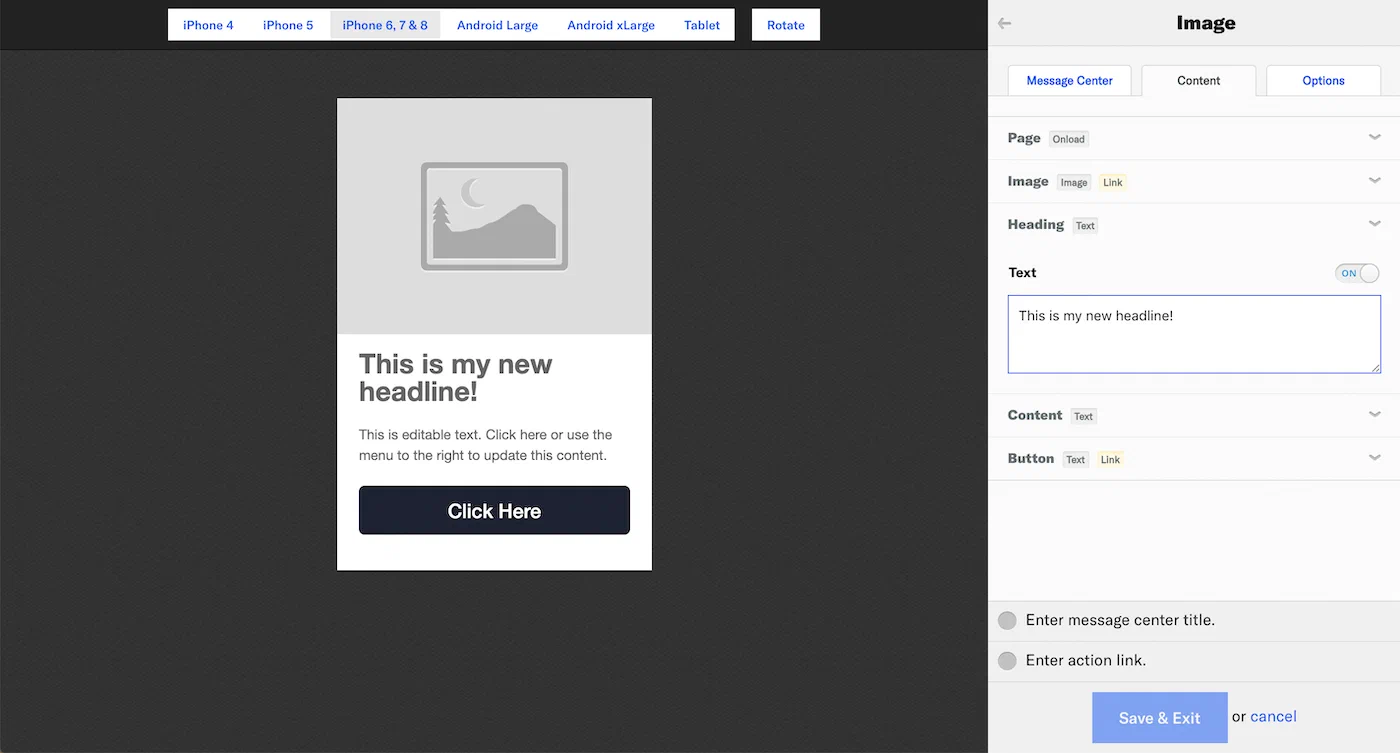
*Configuring Message Center template fields*
1. (Message Center only) Select **Message Center** and configure the message preview that appears in the Message Center inbox:
* **Message Center Title** — Required. Enter text.
* **Thumbnail** — Upload an image. See [Media guidelines](https://www.airship.com/docs/reference/messages/media-guidelines/).
* **Lines 1 and 2** — These lines appear below the title. Enter text.
1. (Message Center only, optional) Select **Options** to configure the following:
* **Remove from Message Center** — By default, messages are set to never expire. To set expiration, select **Specify** and enter the number of minutes, hours, or days after send time when the page will expire and be removed from a user's inbox.
* [Custom Keys](https://www.airship.com/docs/reference/glossary/#custom_keys) — Enter the key and value. Click for additional keys.
> **Tip:** If your Message Center is set up with [Named User](https://www.airship.com/docs/reference/glossary/#named_user) filtering, include a custom key with `named_user_id` as the key and the user's actual ID as the value.
>
> See information about filtering by Named User in the Message Center documentation for [SDK integrations](https://www.airship.com/docs/developer/sdk-integration/).
1. Select **Save & Exit**.
* You cannot save until your page meets minimum configuration requirements. Requirements are listed above **Save & Exit**.
* If your template includes a button or image, you must configure or disable its Action Link before you can save.
### Standard templates and fields
Airship provides three default (labeled "Standard") templates: Text, Image, and Video. Each template contains various default elements, which require [configuring one or more fields](#field-configuration).
| Element | Fields | Text template | Image template | Video template |
| --- | --- | --- | --- | --- |
| Page | Onload | ✓ | ✓ | ✓ |
| Headline | Text | ✓ | ✓1 | ✓ |
| Content | Text | ✓ | ✓ | ✓ |
| Button | Text, Link | ✓ | ✓ | |
| Image | Image, Link | | ✓ | |
| Video | Video | | | ✓ |
1. Labeled "Heading" in the Image template.
### Field configuration
Elements in a template are controlled by various fields. Both custom and standard templates use the same field types, requirements, and configuration:
* **Text** — Displayed in a headline, message body, button label, etc. Enter text.
* **Image** — Displayed in the body of the message. Upload an image. See: [Media guidelines](https://www.airship.com/docs/reference/messages/media-guidelines/).
* **Video** — Displayed in the body of the message. Enter the URL for the video source. See: [Media guidelines](https://www.airship.com/docs/reference/messages/media-guidelines/).
* **Onload** — Add or remove tags when the content loads.
1. Click **Add Tags** or **Remove Tags**.
1. Click **Select Tag**.
1. Enter the tag in the search field.
* Matches are listed below the **Create Tag** button. Click to select.
* If the tag is not found, click **Create Tag** to add it.
* Remove a selected tag by clicking
at the end of its row.
1. (Optional) Repeat for additional tag actions.
* **Link** — The action that occurs when a user taps a button or image in the message. Select and configure an [Action](https://www.airship.com/docs/reference/glossary/#action): *Deep Link*, *URL*, or *Share*.
You can also add or remove a tag when your audience taps the button or image. Follow the process as described for *Onload* above.
> **Important:** * Images have *Action Link* enabled by default. This makes the image perform as a button. If you don't want the image to be clickable, disable *Action Link* for the image.
> * While you can disable the *Action Link* for buttons, doing so does not remove the button itself. Because you must configure or disable the *Action Link* to save a template, you can disable it if you want to edit the message later.
Use the **ON/OFF** toggle to enable or disable an element.