SFTP upload for CSV files
Bulk-upload audience and personalization data from CSV files to your Airship project over SFTP.
What you can upload
SFTP upload supports the following tasks:
- Creating an uploaded listAn audience list you populate by uploading a CSV of channel or named user IDs. In the API, uploaded lists are called static lists. — See Uploaded lists.
- Setting and removing attributesMetadata used for audience segmentation and personalization. Attributes extend the concept of tags by adding comparison operators and values to determine whether or not to target a user, helping you better evaluate your audience. — See CSV upload in Setting and removing attributes.
- Associating channelsA device or address registered with Airship to receive messages, such as a mobile app, web browser, email address, or SMS number. It stores opt-in status, device-specific information, and metadata used for targeting. Each channel has a unique channel ID. with named usersA contact identified with an ID you provide, such as a customer ID from your CRM. Associating channels with that ID maps multiple devices and channels to one individual. Each named user has a unique named user ID. — See CSV upload in Named users.
- Adding more codes for a CouponsA service for adding promotional codes to messages. You provide a CSV file with the codes and other optional campaign data and reference the data using Handlebars in your message content. When you send the message, Airship uses the information from your uploaded CSV file to insert the code into the message. campaign — See Managing campaigns and adding more codes in Coupons.
All uploaded files are encrypted in transit and at rest.
Generate an SSH key pair
Airship’s SFTP implementation uses SSH key pairs for authentication: a private key for your client and a public key for Airship.
First, generate your key pair:
- Open a terminal. On Windows, use PowerShell or Command Prompt.
- At the command line, enter
ssh-keygen -t rsa. You can set other options, but the key type must be set to RSA (-t rsa). - Enter the directory and file name for your new keys, without an extension. For example:
/Users/your_username/Documents/rsa_keys/<filename>. - (Optional) Set a passphrase and confirm.
The output of the process generates two files:
<filename>contains your private key.<filename>.pubcontains your public key.
Copy the contents of your .pub file. You’ll paste it when adding the key to Airship.
Add your public key to Airship
Add your public key to Airship so it can authenticate your SFTP transfers:
- Next to your project name, select the dropdown menu (), then Settings.
- Under Project settings, select SFTP.
- Select Add key.
- For Purpose, select the type of transfers you intend to make using the key:
- Attributes or Attributes snapshot — For processing details, see Setting and removing attributes.
- Coupons
- Named users — Use for named user association
- Static lists — Use for uploaded listsAn audience list you populate by uploading a CSV of channel or named user IDs. In the API, uploaded lists are called static lists.
- For Name, enter a value that helps you identify the key in the dashboard.
- For Public key, paste the contents of the
<filename>.pubfile you saved in the previous step. - Select Save key.
Repeat this process for each additional purpose. You can reuse the same key pair, but each purpose needs its own key entry.
After saving, select the view icon () for a key and copy the values you need to configure SSH or an SFTP client:
- For SFTP clients, copy the username, address, and port values.
- For SSH-based connections, copy the SSH command line value. It combines the username, address, and port into one string.
For all SFTP connections, the port is 5222, and the address is sftp.airship.com, or sftp.airship.eu for EU customers.
Configure a connection and transfer files
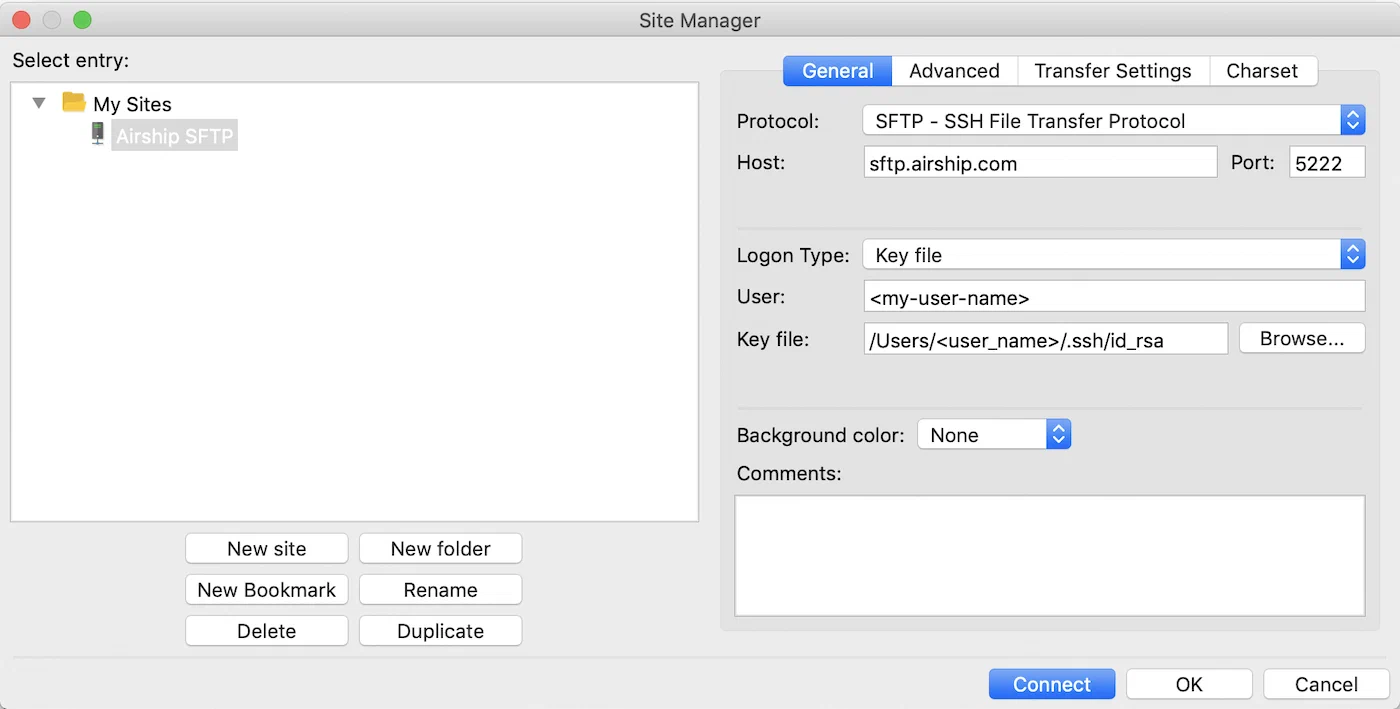
Set up SFTP transfer at the command line or with an SFTP client using the values copied from the Airship dashboard and your private key. Many CRM platforms natively support SFTP.
Once your connection is established, transfer your CSV files to Airship.
Verify transfer
After transfer, find each upload type at the following dashboard locations:
| Upload type | Dashboard path |
|---|---|
| Attributes | Go to Audience, then Attributes, then Upload History. |
| Named user association | Go to Audience, then Attributes, then Upload History. |
| Uploaded lists | Go to Audience, then Lists, then Uploaded. |
| Coupons | Next to your project name, select the dropdown menu (), then Settings. Under Project settings, select Coupons. |