# Web Integrate the Airship SDK into your website or web application. # Getting Started > This is a developer's guide for setting up Airship web push notifications and Scenes.Set up your project to register users for [Web Push Notifications](https://www.airship.com/docs/reference/glossary/#web_push_notification) and Web [Scenes](https://www.airship.com/docs/reference/glossary/#scene). Both are referred to generally as "notifications" and "web notifications" on this page. Airship supports web push notifications and Scenes on: The Airship Web SDK is hosted on a secure content delivery network (CDN). In order to enable these notifications, you will add two components to your site: 1. An asynchronous loading snippet that allows use of the SDK before and after it is fully loaded. 1. A service worker that handles incoming push requests and communicates with the Airship Service. > **Tip:** If you use an AI coding assistant, you can connect it to Airship with Skills and an MCP server. See [Airship AI Tools](https://www.airship.com/docs/developer/ai-tools/ai-tools/). ## Resources * [Web SDK Reference](https://www.airship.com/docs/reference/libraries/web-notify-sdk/v2-latest/index.html) * [Web Platform Overrides](https://www.airship.com/docs/developer/rest-api/ua/schemas/platform-overrides/#weboverrideobject) ## Airship Setup > **Important:** Airship Web SDK v2 was released August 1, 2024. > > * **Channel configuration** — The default title, action URL, and icon URL for web push are required for configuring the Web channel and will be included in the SDK bundle's JavaScript snippet, even if you intend to only use Web [Scenes](https://www.airship.com/docs/reference/glossary/#scene) in your project. > > * **Opt-in** — User opt in is not required for Web Scenes. You only need an opt-in prompt for web push. > > * **Billing** — If you register channels for Web users who do not opt in to web notifications, you are agreeing to be billed for [Monthly Unique Visitors](https://www.airship.com/docs/reference/billing/#monthly-unique-visitors). This may require an amendment to existing contracts. Contact your account manager for details. > > Removed support for Web SDK v2: > > * **AMP** — We will continue to support Web configurations that previously had Accelerated Mobile Pages (AMP) enabled, but AMP is not supported for new configurations. > > * **Secure bridge** — For Web SDK v1, we provided a workaround script for sites that were not fully HTTPS. This workaround was not required for non-HTTPS sites on Safari. Secure bridge is not supported for v2 integrations. > > We will continue to support Web configurations that previously had Secure Bridge enabled, but we no longer provide the script or setup instructions for sites still on Web SDK v1. > > * **Safari versions older than 16** — Web SDK v1 supports Safari versions older than 16, which requires an Apple Safari Web Push certificate in your Airship Web channel configuration. This is not supported for Web SDK v2 integrations. > > If your Web channel was already configured for Safari support, you must either: > > * **Maintain your existing Safari certificate** — This option is for supporting existing users who have opted in to web notifications, even if/when they upgrade to Safari 16 or above. See [Apple Safari Web Push certificates](#apple-safari-web-push-certificates) below. > * **Rebuild your Safari audience** — If you stop maintaining your Safari certificate, users will re-register upon their next visit to your website since they are already opted in at the browser level. > > Upgrading to Web SDK v2: > > * For Web channels already configured for AMP, Secure Bridge, and/or Safari versions older than 16, you will see an **Upgrade** button in the Web channel settings. > * After selecting **Upgrade** and confirming understanding of the consequences: > 1. The options for AMP, Secure Bridge, and Safari configuration will no longer appear in the Web channel settings. > 1. You must update your website. See [Updating an Existing Integration](https://www.airship.com/docs/developer/sdk-integration/web/v2-sdk/#updating-an-existing-integration) in *Implementing Web SDK v2*. Begin by configuring your site in the dashboard. Navigation to the settings differs depending on whether you have App or Web [Scenes](https://www.airship.com/docs/reference/glossary/#scene) enabled for your project. > **Warning:** The downloadable SDK bundle is for Web SDK v2 only. If you need to update your web push default values (Title, Action, Icon URL) and **do not need to migrate to v2**, do not make changes to your Web channel configuration. Instead, directly edit the content from [your `snippet.html`](#add-javascript-snippet-to-web-pages) that you added to each page of your website. 1. Next to your project name, select the dropdown menu (▼), then **Settings**. 1. Under **Channels**, select **Web**. 1. Configure default values for each field. The preview updates as you enter information. You can override your default values on a per message basis via the dashboard or API. | Field | Description | Steps | | --- | --- | --- | | **Default Title** | The bolded title that appears above the message body, typically your brand name | Enter text. | | **Default Action URL** | The URL that opens when a user clicks/taps your message, typically your brand's homepage URL | Enter a publicly accessible URL. | | **Default Icon URL** | The path to the image that will appear in your web push notifications. If you have CDN enabled, you also have the option to upload an icon. See also [Web icon](https://www.airship.com/docs/reference/messages/media-guidelines/#web-icon) in our _Media guidelines_ documentation. | Enter a publicly accessible URL or select **Upload icon** and select an image file. | 1. Manage the following options for websites where they are already in use. The options are not present when configuring a Web channel for the first time. | Option | Description | Steps | | --- | --- | --- | | **Secure Bridge** | Allows support for non-secure (non-HTTPS) websites | Toggle to enable or disable. | | **AMP Support** | Allows support for notifications on [Accelerated Mobile Pages](https://en.wikipedia.org/wiki/Accelerated_Mobile_Pages) | Toggle to enable or disable. | | **Safari Configuration** | For configurations supporting Safari versions older than 16, these are the domains that are allowed to request Safari registration permission from the user, and the required [Apple Safari Web Push certificate](#apple-safari-web-push-certificates) .p12 file and password | Enter the domains, starting with "http://" or "https://", either comma-separated or one per line. To replace the certificate, select **Choose File**, upload your .p12 file, and then enter the certificate password, if any. | 1. Select **Save**. The button will be labeled **Update** if you are editing an existing configuration. 1. Select **Download SDK Bundle** and save the zip file. 1. Unzip the bundle so you can use its files to complete the next steps. > **Important:** When you edit your web channel configuration, you must ALSO update your website with the new configuration files. > > After making changes and selecting **Update**, complete the final steps in the above procedure: download and unzip your new SDK bundle. Then you can proceed with the web SDK steps. ## Add JavaScript Snippet to Web Pages Locate file `snippet.html` in your unzipped SDK bundle and add the file content to all pages of your site. This file provides an asynchronous loading snippet that allows use of the Web SDK before it loads and comes populated with the configuration values required for your site. ### UA Object The loading snippet adds a `UA` object to the global scope. This object is a [Promise](https://developer.mozilla.org/en-US/docs/Web/JavaScript/Reference/Global_Objects/Promise) which resolves to the SDK object: ```js const sdk = await UA const {channelId} = await sdk.create() console.log("Channel ID: %s", channelId) ``` > **Note:** Our documentation uses the async/await syntax for promises, which may not be available to you depending on your environment. If this is the case, you may use the classic `then` syntax, such as: > > ```js > UA.then(function (sdk) { > sdk.create().then(function (result) { > console.log("Channel ID: %s", result.channelId) > }) > }) > ``` ### iOS and iPadOS Safari Apple added Safari support for web push in iOS and iPadOS 16.4. To use web notifications and Scenes on iOS/iPadOS devices, Apple first requires a user to save the website to their home screen as a web app. This essentially means bookmarking a web page by selecting the *Share* action and then *Add to Home Screen*. After that, you can direct users to take specific actions to opt in to receiving notifications. Once opted in, users can manage those permissions per web app/site in their device *Notifications* settings. The notifications from web apps work exactly like notifications from native iOS and iPadOS apps and appear on the Lock Screen, in Notification Center, and on a paired Apple Watch. > **Important:** This is not a comprehensive guide on Home Screen web pages. If you wish to add full support for these features, it's recommended you see the following articles for further details: > > * [WebKit: Release Announcement](https://webkit.org/blog/13878/web-push-for-web-apps-on-ios-and-ipados/) > * [Apple: Supported Meta Tags](https://developer.apple.com/library/archive/documentation/AppleApplications/Reference/SafariHTMLRef/Articles/MetaTags.html) In preparation for sending web notifications to your iOS and iPadOS users, you will need to configure your site to operate as a web app. At a minimum, add the following metadata to the `head` of your pages, which specifies to the browser that an app can run in "standalone" mode: **Site Metadata** ```html ``` > **Note:** The Airship-provided [HTML Prompt plugin](https://www.airship.com/docs/developer/sdk-integration/web/plugins/html-prompt/) does not prompt a browser that is in an unsupported context. It does not instruct the user to take any further action. If you are handling your own opt-in, you may also wish to handle iOS/iPadOS Safari opt-in differently, as calling `sdk.register()` will fail if the app is not running in standalone mode. The following [SDK Properties](https://www.airship.com/docs/reference/libraries/web-notify-sdk/v2-latest/UaSDK.html) are available: - `sdk.isSupported` is `true` if the SDK can load and track events; web push support is not considered - `sdk.isWebPushSupported` is `true` if the browser is supported _and_ supports web push; it does not consider if the current _context_ is supported (such as requiring it be added to the home screen on iOS) - `sdk.isAllowedPushRegistrationContext` is `true` if the browser is currently in an allowed registration context; note this does not otherwise check for browser features, so should only be checked after an `sdk.isWebPushSupported` check - `sdk.canRegister()` is a comprehensive check against _all_ checks required for web push registration, and returns a promise which resolves to `true` if: - the browser supports web push - the page is a secure context - the browser is in an allowable context (such as being saved to the home screen on iOS) - push permission has not already been denied When registering for web push, if `isSupported` is `true` and the value returned from `canRegister()` resolves to `false`, your site may be in a context that disallows registration. You can prompt the user to add the page to their home screen if they wish to receive notifications. This can also be detected using the [`Navigator.standalone`](https://developer.mozilla.org/en-US/docs/Web/API/Navigator#non-standard_properties) property, which is only available on iOS/iPadOS Safari, using code similar to the following: **iOS Safari Context Detection** ```javascript const sdk = await UA const canRegister = await sdk.canRegister() if (sdk.isSupported && !canRegister) { if ('standalone' in navigator) { // this is an iOS Safari context; prompt the user } } ``` ## Place Service Worker Web push employs a *service worker*, which runs as a background process until woken up to perform SDK tasks, e.g., displaying notifications. Locate the service worker file `push-worker.js` in your unzipped SDK bundle and place it in the **root directory of your site**. It is imperative that you do so **at the beginning of your implementation** so that your entire website is within the scope of the worker. The [JavaScript snippet](#add-javascript-snippet-to-web-pages) that you added to your site pages contains a URL for `push-worker.js` and assumes it is placed in the root. **If you are unable to place the file at root, your entire site may not be able to access the service.** If you need to combine the push worker with an existing service worker, you may need to specify a new location for your worker file. You can do this by adding a `workerUrl: '/service-worker.js',` setting to your on-page snippet, inside your service worker. For further reading on service workers, see these excellent primers from Google and Mozilla: * [Chrome Developers: Service worker overview](https://developer.chrome.com/docs/workbox/service-worker-overview/) * [Mozilla Developer Network: Service Worker API](https://developer.mozilla.org/en-US/docs/Web/API/Service_Worker_API) ### Troubleshooting: Duplicate Web Notifications If for any reason you have moved the service worker, e.g., from a non-root location to the root directory, users may receive duplicate push notifications. This is because users may have a browser-cached service worker running even though the file has been moved, and subscriptions are tied to push worker location. If they register again with the new (or newly-moved) service worker, they will have a new channel ID. **Add a new push-worker.js in prior location of service worker to unsubscribe users from duplicate notifications** ```js self.onactivate = function (ev) { self.registration.pushManager.getSubscription().then(subscription => { if (subscription) { subscription.unsubscribe() } }) } ``` To help out in situations like this, we have provided a bit of code (think of it as a "cleanup" service worker) that can be placed at the location of the original service worker. The process here is simple. All you have to do is put this code in a `push-worker.js` file placed where your previous service worker lived. Once you've done this, browsers will detect the change and unsubscribe any subscriptions tied to that worker location. And don't worry, this will not affect your Airship channels or any registrations tied to any other service worker locations. ## Send Your First Push Notification Now that you have configured your project for web push and are able to register users, it's time to send a test notification. You can do this via either the dashboard or our API. To send a notification via the dashboard, see: * [Create a message](https://www.airship.com/docs/guides/messaging/messages/create/) and [Web content](https://www.airship.com/docs/guides/messaging/messages/content/web/). * [Create a Scene](https://www.airship.com/docs/guides/messaging/in-app-experiences/scenes/create/) To send a web push via our API, two examples are provided below, one only to web browsers, and one to web, iOS, and Android. ### Web-Only Push In this example, we will introduce the [push object](https://www.airship.com/docs/developer/rest-api/ua/schemas/push/#pushobject), the required request body for sending a web push notification via the push API, using the three required attributes `audience`, `device_types`, and `notification`. Audience : We'll start with the simplest [audience selector](https://www.airship.com/docs/developer/rest-api/ua/schemas/audience-selection/#audienceselector1000) possible: an individual channel ID. For testing purposes, you can retrieve your channel ID from a registered browser by entering the following in the JavaScript console: ```js const sdk = await UA const channelId = await sdk.channel.id() console.log("Channel ID: %s", channelId) ``` Device Types : Since we are only sending to web devices, we will specify the `"web"` device type as an array of one. In the next example, we will include additional device types. Notification : Finally, we will specify the values for our test notification, including the alert text, and web push-specific attributes that we will include in the [web platform override](https://www.airship.com/docs/developer/rest-api/ua/schemas/platform-overrides/#weboverrideobject) object. Platform overrides can be used either to override a value for a specific platform or to specify values that are only applicable to that platform. **Example Request: Web only push** ```http POST /api/push HTTP/1.1 Authorization: Basic Content-Type: application/json Accept: application/vnd.urbanairship+json; version=3 { "audience": { "channel": "" }, "device_types": [ "web" ], "notification": { "alert": "Hello, Web!", "web": { "title": "My First Web Push Title", "require_interaction": true, "icon": { "url": "https://example.com/icon.png" } } } } ``` ### Push to Multiple Platforms This example illustrates sending a web push notification to a named user, "sven_svensson", who is registered on multiple platforms, including web. In the top-level `notification` attribute of the payload, the value for the `alert` property is "Hello, World!". Since we want our web users to experience the most relevant content possible, we are going to use the `web` override on the `notification` object to specify the more appropriate "Hello, Web!" alert message for web users. **Example Request: Push to multiple platforms** ```http POST /api/push HTTP/1.1 Authorization: Basic Content-Type: application/json Accept: application/vnd.urbanairship+json; version=3 { "audience": { "named_user": "sven_svensson" }, "device_types": [ "web", "ios", "android" ], "notification": { "alert": "Hello, World!", "web": { "alert": "Hello, Web!", "title": "My First Web Push Title", "require_interaction": true, "icon": { "url": "https://example.com/icon.png" } } } } ``` ### Additional Resources * [Web Content](https://www.airship.com/docs/guides/messaging/messages/content/web/) * [Web Platform Overrides](https://www.airship.com/docs/developer/rest-api/ua/schemas/platform-overrides/#weboverrideobject) ## Web SDK This section is an introduction to the Web SDK and associated methods. Please visit our [Airship Web SDK Reference](https://www.airship.com/docs/reference/libraries/web-notify-sdk/v2-latest/index.html) for a complete reference. ### UaSDK The main Web SDK object. It cannot be instantiated manually. It is returned by the async loader. #### Creating a Channel You may create a channel by using the Airship SDK's `create` method; using this method will make the current browser known to Airship, and allow you to use the SDK features. ```js const sdk = await UA await sdk.create() ``` #### Registering for Push Notifications Follow these steps to register the current browser with Airship. * Fetch the browser's subscription object, prompting the user for permission if necessary. * Collect browser information for out-of-the-box tag segmentation. * Register with Airship and resolve the returned channel object. * Resolves an error that can be caught if there is an error while registering or if the browser is in an unsupported context. > **Note:** A request to register for push notifications _must_ happen as the result of a > user interaction, otherwise the registration will be rejected by the browser > without prompting the user. **Example registration** ```js const sdk = await UA // now that the SDK is available, add a registration button to the DOM const button = document.createElement('button') button.innerHTML = "Register for Notifications" button.onclick = async (el) => { await sdk.register() } document.body.append(button) ``` #### Checking Browser Capabilities Make sure that the current browser has web push features AND is in a secure context capable of attempting registration. - `sdk.isSupported` is `true` if the SDK can load and track events; web push support is not considered - `sdk.isWebPushSupported` is `true` if the browser is supported _and_ supports web push; it does not consider if the current _context_ is supported (such as requiring it be added to the home screen on iOS) - `sdk.isAllowedPushRegistrationContext` is `true` if the browser is currently in an allowed registration context; note this does not otherwise check for browser features, so should only be checked after an `sdk.isWebPushSupported` check - `sdk.canRegister()` is a comprehensive check against _all_ checks required for web push registration, and returns a promise that resolves to `true` if: - the browser supports web push - the page is a secure context - the browser is in an allowable context (such as being saved to the home screen on iOS) - push permission has not already been denied Using these methods may be important if you wish to support Safari on iOS or iPad OS, as those have special requirements before push notification registration is allowed: **Checking for Push Notification Registration Support** ```js const permission = await sdk.getNotificationPermission() if (permission === 'granted') { await sdk.register() } if (permission === 'denied') { // user has denied notifications at the browser level, and opt-in is not // possible without the user changing their browser settings } else if (sdk.isWebPushSupported && !sdk.isAllowedPushRegistrationContext) { // prompt user to add the website to their home screen } else if (await sdk.canRegister()) { // is in an allowed context; prompt the user to opt into push notifications } ``` ### Channel Object {#channel-object} The property `sdk.channel` returns the channel interface for the current browser. It contains methods for retrieving or setting information on the channel. **Example** ```js const sdk = await UA // the current channel id, a string. will be `null` if no channel exists const channelId = await sdk.channel.id() // the current opted-in status, a boolean const optedIn = await sdk.channel.optedIn() // opt out the channel for push notifications const optedIn = await sdk.channel.optOut() ``` ### Event Listeners The channel interface fires a `channel` event when a channel is loaded or registered. > **Note:** If you intend to set attributes, tags, named user, or anything that could modify > the channel within your event listener, make sure to set the `once` option to > `true` in order to prevent an infinite loop. ```js const sdk = await UA sdk.channel.addEventListener('channel', ev => { console.log('channel id:', ev.detail.id) }, { once: true }) ``` If you are on a page that is in-scope of your push-worker.js: The main SDK object fires a `push` event when the browser receives a push. ```js const sdk = await UA sdk.addEventListener('push', ev => { // ev.detail is the push payload object }) ``` ## Apple Safari Web Push certificates If your [Web channel was already configured for Safari support](#airship-setup), you must maintain your existing Safari certificate to keep supporting existing users who have opted in to web notifications, even if/when they upgrade to Safari 16 or above. Otherwise, you will need to rebuild your audience. To create an Apple Safari Website Push certificate, you will need: * An Apple Developer account * A Certificate Signing Request (CSR). If you don't already have this file saved locally, [follow Apple's instructions](https://developer.apple.com/help/account/create-certificates/create-a-certificate-signing-request) to create one. First, download your SSL certificate: 1. Log in to your [Apple Developer account](https://developer.apple.com/account). 1. Go to **Account**, then **Certificates, Identifiers & Profiles**. 1. Select **Identifiers**, select the **Website Push IDs** filter, and then select your web push identifier from the list. 1. Select **Create Certificate** under **Production Certificates**. This will generate a Website Push Notification service SSL (Sandbox & Production) certificate compatible with both the Production and Development environments. 1. Select **Choose File** and upload your CSR file, and then select **Continue**. 1. Select **Download** and save the SSL certificate file for use in the next step. You may need to reload the page if the Download button is not yet active. Next, install your certificate, export it as a .p12 file, and create a password: 1. Open the certificate you downloaded in the previous step. It should open in the Keychain Access app and be listed in **My Certificates**. 1. ![Getting Started](https://www.airship.com/docs/images/p-export-p12_hu_853f430fb03d4b60.webp) Select the certificate in the list, then go to the **File** menu and select **Export Items...**.

Also be sure to select the **My Certificates** category in the sidebar. If **My Certificates** is not highlighted, you will not be able to export the certificate as a .p12 file. 1. ![Getting Started](https://www.airship.com/docs/images/export-filename_hu_a67ac4824a950386.webp) 
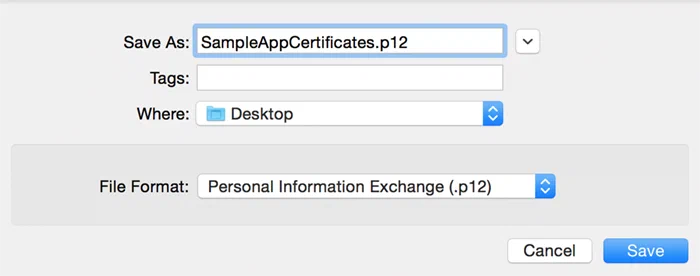
Save the file in the Personal Information Exchange (.p12) format.

You will be prompted to create a certificate password, which you will enter when you upload the .p12 file in the Airship dashboard. Now you can upload the .p12 file and provide the password when [configuring the Web channel in the Airship dashboard](#airship-setup). # Implementing Web SDK v2 > Implement version 2 of the Airship Web SDK.The v2 Web SDK supports features not included in v1: * Web [Scenes](https://www.airship.com/docs/reference/glossary/#scene), including survey questions and Story format * Registering browsers without Push Notification Opt-in ## Removed Support and Known Issues Before continuing, confirm that you do not use or require the following features of the v1 SDK, as support for them has been removed: * **HTTP setups** — This is also referred to as "secure bridge." The v2 SDK requires HTTPS on all pages. We removed the registration page plugin, as it was only needed for these setups. * **Multi-domain setups** — This is where a single registration was shared across multiple domains or subdomains. * **Safari versions older than 16 (APNs Safari)** — Apple started supporting VAPID push in Safari 16 on macOS 13 and above, which was released October 2022. * **AMP** — We will continue to support Web configurations that previously had Accelerated Mobile Pages (AMP) enabled, but AMP is not supported for new configurations. Additionally, APNs Safari registrations are not automatically migrated to VAPID. They must be re-registered using the `sdk.register()` method. ## Integration Follow the below instructions depending on whether you are performing a new Installation or upgrade. ### Setting Up a New Integration If you have not previously integrated the Airship Web SDK, follow these steps in the Web *Getting Started* guide: * [Airship Setup](https://www.airship.com/docs/developer/sdk-integration/web/getting-started/#airship-setup) * [Add JavaScript Snippet to Web Pages](https://www.airship.com/docs/developer/sdk-integration/web/getting-started/#add-javascript-snippet-to-web-pages) * [Place Service Worker](https://www.airship.com/docs/developer/sdk-integration/web/getting-started/#place-service-worker) Then proceed to [Channel Registration](#channel-registration) below. ### Updating an Existing Integration > **Important:** The v2 SDK has an updated API which is incompatible with the previous version. > An upgrade must be performed in a single release, you cannot partially upgrade. > > Airship has not thoroughly tested downgrading from v2 to v1. It should be > assumed that a downgrade is not possible once you have updated your > production site to v2. Follow these steps in the Web *Getting Started* guide to redownload your SDK bundle and replace your existing JavaScript snippets and service worker with the bundle's updated contents: * [Airship Setup](https://www.airship.com/docs/developer/sdk-integration/web/getting-started/#airship-setup) * [Add JavaScript Snippet to Web Pages](https://www.airship.com/docs/developer/sdk-integration/web/getting-started/#add-javascript-snippet-to-web-pages) * [Place Service Worker](https://www.airship.com/docs/developer/sdk-integration/web/getting-started/#place-service-worker) Also follow our [Developer Migration Guide](https://www.airship.com/docs/reference/libraries/web-notify-sdk/v2-latest/tutorial-v1-to-v2-migration.html) , which instructs you on migrating your integration to the updated API. Then proceed to Channel Registration below. ## Channel Registration To use the new features of the v2 Web SDK, you will need to register a channel for browsers that visit your web site. Channel registration no longer requires push notification opt-in. When you choose to do this will be up to your integration, but Airship recommends registering a channel only once a visitor is considered relevant to you. > **Note:** Any visitor you choose to register will count toward your [Monthly Unique > Visitors](https://www.airship.com/docs/reference/billing/#monthly-unique-visitors). If your > billing plan does not include Monthly Unique Visitors, you will be contacted by > your Account Manager to update your subscription. The following methods are relevant to channel registration: * [UaSDK.create](https://www.airship.com/docs/reference/libraries/web-notify-sdk/v2-latest/UaSDK.html#create) —  Create a channel without prompting for notification opt-in. * [UaSDK.register](https://www.airship.com/docs/reference/libraries/web-notify-sdk/v2-latest/UaSDK.html#register) —  Create a channel prompting for notification opt-in. If the user denies notification permissions, has previously denied it, or if the browser is in an unsupported context this method will throw an error, and not register a channel. See the example below for details on how to approach a push notification registration. **Registering a channel without notification opt-in** ```js const sdk = await UA const {channelId} = await sdk.create() console.debug('registered channel with id:', channelId) ``` You may decide to register that channel for push notifications at a later date using the `register()` method, as usual. Note that if you are calling `register()` you **do not** need to also call `create()`: **Requesting push notification opt-in** ```js const sdk = await UA if (sdk.isWebPushSupported && sdk.isAllowedPushRegistrationContext) { // prompt the user to install to their home screen so notification // registration may be requested. } else if (await sdk.canRegister()) { const {channelId} = await sdk.register() console.debug('opted in push notifications for channel with id:', channelId) } ``` ## Using the v2 SDK and Instrumenting Your Application For detailed v2 SDK usage information, see the [API Documentation](https://www.airship.com/docs/reference/libraries/web-notify-sdk/v2-latest/index.html) . To get the most out of the v2 SDK, we recommend instrumenting your website or web application to emit events for triggering and event segmentation. See [Instrument your Application](https://www.airship.com/docs/developer/sdk-integration/web/in-app-experiences/#instrumenting-your-application) in the *In-App Experiences* documentation. ## Custom Domain Proxy If you intend to use Web [Scenes](https://www.airship.com/docs/reference/glossary/#scene), you should send Airship traffic through your own domain in order to provide a consistent brand experience and avoid blocked content. See [Custom Domain Proxy](https://www.airship.com/docs/guides/getting-started/developers/custom-domain-proxy/). # In-App Experiences > Instrument your website or web application for in-app experiences. {{< badge_sdk_min web="2+" >}}The Airship Web SDK v2 supports [Scenes](https://www.airship.com/docs/reference/glossary/#scene), including [Embedded Content](https://www.airship.com/docs/developer/sdk-integration/web/embedded/). See also [Implementing Web SDK v2 ](https://www.airship.com/docs/developer/sdk-integration/web/v2-sdk/). ## Instrumenting your Application In order for Scenes to function, you must [Create a channel](https://www.airship.com/docs/developer/sdk-integration/web/getting-started/#creating-a-channel). This will count the current browser toward your [Monthly Unique Visitors](https://www.airship.com/docs/reference/billing/#monthly-unique-visitors). To get the most out of Scenes, instrument your website or web application to emit events for triggering and event segmentation. The following sections describe the events and provide code samples. See also: * [In-App Experience Triggers](https://www.airship.com/docs/guides/messaging/in-app-experiences/configuration/triggers/) * [Event segmentation](https://www.airship.com/docs/developer/rest-api/ua/schemas/event-segmentation/) in our API reference ### Custom Events [Custom Events](https://www.airship.com/docs/reference/glossary/#custom_event) can be used to track any interaction you wish, for example a purchase or a product view. **Sending a Custom Event** ```js const sdk = await UA const evt = new sdk.CustomEvent('purchase', 34.5, {productId: 1337}) await evt.track() ``` ### Screen View Events Tracking App Screens can make it easy to trigger a Scene or to ensure a Scene is only displayed when currently on a given screen. You must [define App Screens](https://www.airship.com/docs/guides/messaging/in-app-experiences/configuration/app-screens/) in the Airship dashboard. In the context of a website or web application, you can think of a "screen" as a page with a general purpose. For example, `home`, `product_listing`, and `product_detail` are good generic screen names, whereas `product_id_18957` is too specific and unlikely to be generally useful for reporting or targeting. **Tracking a Screen View** ```js const sdk = await UA await sdk.analytics.trackScreen('home') ``` ### Feature Flag Interactions When using [Feature Flags](https://www.airship.com/docs/reference/glossary/#feature_flag), you should track when a user has interacted with the feature the flag controls. The interaction event is included in Feature Flag reporting and can also be used for triggering: **Tracking Interaction with a Flagged Feature** ```js const sdk = await UA const flag = await sdk.components.featureFlags.get('new_product_pages') // later, when the user interacts with the new product pages await sdk.components.featureFlags.trackInteraction(flag) ``` ### App Version Updates If you version your web app and wish to be able to target users who may have seen an earlier version of the app, when initializing the SDK, use the `appVersion` property set to your app's version number. This will be passed in your snippet as well as your push worker: **Setting your App Version** ```js ``` ## Controlling Scenes If Scenes are enabled for your project, they will display according to their trigger and conditions settings. You can control their display programmatically or disable them completely, if desired. ### Screen Sizes and Breakpoints When creating Scene [view styles](https://www.airship.com/docs/guides/features/messaging/scenes/scenes/#view-styles) in your project's default settings, you can [define alternative settings that apply to a Scene based on a device's screen size](https://www.airship.com/docs/guides/features/messaging/scenes/conditional-design-overrides/). These sizes are defined by screen width breakpoints in the SDK: * Small: Less than 1024px * Medium: Greater or equal to 1024px and less than 1920px * Large: 1920px and greater You can override the values by setting custom breakpoints that better match your web application. Pass the following options in your SDK initialization snippet: **Setting Screen Sizes** ```js components: { inAppAutomation: { displayBreakpoints: { // the size at which a screen will be considered "medium", in pixels; inclusive medium: 800, // the size at which a screen will be considered "large", in pixels; inclusive large: 1024 } } } ``` Anything smaller than "medium" is considered to be a "small" screen, so no value needs to be set for that breakpoint. If you set custom breakpoints, also add them to your project settings for more accurate device previews when creating Scenes. Follow the steps for [Setting Scene defaults](https://www.airship.com/docs/guides/messaging/in-app-experiences/configuration/defaults/#scene-defaults) in *In-App Experience Defaults* and set Breakpoint values in a view style's Background settings. ### Disabling To permanently disable Scenes in the current browser, pass the following options in your SDK initialization snippet: **Disabling Scenes** ```js components: { inAppAutomation: { enabled: false } } ``` ### Pausing and Resuming Display You can choose to pause and resume Scene display. For example, you might wish to only disable showing new Scenes when opening a modal on your site or during a checkout flow. **Pausing and Resuming Scenes** ```js const sdk = await UA // pause display of scenes await sdk.components.inAppAutomation.setPaused(true) // get the paused status; resolves to a boolean value await sdk.components.inAppAutomation.isPaused() // resume display await sdk.components.inAppAutomation.setPaused(false) ``` By default, displays are not paused. If you'd like to start in a paused state so that you can manually unpause at a time of your choosing, pass the following configuration in your SDK initialization snippet: **Starting Scenes in Paused State** ```js components: { inAppAutomation: { startInPausedState: true } } ``` ### Display Interval The display interval controls the amount of time to wait before the manager can display the next triggered Scene. The default value is set to 0 milliseconds and can be adjusted to any amount of time in milliseconds. **Setting the Display Interval Programmatically** ```js await sdk.components.inAppAutomation.setDisplayInterval(30000) // 30 seconds ``` You can also set the display interval via your SDK initialization snippet: **Setting the Display Interval via Config** ```js components: { inAppAutomation: { displayIntervalMs: 30000 // 30 seconds } } ``` ### Delegating Display You can choose to implement your own display delegate, which can control if a Scene is allowed to be displayed. It can also be notified when a Scene is displayed or has finished displaying. Your display delegate must implement the `[InAppDisplayDelegate](https://www.airship.com/docs/reference/libraries/web-notify-sdk/v2-latest/InAppDisplayDelegate.html) ` interface. All methods are optional. > **Note:** When using a display delegate, we recommended that you [start display in a paused state](#pausing-and-resuming-display) and then unpause after setting your delegate. > Otherwise, it is not guaranteed your delegate will be registered before displays > occur. **Controlling Display using a Delegate** ```js const delegate = { isMessageReadyToDisplay: (message) => { if (myApp.canDisplayMessage(message)) { return true } return false } } await sdk.components.inAppAutomation.setDisplayDelegate(delegate) await sdk.components.inAppAutomation.setPaused(false) ``` If you need to pass additional information to your application, you can use [Custom Keys](https://www.airship.com/docs/guides/messaging/in-app-experiences/configuration/optional-features/#custom-keys) when composing your Scene. They will be available on the `extras` property of the `[InAppAutomationDetails](https://www.airship.com/docs/reference/libraries/web-notify-sdk/v2-latest/global.html#InAppAutomationDetails) ` that are passed to your delegate. ### Dark Mode By default, Scenes follow the browser preferences for dark mode. This behavior can be disabled by a configuration value. When disabled, all displayed content will use the colors configured for light mode. **Disabling Automatic Dark Mode** ```js components: { inAppAutomation: { matchBrowserDarkMode: false } } ``` ## Custom Views A *Custom View* is a native view from your mobile or web application embedded into a Scene. Custom Views can display any native content your app exposes, so you can reuse that existing content within any screen in a Scene. For a web page, this means embedding an HTML view into a Scene. > **Note:** When using Custom Views, you should initialize In-App Experiences in a paused > state. If you do not, there's no guarantee that your Custom View delegate will > be registered by the time a Scene displays, and the Custom View would not be > shown. See the section on [Pausing and Resuming > Display](#pausing-and-resuming-display) for further information. ### Implementation To display Custom Views, you must implement the `[InAppCustomViewDelegate](https://www.airship.com/docs/reference/libraries/web-notify-sdk/v2-latest/InAppCustomViewDelegate.html) ` interface and register it using the `[setCustomViewDelegate](https://www.airship.com/docs/reference/libraries/web-notify-sdk/v2-latest/InAppAutomationManager.html#setCustomViewDelegate) ` method of the `[InAppAutomationManager](https://www.airship.com/docs/reference/libraries/web-notify-sdk/v2-latest/InAppAutomationManager.html) `. Only one delegate may be registered at a time. When it's time for a Custom View to be displayed, your delegate's `onCustomViewShown` method will be called with the following parameters: * `name` — The name of the Custom View, which is referenced when adding it to a Scene * `element` — The HTML element into which your Custom View should render * `properties` — Any additional properties set for your Custom View as a key/value object; all keys and values will be strings When called, your `onCustomViewShown` method must return an object that fulfills the `[InAppCustomViewHandler](https://www.airship.com/docs/reference/libraries/web-notify-sdk/v2-latest/InAppCustomViewHandler.html) ` interface. This will contain the `destroy` method, which will be called with no parameters when your view is to be removed. > **Important:** Your delegate should render synchronously into the provided `element`. If it > does not, you may cause the Scene's layout to shift after rendering. ### Example Custom View The following example shows a Custom View that renders an embedded [Google Map](https://developers.google.com/maps/documentation/embed/embedding-map) when called to render a Custom View named `map`. This example assumes that you have started In-App Experiences in a paused state, as recommended above. In our example, we pass `properties` to the view to determine the location the map should show. `q` is the query to pass to the map view. **Example Custom View rendering a map** ```js // a React Function Component for rendering an embedded Google Map const Map = ({ q }) => { return (