Troubleshooting Initialization
Troubleshoot common initialization issues and apply solutions.
When following steps in Getting Started, if you don’t see a channel ID in the logs or encounter errors during initialization, review the following common problems and solutions.
Installation Errors
If you encounter errors during installation:
- Verify that you’re using a compatible version of Unity. See Requirements in Getting Started.
- Ensure the Unity package is properly imported.
- Check that your iOS and Android build settings are correctly configured.
Initialization Errors
If you encounter errors during SDK initialization:
- Verify your credentials in the Airship dashboard. The credentials used by
takeOffare your Airship project’s app keyUniquely identifies an Airship project. Paired with an app secret or master secret, it authenticates API requests for the project. and app secretAuthenticates API requests for an Airship project when paired with the app key. It is intended to be embedded in distributed applications and is limited to the API endpoints required for SDK operations.. To find them, select the dropdown menu () next to your project name, and then Project details. - Check that
takeOffis called correctly in your Unity scripts. - Ensure both iOS and Android native modules are properly configured.
Gradle Build Errors
A common error when setting up our Unity plugin is “Could not create an instance of type org.gradle.initialization.DefaultSettings_Decorated”. If you encounter this error, take these steps in the Unity Editor:
Go to Assets, then External Dependency Manager, then Android Resolver, then Force Resolve.
Sometimes Unity has difficulty retrieving the JDK installed with your editor even when selected. To solve this:
- Go to Edit, then Preferences, then External Tools.
- For JDK, select Copy Path, uncheck JDK Installed with Unity (Recommended), then paste the path.

Setting the JDK path in the Unity Editor 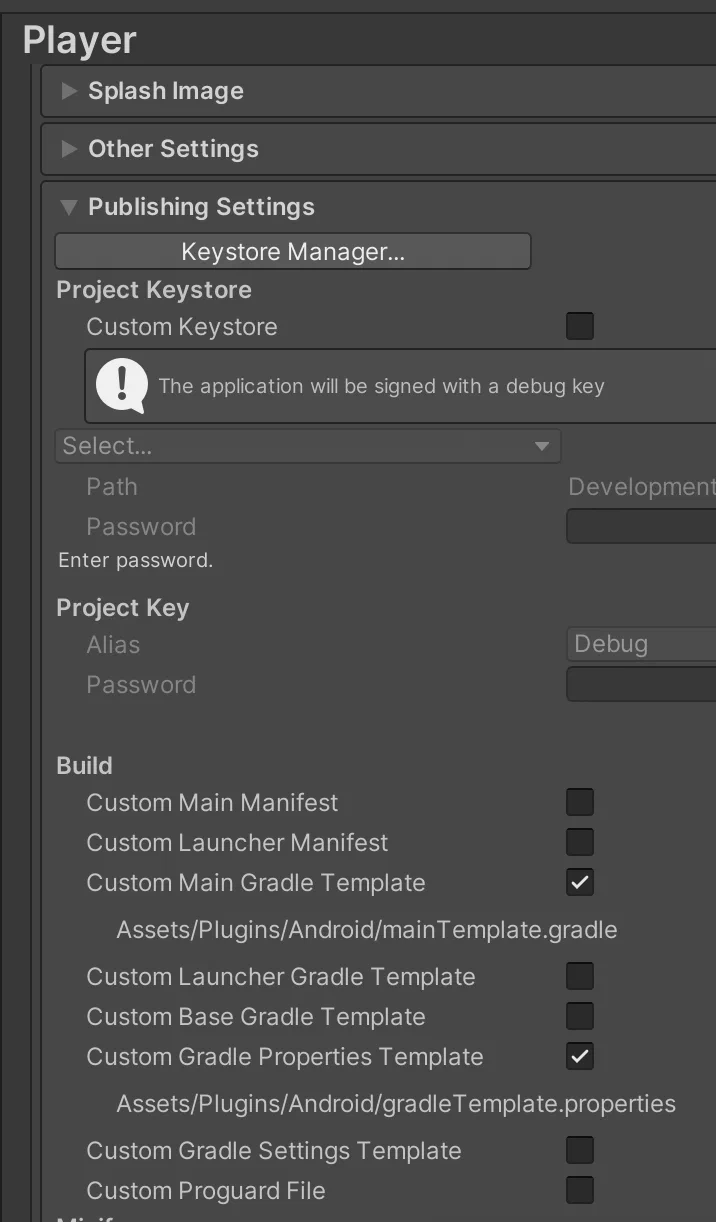
Enabling project templates in the Unity Editor If the previous steps do not fix your issue:
Go to Project Settings, then Player, then Android, then Publishing Settings, then Build, and then select Custom Main Gradle Template and Custom Gradle Properties Template.
Go to Assets, then External Dependency Manager, then Android Resolver, then Force Resolve.