```
To accept any URL within the SDK, set the `urlAllowList` to `["*"]`.
For a complete list of configuration options, see the [AirshipConfig reference](https://www.airship.com/docs/reference/libraries/urbanairship-cordova/latest/interfaces/AirshipConfig.html).
## Push Notifications
Configure and implement push notifications for iOS and Android platforms.
# Push Notifications
> How to configure your application to receive and respond to notifications.
## Platform Setup
Before you can send and receive push notifications, you need to configure your app for the platform(s) you're targeting. Follow the platform-specific setup instructions below.
### iOS
#### Enable Push Notifications Capability
1. Open your project in Xcode.
2. Click on your project in the Project Navigator.
3. Select your main app target and then click the **Signing & Capabilities** tab.
4. If you do not see Push Notifications enabled, click **+ Capability** and add **Push Notifications**.
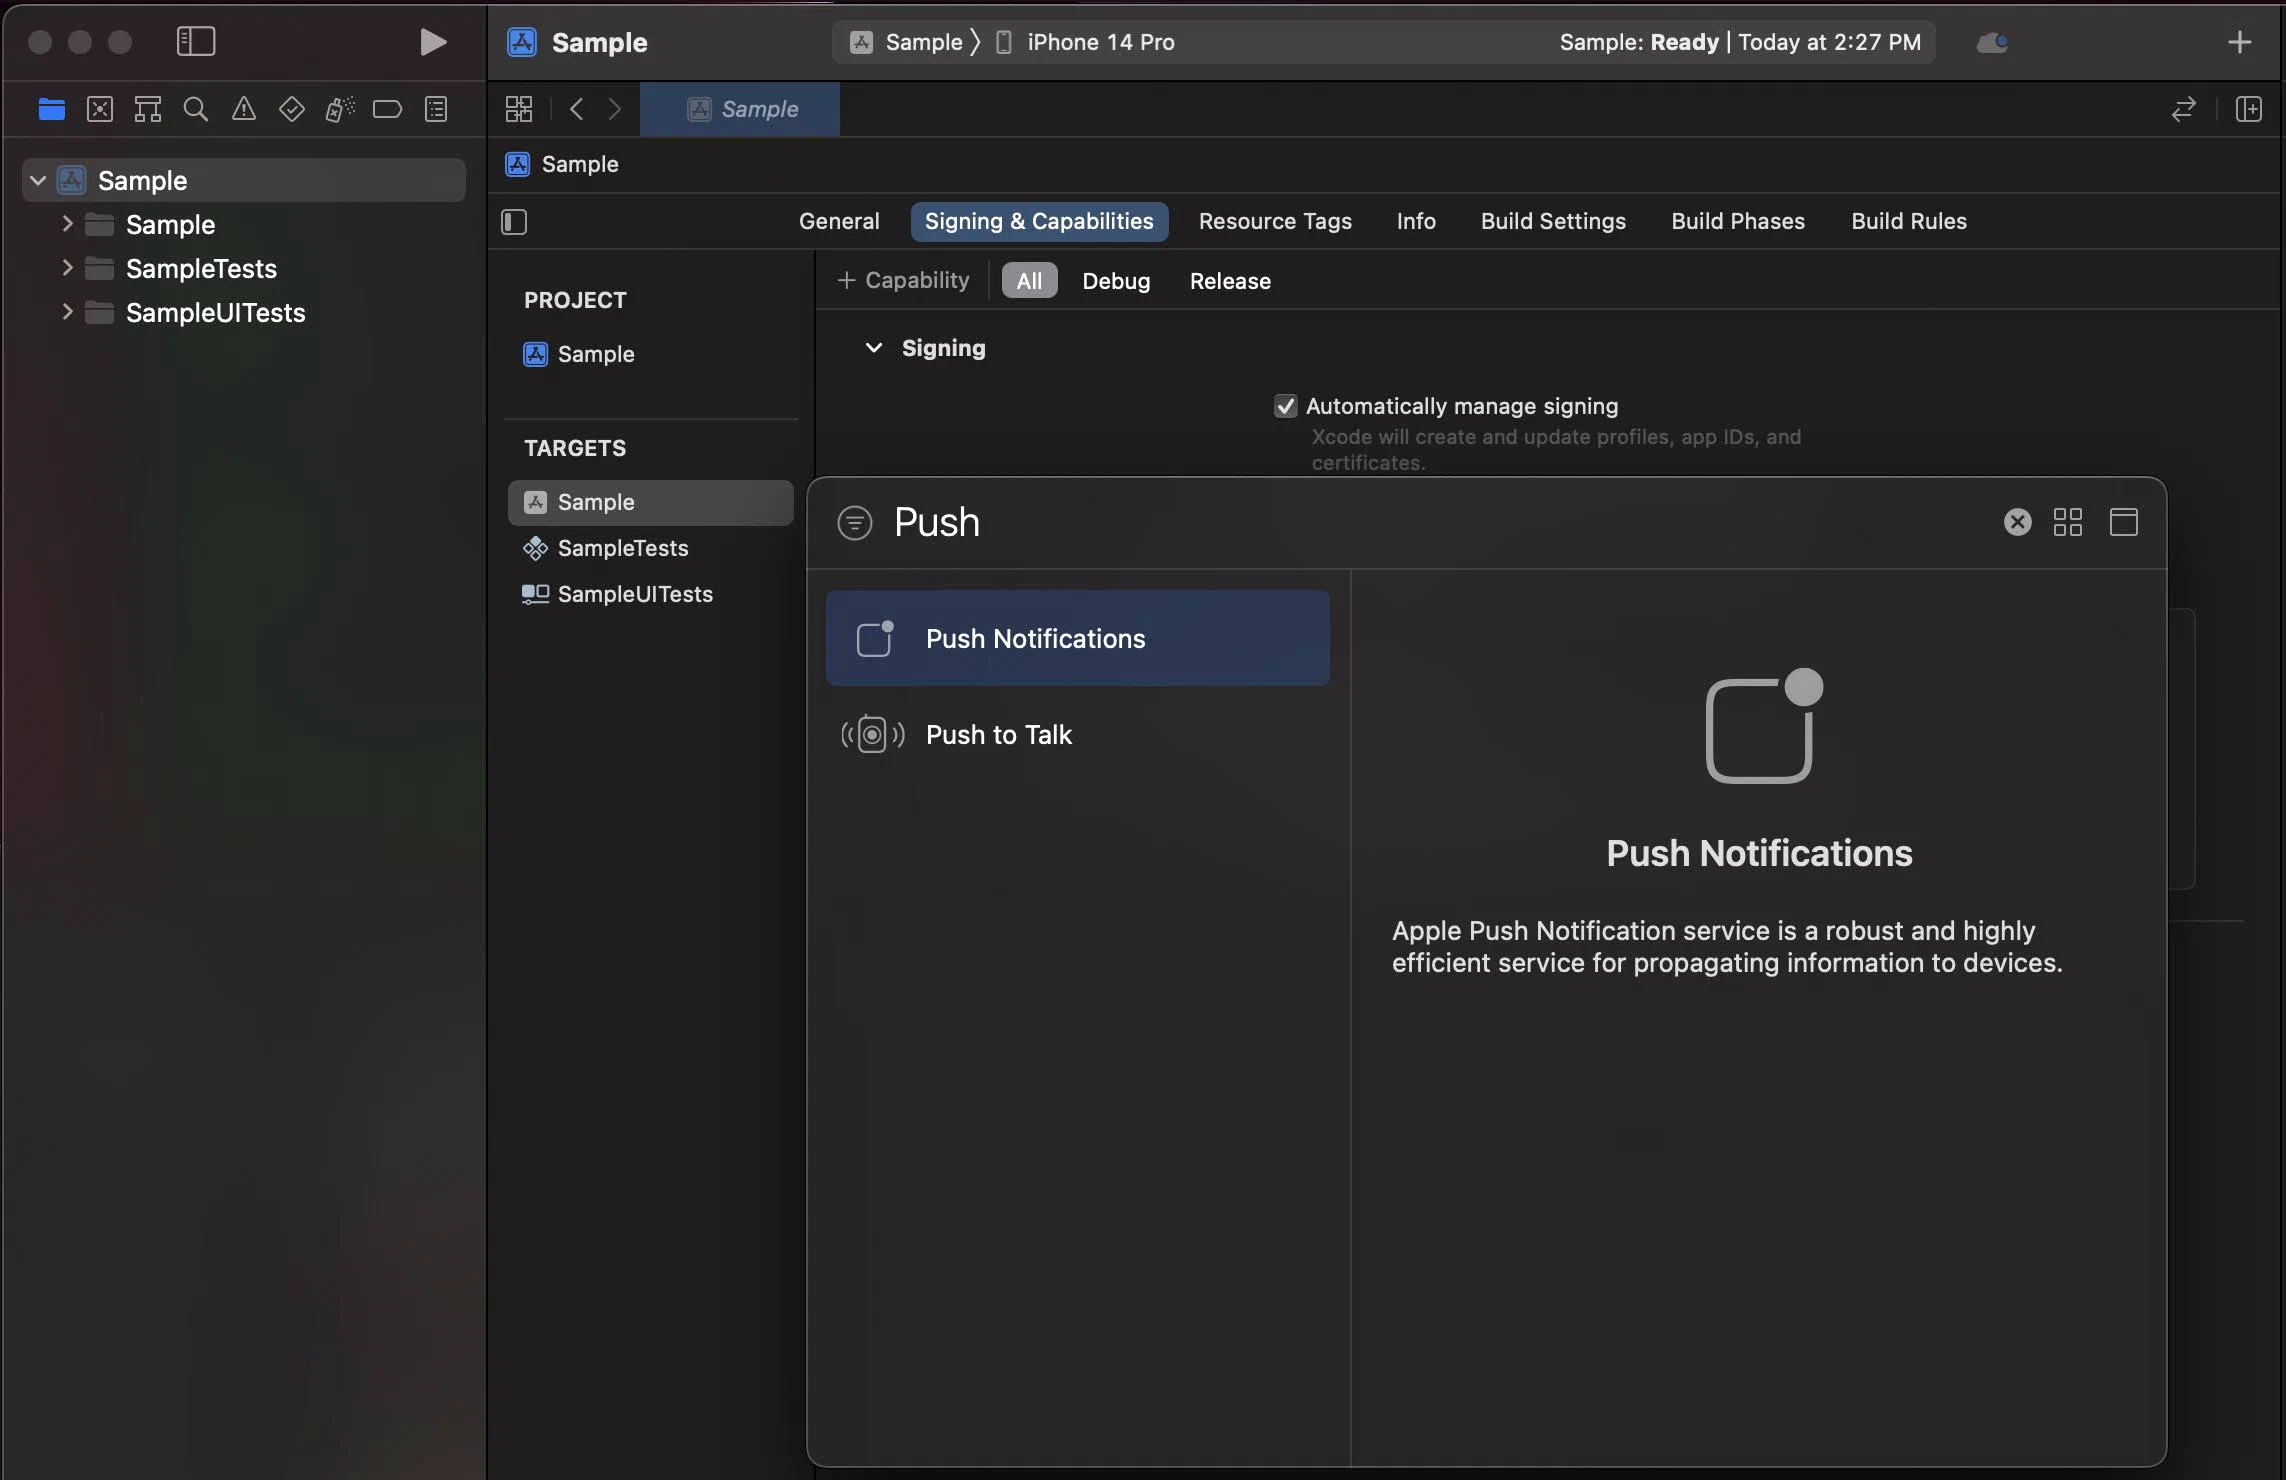
*Adding the Push Notifications capability in Xcode*
#### Enable Background Modes
1. Select your main app target and then click the **Signing & Capabilities** tab.
2. Click **+ Capability** and add **Background Modes**.
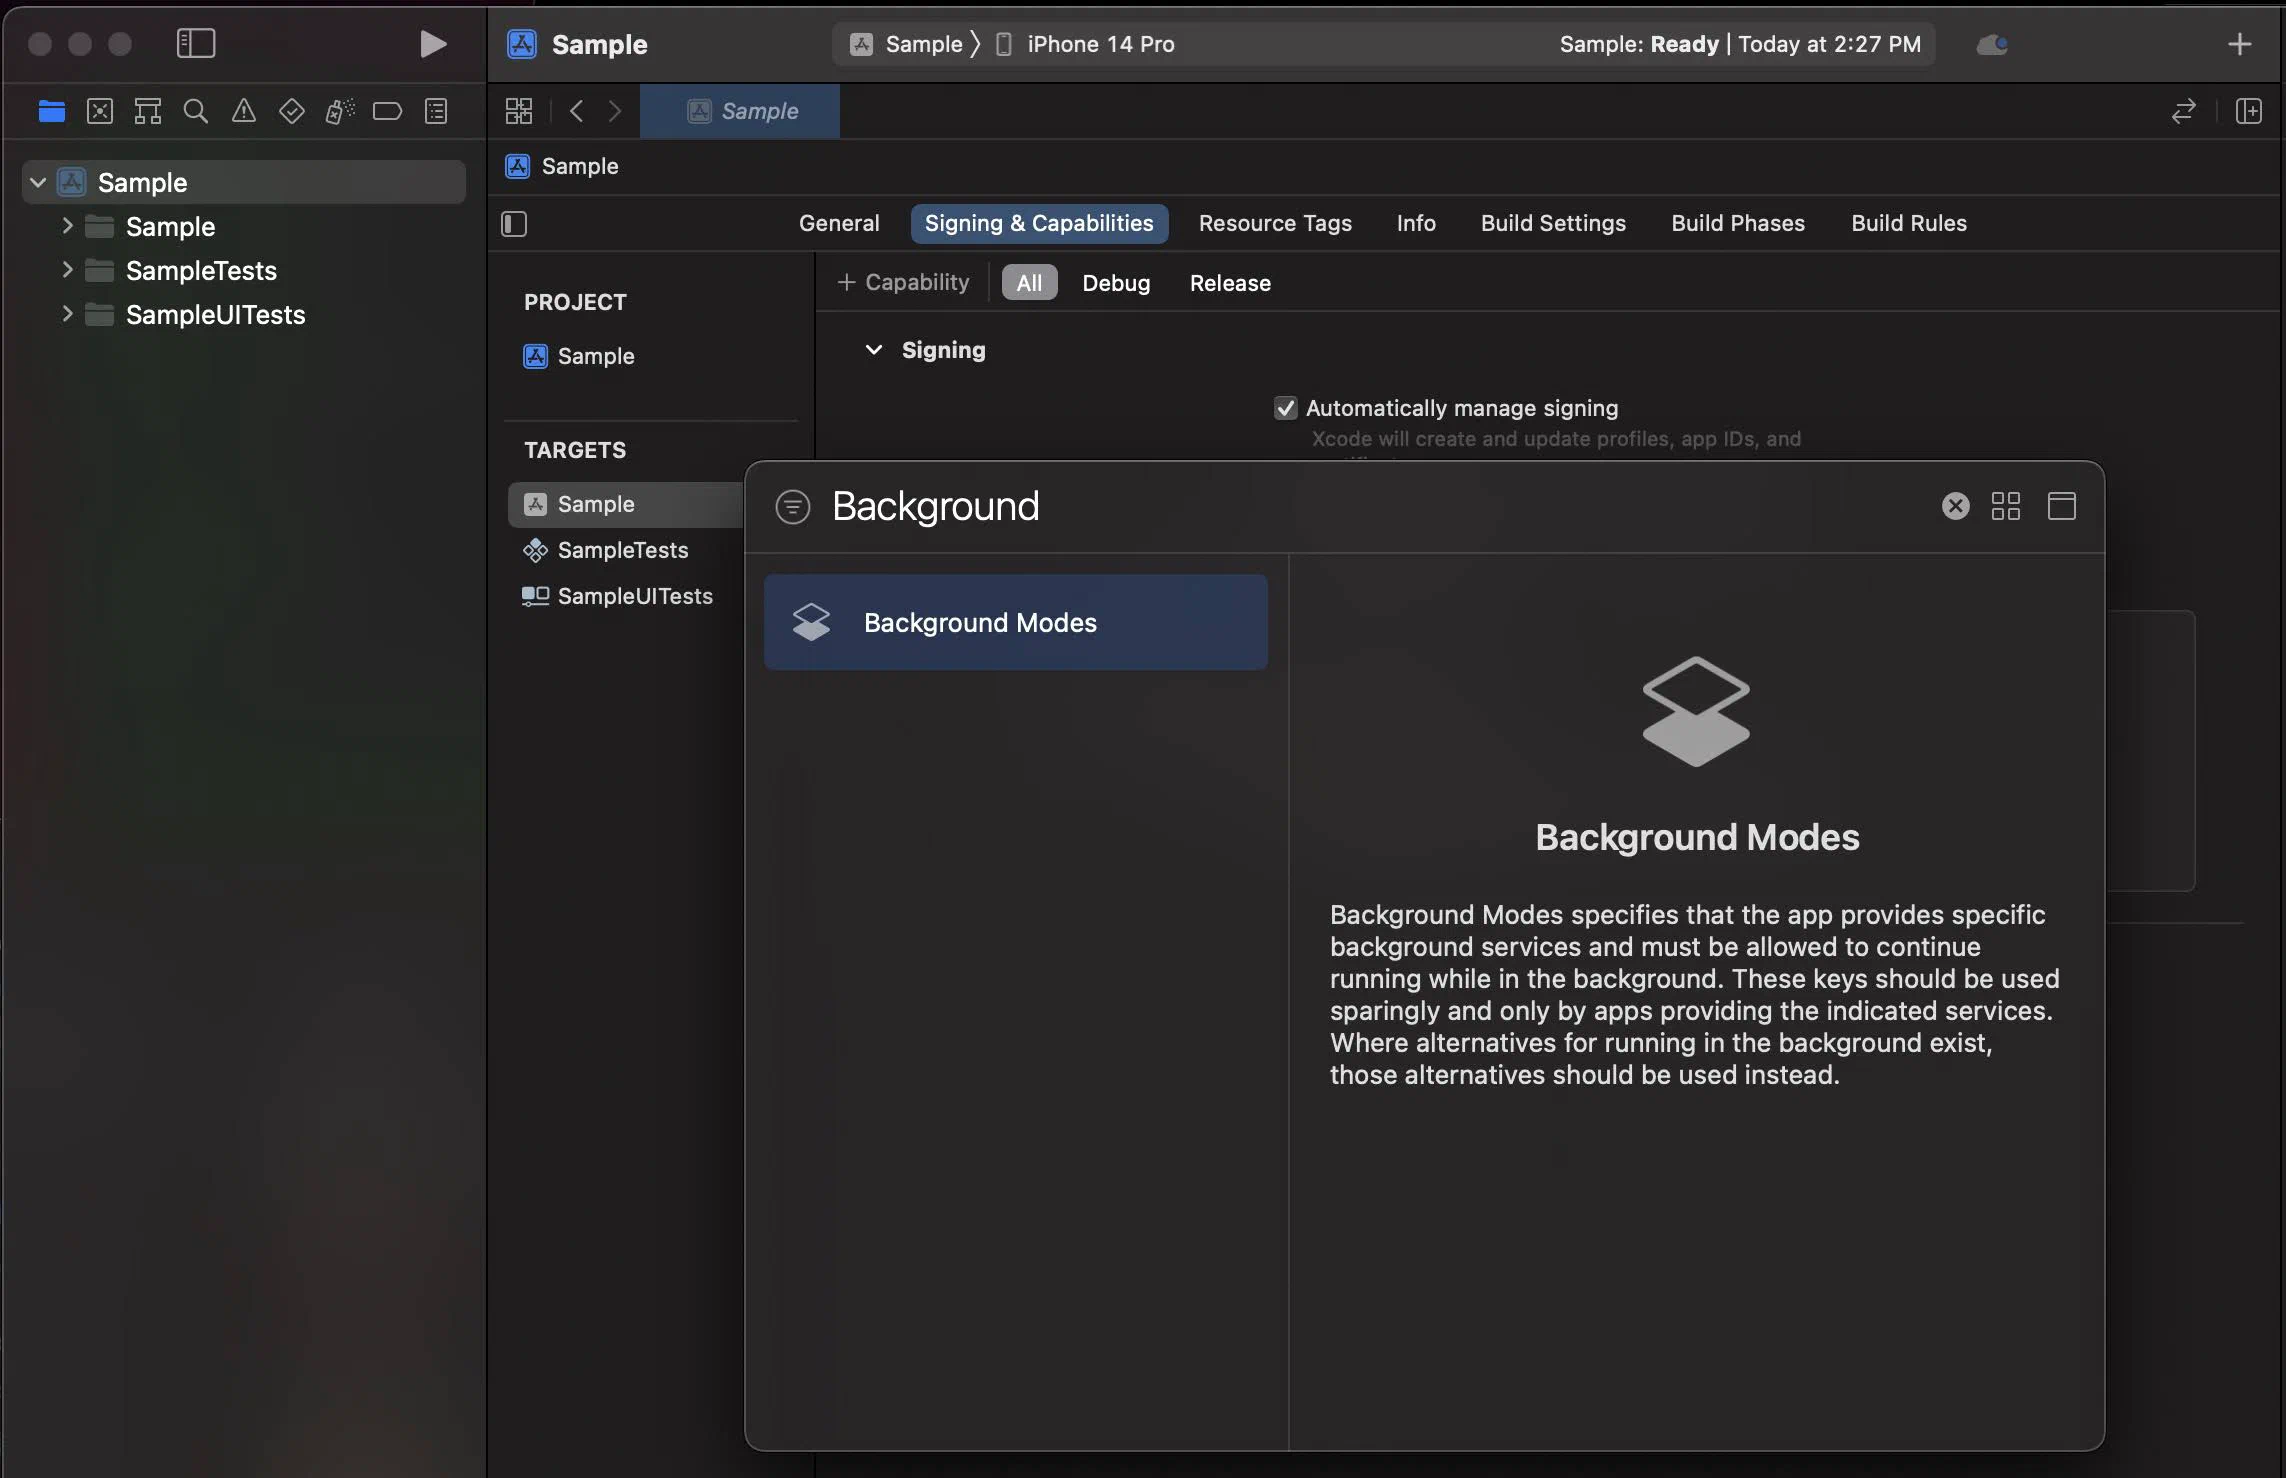
*Adding the Background Modes capability in Xcode*
3. In the **Background Modes** section, select the **Remote notifications** checkbox.
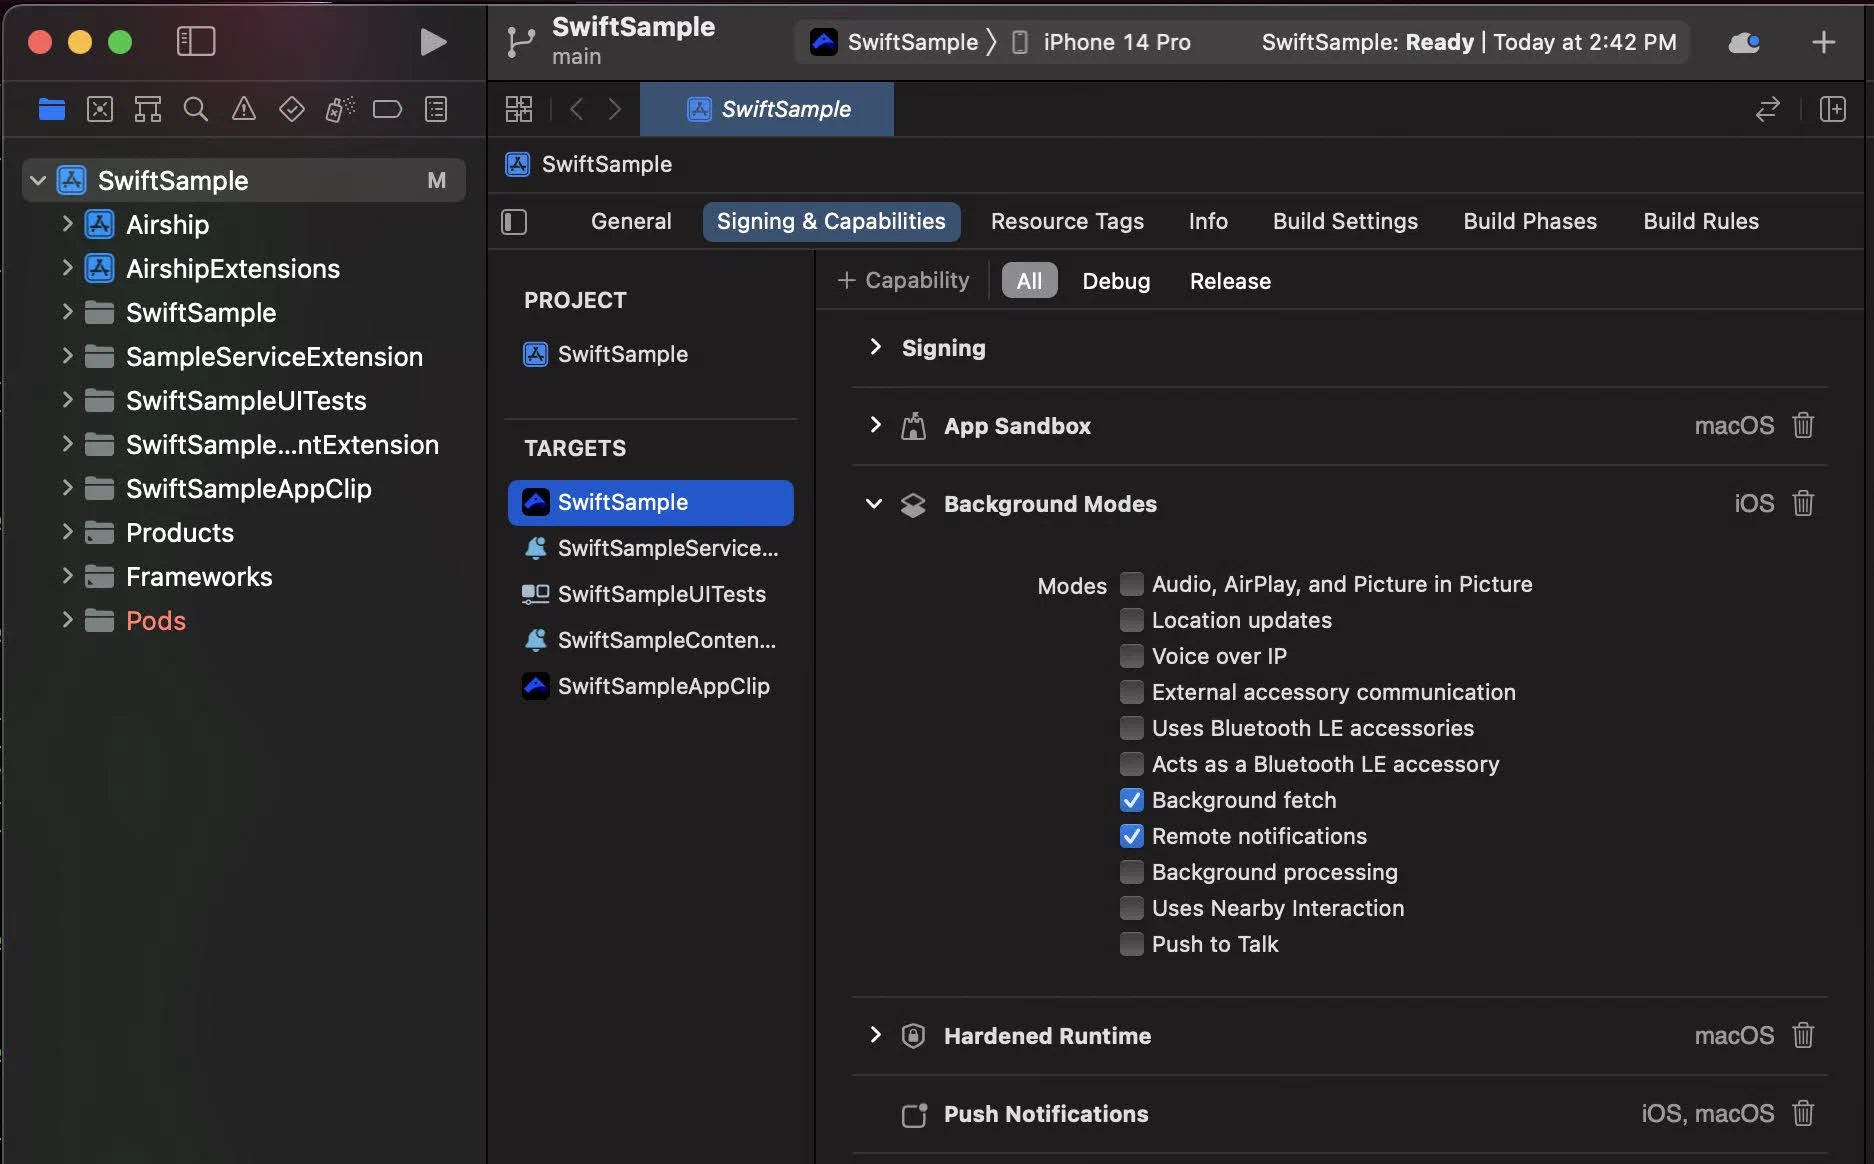
*Enabling Remote notifications in Background Modes*
#### Signing
Add your Apple Developer Account Team ID to the [build.json](https://cordova.apache.org/docs/en/latest/guide/platforms/ios/#using-buildjson).
```json
{
"ios": {
"debug": {
"developmentTeam": "XXXXXXXXXX"
},
"release": {
"developmentTeam": "XXXXXXXXXX"
}
}
}
```
Your iOS builds will need to reference the `build.json` using Cordova's `--buildConfig` flag.
#### Notification Service Extension
To take advantage of notification attachments, such as images,
animated gifs, and video, you will need to create a notification service extension .
Follow the steps in the [iOS Notification Service Extension Guide](https://www.airship.com/docs/developer/sdk-integration/apple/push-notifications/notification-service-extension/).
### Android
Configure Firebase Cloud Messaging (FCM) to enable push notifications on Android.
#### FCM Setup
Add a reference to your `google-services.json` file in the app's `config.xml` and enable Google Services plugin:
```xml
...
```
#### Notification Configuration
Configure the notification icon and accent color in your `takeOff` config:
```javascript
Airship.takeOff({
production: {
appKey: "",
appSecret: ""
},
development: {
appKey: "",
appSecret: ""
},
inProduction: true,
site: "us",
android: {
notificationConfig: {
icon: "ic_notification",
accentColor: "#00ff00"
}
}
})
```
See the [Cordova Plugin Setup guide](https://www.airship.com/docs/developer/sdk-integration/cordova/installation/getting-started/) for complete `takeOff` configuration options.
## Enable User Notifications
The Airship SDK distinguishes between *user notifications* (visible to users) and *silent push notifications* (background data delivery). User notifications require explicit permission from the user.
By default, user notifications are disabled. Enable them when you want to show visible notifications to users.
### Basic Enablement
The simplest way to enable user notifications is with `setUserNotificationsEnabled()`:
```javascript
Airship.push.setUserNotificationsEnabled(true)
```
This will prompt the user for permission if not already granted. However, it does not provide feedback on whether the user accepted or denied the permission.
> **Note:** For apps that target Android 13 (API 33) and above, enabling user notifications will display a runtime permission prompt.
>
> To increase the likelihood that the user will accept, you should avoid prompting the user for permission immediately on app startup, and instead wait for a more appropriate time to prompt for notification permission.
### Async Enablement
For more control over the permission flow, use `enableUserNotifications()` which returns the permission result:
```javascript
Airship.push.enableUserNotifications((granted) => {
if (granted) {
console.log('Notifications enabled')
} else {
console.log('Notifications denied')
}
})
```
### Checking Notification Status
To check if user notifications are currently enabled:
```javascript
Airship.push.isUserNotificationsEnabled((enabled) => {
console.log('User notifications enabled:', enabled)
})
```
For more detailed status information, use `getNotificationStatus()`:
```javascript
Airship.push.getNotificationStatus((status) => {
console.log('Are notifications allowed:', status.areNotificationsAllowed)
console.log('Is opted in:', status.isOptedIn)
})
```
To monitor notification status changes in real-time:
```javascript
const subscription = Airship.push.onNotificationStatusChanged((event) => {
console.log('Notification status changed:', event.status)
console.log('Is opted in:', event.status.isOptedIn)
})
// Later, to cancel the subscription
subscription.cancel()
```
### Getting the Push Token
To get the platform-specific push token (APNs token on iOS, FCM token on Android):
```javascript
Airship.push.getPushToken((token) => {
console.log('Push token:', token)
})
// Or listen for token updates
const subscription = Airship.push.onPushTokenReceived((event) => {
console.log('Push token:', event.pushToken)
})
```
If push notifications aren't working as expected, see [Troubleshooting Push Notifications](https://www.airship.com/docs/developer/sdk-integration/cordova/troubleshooting/push-notifications/) to check notification status and fix common issues.
# Notification Events
> How to handle push notification events, respond to user interactions, and manage active notifications.
The Airship SDK provides event listeners for when a push is received or a notification is interacted with.
## Push Received
Listen for when a push notification is received:
```javascript
const subscription = Airship.push.onPushReceived((event) => {
console.log('Push received:', event.pushPayload)
console.log('Is foreground:', event.isForeground)
})
// Later, to cancel the subscription
subscription.cancel()
```
This event fires when a push notification arrives. On iOS, it fires regardless of whether the app is in the foreground or background. On Android, this event only fires in the foreground.
## Notification Response
Listen for when a user interacts with a notification:
```javascript
const subscription = Airship.push.onNotificationResponse((event) => {
console.log('Notification tapped:', event)
console.log('Action ID:', event.actionId)
console.log('Is foreground action:', event.isForeground)
if (event.actionId === 'custom_action') {
// Handle custom action
}
})
// Later, to cancel the subscription
subscription.cancel()
```
This event fires when a user taps on a notification or a notification action button.
## Managing Active Notifications
You can retrieve and clear notifications that are currently displayed in the notification center.
### Get Active Notifications
Retrieve the list of currently displayed notifications:
```javascript
Airship.push.getActiveNotifications((notifications) => {
console.log('Active notifications:', notifications)
})
```
> **Note:** On Android, this list only includes notifications sent through Airship.
### Clear Notifications
Clear all notifications for the app:
```javascript
Airship.push.clearNotifications()
```
Clear a specific notification by identifier:
```javascript
Airship.push.clearNotification(identifier)
```
> **Note:** On Android, you can use this method to clear notifications outside of Airship. The identifier is in the format `:`.
# Customize Notifications
> How to customize push notification presentation, badges, quiet time, and foreground display behavior.
## iOS Notification Options
By default, the Airship SDK will request `alert`, `badge`, and `sound` notification options for remote notifications. This can be configured by setting notification options before enabling user notifications.
```javascript
Airship.push.iOS.setNotificationOptions([
"alert",
"badge",
"sound"
])
```
### Provisional Authorization
Apps can request provisional authorization along with the usual notification options. When requesting provisional authorization, apps do not need to prompt the user for permission initially, and notifications will be delivered in a non-interruptive manner to the Notification Center until the user explicitly chooses to keep delivering messages either prominently or quietly.
```javascript
Airship.push.iOS.setNotificationOptions([
"alert",
"badge",
"sound",
"provisional"
])
```
### Foreground Presentation Options
When a push is received in the foreground on iOS, how the notification is displayed to the user is controlled by foreground presentation options. By default, the SDK will not set any options so the notification will be silenced.
```javascript
Airship.push.ios.setForegroundPresentationOptions([
"banner",
"list",
"sound"
])
```
### Badges
The badge on iOS presents a counter on top of the application icon. You can control this directly through Airship.
```javascript
// Set badge number
Airship.push.ios.setBadgeNumber(20)
// Reset badge
Airship.push.ios.resetBadge()
// Enable auto-badge
Airship.push.ios.setAutobadgeEnabled(true)
```
> **Important:** When using auto-badge, only modify the badge value through Airship methods to ensure the value stays in sync.
### Quiet Time
Quiet time allows you to suppress notifications during specific hours. Notifications are still received but won't be displayed to the user during the quiet time window.
```javascript
// Set quiet time hours
Airship.push.ios.setQuietTime({
startHour: 22,
startMinute: 0,
endHour: 7,
endMinute: 0
})
// Enable quiet time
Airship.push.ios.setQuietTimeEnabled(true)
```
> **Note:** Quiet time is only supported on iOS.
## Android Foreground Notifications
By default, push notifications received while the app is in the foreground on Android are displayed to the user. You can control this behavior globally:
```javascript
// Disable foreground notifications
Airship.push.android.setForegroundNotificationsEnabled(false)
// Enable foreground notifications
Airship.push.android.setForegroundNotificationsEnabled(true)
```
## Silent Notifications
Silent notifications are push messages that do not present a notification to the user. These are typically used to briefly wake the app from a background state to perform processing tasks or fetch remote content.
> **Important:** We recommend that you thoroughly test your implementation to confirm that silent notifications do not generate any device notifications.
For Android, all push messages are delivered in the background, but default Airship will treat messages without an `alert` as silent. For iOS, set the `content_available` property to `true` in the [iOS override object](https://www.airship.com/docs/developer/rest-api/ua/schemas/platform-overrides/#iosoverrideobject).
> **Note:** Pushes sent with the `content_available` property (iOS) or without an `alert` (Android) do not have guaranteed delivery. Factors affecting delivery include battery life, whether the device is connected to WiFi, and the number of silent pushes sent within a recent time period. These metrics are determined solely by iOS/Android and APNs/FCM. Therefore, this feature is best used for supplementing the regular behavior of the app rather than providing critical functionality. For instance, an app could use a silent push to pre-fetch new data ahead of time in order to reduce load times when the app is later launched by the user.
## In-App Experiences
Configure and control In-App Experiences in Cordova applications.
# In-App Experiences
> Pause, resume, and control display timing for In-App Experiences.
In-App Experiences are automatically enabled when you integrate the Airship SDK. Use these methods to control when and how they are displayed.
## Pausing and Resuming Display
You can pause and resume In-App Experiences to control when they are displayed to users.
```javascript
// Pause in-app experiences
Airship.inApp.setPaused(true)
// Resume in-app experiences
Airship.inApp.setPaused(false)
// Check if paused
Airship.inApp.isPaused((isPaused) => {
console.log('Is paused:', isPaused)
})
```
### Auto-Pause on Launch
You can configure the SDK to automatically pause In-App Experiences on launch. This is useful if you want to defer showing In-App Experiences until after onboarding or other critical app flows.
```javascript
Airship.takeOff({
production: {
appKey: "",
appSecret: ""
},
development: {
appKey: "",
appSecret: ""
},
inProduction: true,
site: "us",
autoPauseInAppAutomationOnLaunch: true
})
```
See the [Cordova Plugin Setup guide](https://www.airship.com/docs/developer/sdk-integration/cordova/installation/getting-started/) for complete `takeOff` configuration options.
When you're ready to display In-App Experiences, call `setPaused(false)`:
```javascript
Airship.inApp.setPaused(false)
```
## Display Interval
Control the minimum time between In-App Experience displays to avoid overwhelming users.
```javascript
// Set display interval to 5 seconds
Airship.inApp.setDisplayInterval(5000)
// Get current display interval
Airship.inApp.getDisplayInterval((interval) => {
console.log('Display interval:', interval)
})
```
The display interval is the minimum time (in milliseconds) that must pass between displaying In-App Experiences.
# Custom Views
> Register custom native views to use within Scenes.
A *Custom View* is a native view from your mobile or web application embedded into a Scene. Custom Views can display any native content your app exposes, so you can reuse that existing content within any screen in a Scene.
Custom Views allow you to embed native iOS and Android views within Scenes, giving you full control over design and layout while leveraging Airship's targeting and orchestration capabilities.
## Requirements
To use Custom Views in Cordova, you must extend the native Airship modules by implementing native code on each platform.
## Registering Custom Views
Custom Views must be registered on each native platform separately:
### iOS
See the [Apple Custom Views documentation](https://www.airship.com/docs/developer/sdk-integration/apple/in-app-experiences/custom-views/) for detailed implementation instructions.
Custom Views should be registered after takeOff in your native iOS code. You can add this to your `AppDelegate.swift` or a custom plugin:
```swift
import AirshipKit
// In your AppDelegate or after Airship.takeOff
AirshipCustomViewManager.shared.register(name: "my-custom-view") { args in
// Return your SwiftUI view
MyCustomView(args: args)
}
```
### Android
See the [Android Custom Views documentation](https://www.airship.com/docs/developer/sdk-integration/android/in-app-experiences/custom-views/) for detailed implementation instructions.
Custom Views should be registered during the `onAirshipReady` callback in your native Android code. You can use Airship's `Autopilot` to register views at startup:
```kotlin
import com.urbanairship.AirshipCustomViewManager
import com.urbanairship.Autopilot
import com.urbanairship.UAirship
class CustomAutopilot : Autopilot() {
override fun onAirshipReady(airship: UAirship) {
// Register custom views
AirshipCustomViewManager.register("my-custom-view") { context, args ->
// Return your Android View
MyCustomView(context, args)
}
}
}
```
Don't forget to register your `Autopilot` in `AndroidManifest.xml`:
```xml
```
## Using Custom Views
Once registered, Custom Views can be added to Scenes in the Airship dashboard:
1. Create or edit a Scene
2. Add the **Custom View** content element to a screen
3. Enter the view name (e.g., `my-custom-view`) that matches the name you registered in your native code
4. Optionally add key-value pairs to pass custom properties to the view
The native view will be displayed within the Scene with the properties you configured.
## Message Center
Implement Message Center to provide an inbox for rich HTML-based messages.
# Message Center
> The default Message Center is available for Cordova with minimal integration required. Basic theming options are supported.
Message Center provides an inbox for rich, HTML-based messages. Learn more about Message Center in our [feature guide](https://www.airship.com/docs/guides/features/messaging/message-center/).
## Display the Message Center
Display the Message Center with a single method call:
```js
Airship.messageCenter.display();
```
To build a custom message list, see [Embedding the Message Center](https://www.airship.com/docs/developer/sdk-integration/cordova/message-center/embedding/). Individual messages will still display as a native overlay.
## Fetch Messages
Retrieve messages from the inbox:
```js
Airship.messageCenter.getMessages((messages) => {
console.log('Inbox messages: ' + messages);
});
```
## Listen for Message Updates
Subscribe to message updates using event listeners:
```js
Airship.addListener('messageCenterUpdated', () => {
Airship.messageCenter.getMessages((messages) => {
// Handle messages
});
});
```
## Listen for Unread Count Changes
Subscribe to unread count updates:
```js
Airship.messageCenter.getUnreadCount((unreadCount) => {
// Update badge or UI
});
```
## Refresh Messages
Manually refresh the message list from the server:
```js
Airship.messageCenter.refreshMessages(
() => {
console.log('Refreshed');
},
(error) => {
console.log('Failed: ' + error);
}
);
```
## Mark Messages as Read
Mark one or more messages as read:
```js
Airship.messageCenter.markRead("message-id");
```
## Delete Messages
Delete one or more messages:
```js
Airship.messageCenter.deleteMessage("message-id");
```
# Embed the Message Center
> Create custom Message Center lists with full control over design and navigation.
This guide covers creating custom Message Center list implementations for Cordova applications. You can build a custom message list using web technologies, but individual messages must be displayed using the native overlay.
> **Note:** Cordova does not support embedding native message views. Use `showMessageView()` to display individual messages as an overlay.
## Override Default Display Behavior
To use a custom Message Center list instead of the default UI, disable auto-launch and add a listener to handle display events:
```js
// Disable the default UI
Airship.messageCenter.setAutoLaunchDefaultMessageCenter(false);
// Add a listener to handle display events
Airship.messageCenter.onDisplay((event) => {
if (event.messageId) {
// Show specific message in native overlay
Airship.messageCenter.showMessageView(event.messageId);
} else {
// Navigate to your custom message list
navigateToCustomMessageList();
}
});
```
## Displaying Individual Messages
Use `showMessageView` to display messages in a native overlay:
```js
Airship.messageCenter.showMessageView("message-id");
```
## Preference Center
Implement Preference Center to let users control their subscription preferences.
# Preference Center
> Preference Center allows users to opt in and out of subscription lists configured via the Airship Dashboard.
> **Important:** Airship Preference Centers are widgets that can be embedded in a page in an app or website. Please verify with your legal team that your full Preference Center page, including any web page for email Preference Centers, is compliant with local privacy regulations.
Preference Center provides a pre-built UI for users to manage their subscription preferences. Learn more in the [Preference Center user guide](https://www.airship.com/docs/guides/messaging/features/preference-centers/).
## Display a Preference Center
Display a Preference Center with a single method call:
```js
Airship.preferenceCenter.display("preference-center-id");
```
To build a custom Preference Center UI, see [Embedding the Preference Center](https://www.airship.com/docs/developer/sdk-integration/cordova/preference-center/embedding/).
# Embed the Preference Center
> Create custom Preference Center UIs by fetching the config and building your own subscription management interface.
This guide covers creating custom Preference Center UIs for Cordova applications. Unlike the default Preference Center, you'll build your own UI from scratch using the Preference Center configuration and subscription list APIs.
## Override Default Display Behavior
To use a custom Preference Center instead of the default UI, disable auto-launch for the specific Preference Center ID and handle display events:
```js
// Disable the OOTB UI for this Preference Center
Airship.preferenceCenter.setAutoLaunchDefaultPreferenceCenter(
"preference-center-id",
false
);
// Add a listener to handle display events
Airship.preferenceCenter.onDisplay((event) => {
const preferenceCenterId = event.preferenceCenterId;
// Navigate to your custom preference center UI
navigateToCustomPreferenceCenter(preferenceCenterId);
});
```
## Fetching Preference Center Config
The Preference Center config contains all the information needed to build your UI, including subscription lists, sections, and display settings.
```js
Airship.preferenceCenter.getConfig("preference-center-id", (config) => {
// Use config to build your UI
});
```
> **Note:** The config might not be available immediately on first app start. Implement exponential backoff if automatically retrying, or provide a UI for users to manually retry.
## Building Your Custom UI
You'll need to:
1. **Fetch the config** to get the list of subscription lists and their current state
2. **Build your UI** using the config data (sections, subscription lists, display settings)
3. **Update subscription lists** when users make changes using the [Subscription List APIs](https://www.airship.com/docs/developer/sdk-integration/cordova/audience/subscription-lists/)
### Example Implementation
```js
function loadPreferenceCenter(preferenceCenterId) {
Airship.preferenceCenter.getConfig(preferenceCenterId, (config) => {
// Build your UI with the config
const container = document.getElementById('preference-center');
// Display title
const title = document.createElement('h1');
title.textContent = config.display.name;
container.appendChild(title);
// Display sections
config.sections.forEach((section) => {
const sectionDiv = document.createElement('div');
const sectionTitle = document.createElement('h2');
sectionTitle.textContent = section.display.name;
sectionDiv.appendChild(sectionTitle);
// Display items (subscription lists)
section.items.forEach((item) => {
const itemDiv = document.createElement('div');
const label = document.createElement('label');
label.textContent = item.display.name;
const checkbox = document.createElement('input');
checkbox.type = 'checkbox';
checkbox.checked = isSubscribed(item.subscriptionId);
checkbox.addEventListener('change', (e) => {
if (e.target.checked) {
Airship.contact.subscriptionLists.subscribe(item.subscriptionId);
} else {
Airship.contact.subscriptionLists.unsubscribe(item.subscriptionId);
}
});
itemDiv.appendChild(checkbox);
itemDiv.appendChild(label);
sectionDiv.appendChild(itemDiv);
});
container.appendChild(sectionDiv);
});
});
}
```
> **Important:** Preference Center configuration is currently limited to subscription lists only. Use the [Subscription List APIs](https://www.airship.com/docs/developer/sdk-integration/cordova/audience/subscription-lists/) to manage user subscriptions.
## Audience Management
Integrate audience management features into your Cordova app. This guide covers how to identify contacts, access channel IDs, and set tags, attributes, and subscription lists on channels and contacts. For information about using these features for segmentation and targeting, see the [Audience User Guide]({{< ref "/guides/audience/segmentation/segmentation.md" >}}).
# Channels
> Access and manage channel IDs and listen for channel creation.
Each device/app install will generate a unique identifier known as the Channel ID.
Once a Channel ID is created, it will persist in the application until the app is
reinstalled, or has its internal data is cleared.
For information about finding Channel IDs, using the Channel Capture tool, and other methods to access Channel IDs, see [Finding Channel IDs](https://www.airship.com/docs/guides/getting-started/developers/identifiers/).
## Accessing the Airship Channel ID
Apps can access the Channel ID directly through the SDK.
```js
// Get the channel ID (may return null if not yet created)
Airship.channel.getChannelId((channelID) => {
console.log("Channel: " + channelID)
})
// Wait for the channel ID to be created (returns the channel ID once available)
Airship.channel.waitForChannelId((channelID) => {
console.log("Channel: " + channelID)
})
```
The Channel ID is asynchronously created, so it may not be available right away on the first run. Use `waitForChannelId()` if you need to wait for the channel to be created before proceeding. Changes to Channel data will automatically be batched and applied when the Channel is created, so there is no need to wait for the Channel to be available before modifying any data.
Applications that need to access the Channel ID can use a listener to be notified when it is available.
```js
Airship.channel.onChannelCreated((event) => {
console.log('Channel created: ' + event.channelId);
});
```
## Channel Capture tool
The Channel Capture tool is a feature built into the SDK that helps users find their Channel ID. For detailed information about how it works and how to use it, see [Finding Channel IDs](https://www.airship.com/docs/guides/getting-started/developers/identifiers/).
The Channel Capture tool can be disabled through the Airship Config options passed to `takeOff` during SDK initialization. For information about setting up the Airship SDK and configuring the takeOff options, see [Cordova SDK Setup](https://www.airship.com/docs/developer/sdk-integration/cordova/installation/getting-started/).
```js
Airship.takeoff({
...
isChannelCaptureEnabled: false,
})
```
## Delaying channel creation
Airship creates the channel if at least one feature is enabled in the Privacy Manager.
To delay channel creation, use the Privacy Manager to disable all features during takeOff.
For more information about Privacy Manager, see [SDK Data Collection](https://www.airship.com/docs/reference/data-collection/sdk-data-collection/).
# Contacts
> Identify contacts, reset contacts, and get named user IDs.
A Contact is any user in your project. Contacts are identified as either an Anonymous Contact or a Named User. Airship can set targeting data on these identifiers, which are also used to map devices and channels to a specific user. For detailed information about contacts and named users, see [Named users](https://www.airship.com/docs/guides/audience/named-users/).
## Managing the Contact's identifier (Named User ID)
Identify can be called multiple times with the same Named User ID. The SDK will automatically deduplicate `identify`
calls made with the same Named User ID. If the ID is changed from a previous value, the Contact will automatically
be dissociated from the previous Named User ID.
```js
Airship.contact.identify(namedUserId);
```
If the user logs out of the device, you may want to reset the contact. This will clear
any anonymous data and dissociate the contact from the Named User ID, if set. This
should only be called when the user manually logs out of the app, otherwise you will
not be able to target the Channel by its Contact data.
```js
Airship.contact.reset();
```
You can get the Named User ID only if you set it through the SDK.
```js
Airship.contact.getNamedUserId((namedUser) => {
if (namedUser) {
console.log("Named User ID: " + namedUser)
}
});
```
# Tags
> Set device tags, contact tags, and tag groups for audience segmentation.
For information about tags, including how to use them for segmentation and targeting, see the [Tags user guide](https://www.airship.com/docs/guides/audience/tags/).
## Channel Tags
Channel tags are tags managed on the Channel by the SDK. Device tags (tags without a group) can be modified or fetched from the Channel.
```js
Airship.channel.editTags()
.addTags(["one", "two", "three"])
.removeTags(["some_tag"])
.apply()
// Accessing channel tags
Airship.channel.getTags((tags) => {
console.log("Tags: " + tags)
});
```
## Channel Tag Groups
Tag groups are tags scoped within a group. Tag groups can be modified from the SDK but cannot be fetched. Device tags (tags without a group) can be fetched. If you need to be able to fetch tag groups, consider using subscription lists.
```js
Airship.channel.editTagGroups()
.addTags("loyalty", ["silver-member"])
.removeTags("loyalty", ["bronze-member"])
.apply()
```
## Contact Tag Groups
Contact tag groups are tags scoped within a group at the Contact level. Tag groups can be modified from the SDK but cannot be fetched. If you need to be able to fetch tag groups, consider using subscription lists.
```js
Airship.contact.editTagGroups()
.addTags("loyalty", ["silver-member"])
.removeTags("loyalty", ["bronze-member"])
.apply()
```
## Verifying Tags
To verify that tags have been set correctly, look up the channel or contact in the [Contact Management](https://www.airship.com/docs/guides/audience/contact-management/) view. You can search by Channel ID or Named User ID to view the tags and tag groups associated with a channel or contact.
# Attributes
> Set channel and contact attributes as key-value pairs for personalization.
For information about Attributes, including overview, use cases, and how to target Attributes, see [About Attributes](https://www.airship.com/docs/guides/audience/attributes/about/).
## Channel Attributes
Channel attributes are attributes managed on the Channel by the SDK.
```js
Airship.channel.editAttributes()
.setAttribute("device_name", "Bobby's Phone")
.setAttribute("average_rating", 4.99)
.removeAttribute("vip_status")
.apply()
```
## Contact Attributes
Contact attributes are attributes managed on the Contact by the SDK.
```js
Airship.contact.editAttributes()
.setAttribute("first_name", "Bobby")
.apply()
```
## JSON Attributes
JSON Attributes are data objects containing one or more string, number, date, or boolean key-value pairs.
```js
Airship.contact.editAttributes()
.setJsonAttribute("attribute_name", "instance_id", {"key":"value", "another_key":"another_value"})
.removeJsonAttribute("some_attribute_name", "some_instance_id")
.apply()
```
## Verifying Attributes
To verify that attributes have been set correctly, look up the channel or contact in the [Contact Management](https://www.airship.com/docs/guides/audience/contact-management/) view. You can search by Channel ID or Named User ID to view the attributes associated with a channel or contact.
# Subscription Lists
> Manage channel and contact subscription lists for topic-based messaging.
For information about Subscription Lists, including overview, use cases, and how to create subscription lists, see [Subscription Lists](https://www.airship.com/docs/guides/audience/segmentation/audience-lists/subscription/).
## Channel Subscription Lists
Channel subscriptions apply only to the single channel.
```js
// Modifying channel subscription lists
Airship.channel.editSubscriptionLists()
.subscribe("food")
.unsubscribe("sports")
.apply()
// Fetching channel subscription lists
Airship.channel.getSubscriptionLists((lists) => {
console.log("channel subscriptions: " + lists)
});
```
## Contact Subscription Lists
Contact subscriptions are set at the user-level and require a Channel scope specifying the types that the subscription list applies to.
```js
// Modifying contact subscription lists
Airship.contact.editSubscriptionLists()
.subscribe("food", "app")
.unsubscribe("sports", "sms")
.apply()
// Fetching contact subscription lists
Airship.contact.getSubscriptionLists((lists) => {
console.log("contact subscriptions: " + lists)
});
```
## Verifying Subscription Lists
To verify that subscription lists have been set correctly, look up the channel or contact in the [Contact Management](https://www.airship.com/docs/guides/audience/contact-management/) view. You can search by Channel ID or Named User ID to view the subscription lists associated with a channel or contact.
## Data Collection
Overview of data collection and controls provided by the Airship Cordova SDK.
# Privacy Manager
> Use Privacy Manager to enable or disable Airship SDK features for privacy and consent management.
Privacy Manager allows you to control which Airship SDK features are enabled. This is particularly useful for consent opt-in flows where you need to disable all features initially, then enable them as users grant consent. For information about what data is collected for each Privacy Manager flag, see [SDK Data Collection](https://www.airship.com/docs/reference/data-collection/sdk-data-collection/).
When all features are disabled, the SDK operates in a no-op mode—it doesn't store data or make network requests. Once features are enabled, you can enable or disable specific features at runtime based on user consent.
## Privacy Manager flags
Each Privacy Manager flag controls a group of related Airship features. Enabling a flag enables all features within that group:
| Privacy Manager Flag | Features |
|----------------------|----------|
| `push` | Push notifications |
| `in_app_automation` | In-App Automation, In-App Messages, Scenes, and Landing Pages |
| `message_center` | Message Center |
| `tags_and_attributes` | [Tags](https://www.airship.com/docs/guides/audience/tags/), [Attributes](https://www.airship.com/docs/guides/audience/attributes/about/), Subscription Lists, and Preference Center |
| `contacts` | Contact Tags, Attributes, and Subscription Lists; Named User; and Associated Channels |
| `analytics` | Associated identifiers, Custom events, Screen tracking, Surveys, email address, Feature Flag interaction |
| `feature_flags` | Feature Flag evaluation and interaction |
| `all` | All features |
| `none` | No features |
## Configuring default enabled features
You can configure which features are enabled by default when the SDK initializes. This is done in your Airship config during `takeOff`. For information about setting up the Airship SDK and configuring the takeOff options, see [Cordova SDK Setup](https://www.airship.com/docs/developer/sdk-integration/cordova/installation/getting-started/).
### Default configuration (all features enabled)
By default, all features are enabled. The SDK will collect data and make network requests as configured.
### Disabling all features
To disable all features by default (useful for consent opt-in flows), set the enabled features to an empty array:
```javascript
Airship.takeOff({
default: {
enabledFeatures: []
},
...
});
```
### Enabling specific features
To enable only specific features by default:
```javascript
Airship.takeOff({
default: {
enabledFeatures: ["push", "analytics"]
},
...
});
```
## Modifying enabled features at runtime
You can enable or disable features at any time after takeOff. Once you modify the enabled features from the default, those settings are persisted between app launches.
### Enabling features
```javascript
Airship.privacyManager.enableFeatures(["push", "analytics"]);
```
### Disabling features
```javascript
Airship.privacyManager.disableFeatures(["push", "analytics"]);
```
## Consent opt-in flow example
A common use case is to start with all features disabled, then enable them as users grant consent:
```javascript
// Start with all features disabled
Airship.takeOff({
default: {
enabledFeatures: []
},
...
});
// Later, when user grants consent:
function userGrantedConsent() {
// Enable features based on user's consent choices
Airship.privacyManager.enableFeatures(["push", "analytics"]);
}
```
> **Note:** If features are disabled after being previously enabled, the SDK may make a few network requests to opt the channel out to prevent notifications.
## Related documentation
- [SDK Data Collection](https://www.airship.com/docs/reference/data-collection/sdk-data-collection/) - Comprehensive overview of what data Airship collects for each Privacy Manager flag
- [Apple Privacy Manifest](https://www.airship.com/docs/reference/data-collection/apple-privacy-manifest/) - Declare data collection practices to Apple (iOS)
- [Google Play Data Safety](https://www.airship.com/docs/reference/data-collection/google-play-data-safety/) - Reference for Google Play's Data Safety section (Android)
- [Analytics](https://www.airship.com/docs/developer/sdk-integration/cordova/data-collection/analytics/) - Track user engagement with custom events, screen tracking, and associated identifiers
# Analytics
> Track user engagement and app performance with Airship analytics, including custom events, screen tracking, and associated identifiers.
For information about controlling what data Airship collects, see [Privacy Manager](https://www.airship.com/docs/developer/sdk-integration/cordova/data-collection/privacy-manager/).
> **Note:** Analytics events are batched and uploaded asynchronously in the background to minimize battery impact. The database size is fixed, so events are safely stored even when offline. Events may not upload immediately and may wait until the next app initialization if the app is closed before the upload completes.
## Custom Events
Track user activities and key conversions with custom events. They require enabling analytics for your app. For detailed information, see the [Custom Events guide](https://www.airship.com/docs/guides/audience/events/custom-events/).
```javascript
let event = {
eventName: "event_name",
eventValue: 123.12,
properties: {
"my_custom_property": "some custom value",
"is_neat": true,
"any_json": {
"foo": "bar"
}
}
}
Airship.analytics.addCustomEvent(event)
```
## Associated Identifiers
Associated identifiers (also called custom identifiers) associate an external identifier with a [Channel ID](https://www.airship.com/docs/reference/glossary/#channel_id). They are visible in [Real-Time Data Streaming](https://www.airship.com/docs/reference/glossary/#rtds). We recommend adding any IDs that you may want to be visible in your event stream. You can assign up to 20 associated identifiers to a device. Unlike other identifiers (e.g., tags), you cannot use associated identifiers to target your users.
```javascript
Airship.analytics.setAssociatedIdentifier("key", "value")
```
## Screen Tracking
The Airship SDK gives you the ability to track which screens a user views within the application, how long a user stayed on each screen, and also includes the user's previous screen. These events then come through [Real-Time Data Streaming](https://www.airship.com/docs/reference/glossary/#rtds), allowing you to see the path a user took through the application, or trigger actions based on a user visiting a particular area of the application.
```javascript
Airship.analytics.trackScreen("MainScreen")
```
## Troubleshooting
Common issues and solutions for Airship plugin setup, initialization, and integration.
# Troubleshooting Initialization
> Troubleshoot common initialization issues and apply solutions.
When following steps in [Getting Started](https://www.airship.com/docs/developer/sdk-integration/cordova/installation/getting-started/) or [Advanced Configuration](https://www.airship.com/docs/developer/sdk-integration/cordova/installation/advanced-configuration/), if you don't see a channel ID in the logs or encounter errors during initialization, review the following common problems and solutions.
## Installation Errors
If you encounter errors during installation:
- Verify that you're using a compatible version of Cordova.
- Ensure the plugin is properly installed with `cordova plugin add`.
- Check that your iOS and Android projects are correctly configured.
## Initialization Errors
If you encounter errors during SDK initialization:
- Verify your credentials in the Airship dashboard. The credentials used by `takeOff` are your Airship project's [App Key](https://www.airship.com/docs/reference/glossary/#app_key) and [App Secret](https://www.airship.com/docs/reference/glossary/#app_secret). To find them, select the dropdown menu (▼) next to your project name, and then **Project details**.
- Check that `takeOff` is called correctly in your app.
- Ensure both iOS and Android native modules are properly installed.
# Troubleshooting Push Notifications
> Check push notification status and fix common issues.
If [push notifications](https://www.airship.com/docs/developer/sdk-integration/cordova/push-notifications/) aren't working as expected, you can check the notification status to diagnose the issue.
## Push Notifications Not Working
If push notifications are not being received:
- Verify that push notifications are enabled for both iOS and Android.
- Check that APNs (iOS) and FCM (Android) are properly configured.
- Ensure the app has notification permissions.
## Checking Push Notification Status
If you're having trouble with push notifications, check the notification status to see the current state:
```javascript
Airship.push.getNotificationStatus((status) => {
console.log('Are notifications allowed:', status.areNotificationsAllowed)
console.log('Is opted in:', status.isOptedIn)
console.log('Is user notifications enabled:', status.isUserNotificationsEnabled)
console.log('Is user opted in:', status.isUserOptedIn)
console.log('Is pushable:', status.isPushTokenRegistered)
console.log('Is push privacy feature enabled:', status.isPushPrivacyFeatureEnabled)
})
```
You can also listen for status changes to debug permission issues:
```javascript
const subscription = Airship.push.onNotificationStatusChanged((event) => {
console.log('Notification status changed:', event.status)
if (!event.status.areNotificationsAllowed) {
console.log('System-level notifications are disabled')
}
if (!event.status.isUserNotificationsEnabled) {
console.log('User notifications are disabled in Airship')
}
if (!event.status.isPushTokenRegistered) {
console.log('Push token not registered')
}
})
// Later, to cancel the subscription
subscription.cancel()
```